
Item tags help in organizing the display on your register screen. It is useful when you want to display an item or items from a category without including the other items that are from the same category. You cannot set two categories for an item, so item tags are useful for these instances.
Item tags are especially useful for buffet-type restaurants when you want a certain food to appear during your breakfast and dinner menu, but not on your lunch menu.
Adding Item Tags in the Back Office
Let's get started:
- In the Back Office, hover or click the gear icon or Settings > General Settings.
Redirecting to General Settings
- Under Other Settings, scroll down and look for Use Tags Filter and select Yes.
- Click Save.
Setting 'Yes' in Use Tags Filter
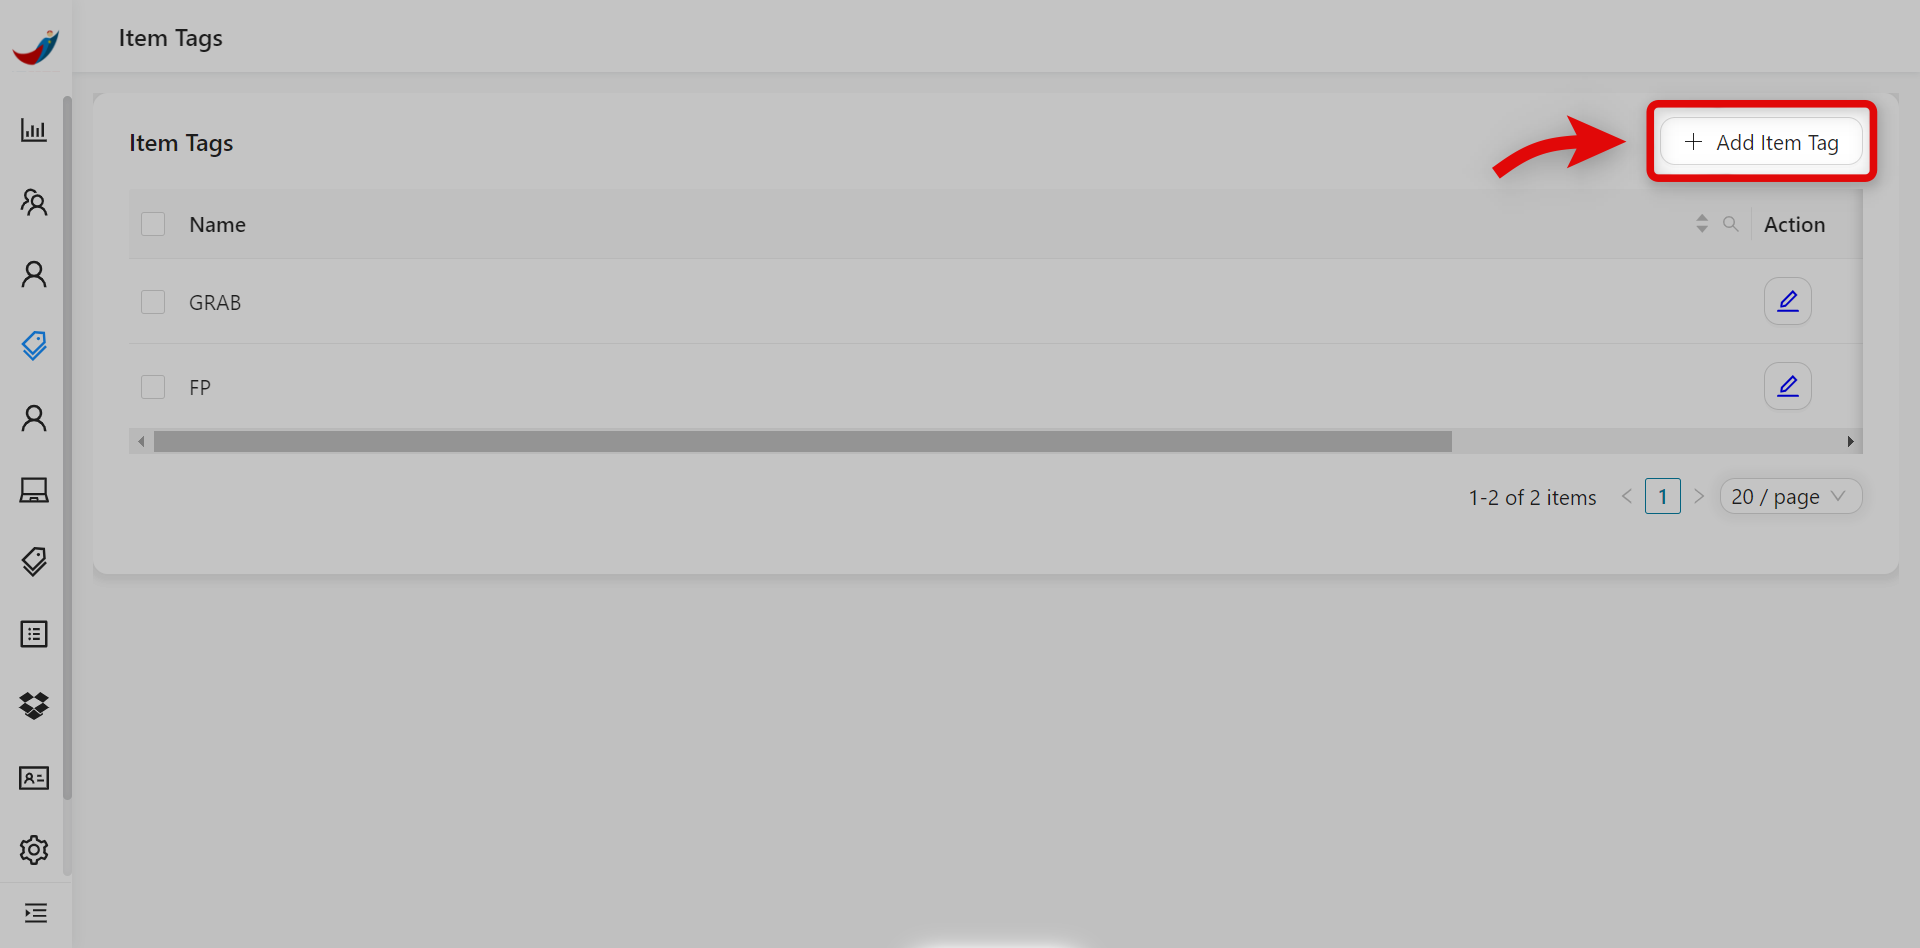
- Once done saving, click or hover the tag icon or Listings > Item Tags.
Redirecting to Item Tags
- On the upper-right of the screen, click Add Item Tag button. A pop-up window named Add Item Tags will appear.
- Under Add Item Tags, input the following:
B. Parent Items - refers to the items you want to add in your tag.
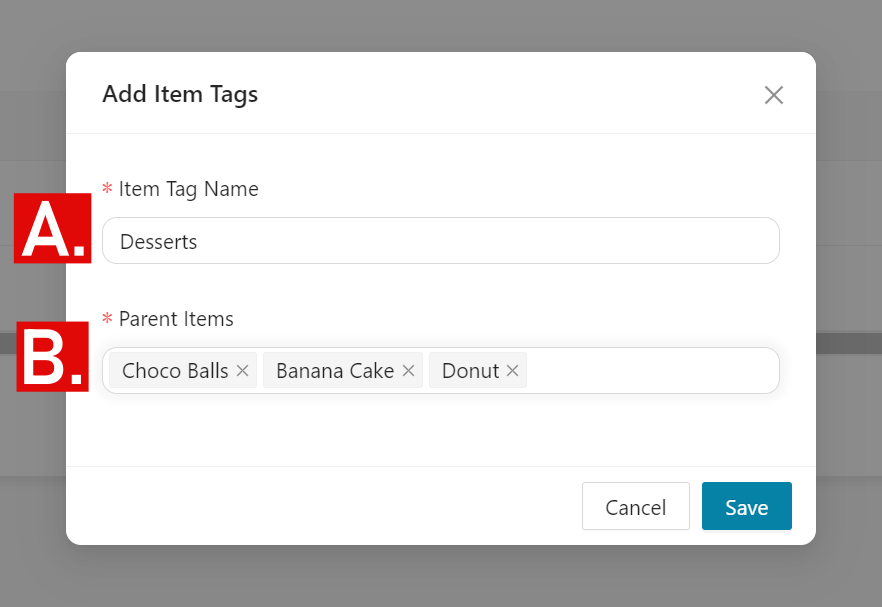
- If done, click Save.
Your item tags will be displayed accordingly.
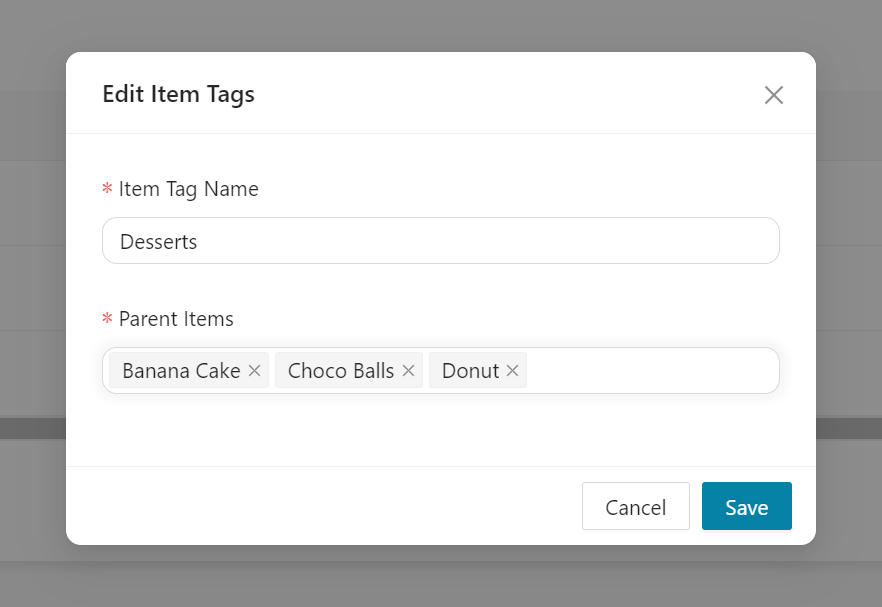
Editing Item Tag
If you want to edit your Item tag:
- Click on the pencil icon or Edit button. A pop-up window named Edit Item Tags will appear.
Opening Edit Item Tags window
- You can edit your Item Tag in the Edit Item Tags window. Click Save to save your changes or click Cancel to cancel editing.
Setting Item Tags in Items
You can also set your Item Tags in your Items.
- Click or hover the tag icon or Listings > Items.
Redirecting to Item Listings
- Click the pencil icon of your desired item to add an item tag. A pop-up window named Edit Item.
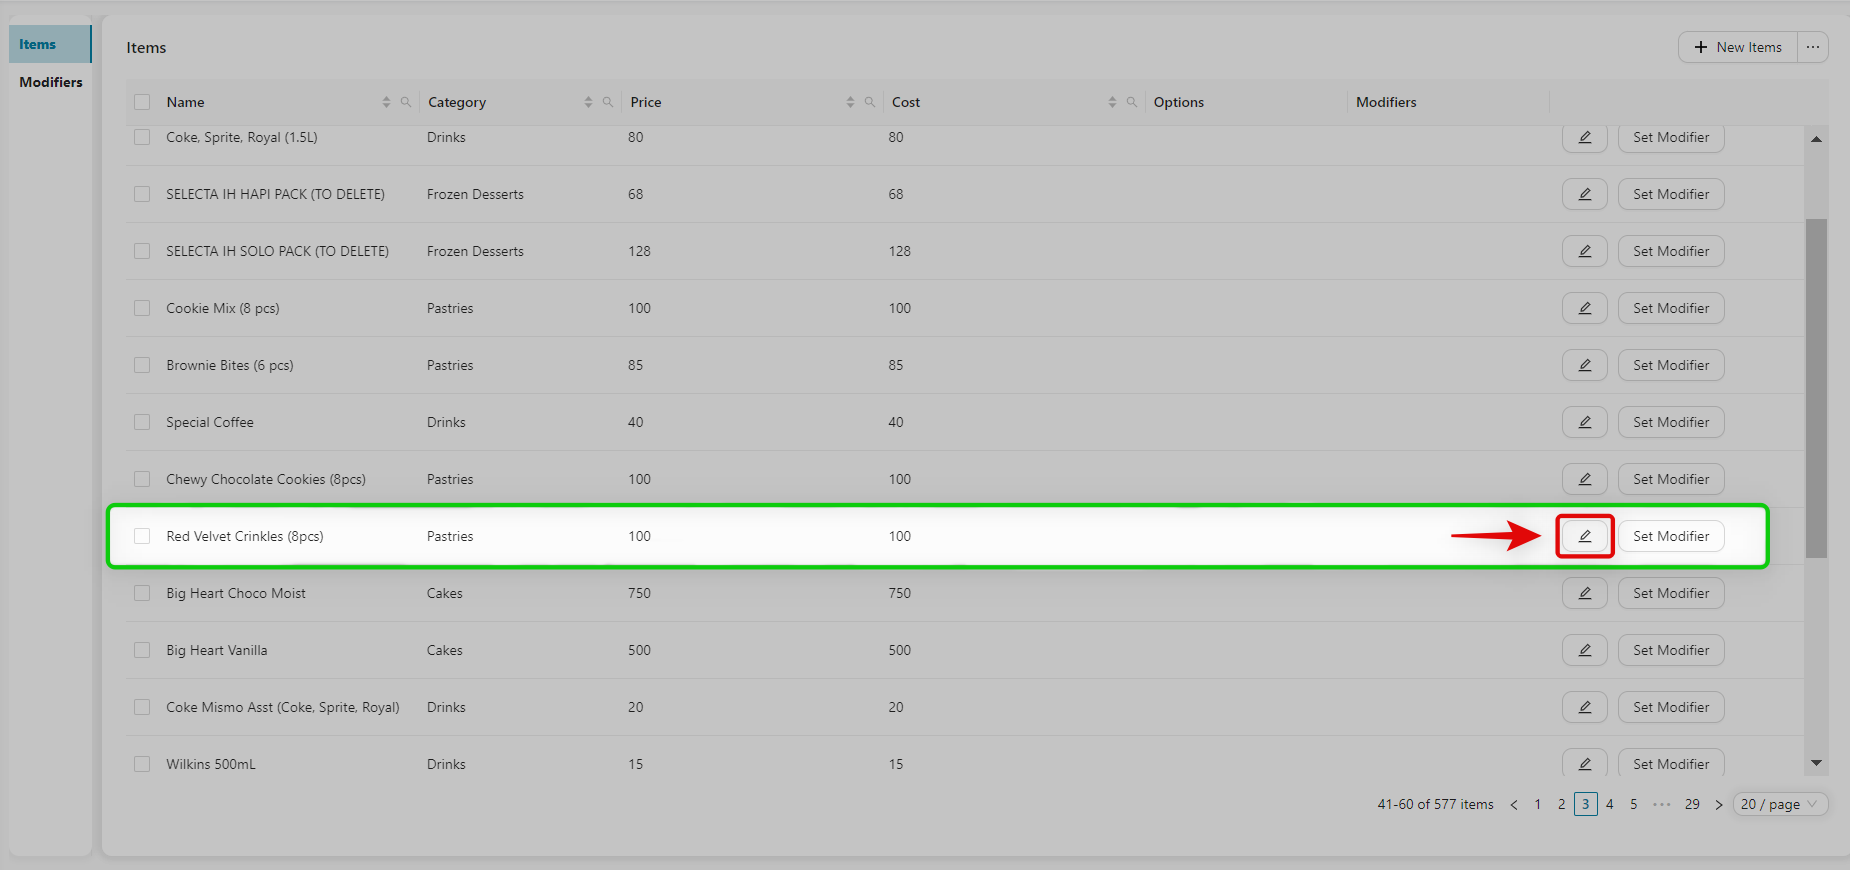
- Scroll down and look for Tags, and select the tags you want to add.
- Then, click Save to save your changes.
Setting a Tag Item
Using Tag Filters on KaHero POS
After creating and setting your tag filters in the Back Office, you can now use them on KaHero POS.
Video Tutorial for Using Tag Filters on KaHero POS
Let's Get Started:
- On the KaHero POS app, navigate to Settings. Select Yes for Use Tags Filter to enable using of Tags Filter.

This is how your register will look like after applying your item tags filter.

In this example, we set the item Spaghetti with the tags Breakfast and Dinner. So Spaghetti will appear on the Breakfast and Dinner tags and not on the Lunch tag. You can also notice that Spaghetti is still under the Meals category.
