
Adding Items
To add items through back office:
- Go to Back Office and login your account.
- Hover/click the Tag icon/Listings > Items.

- Click New Items.

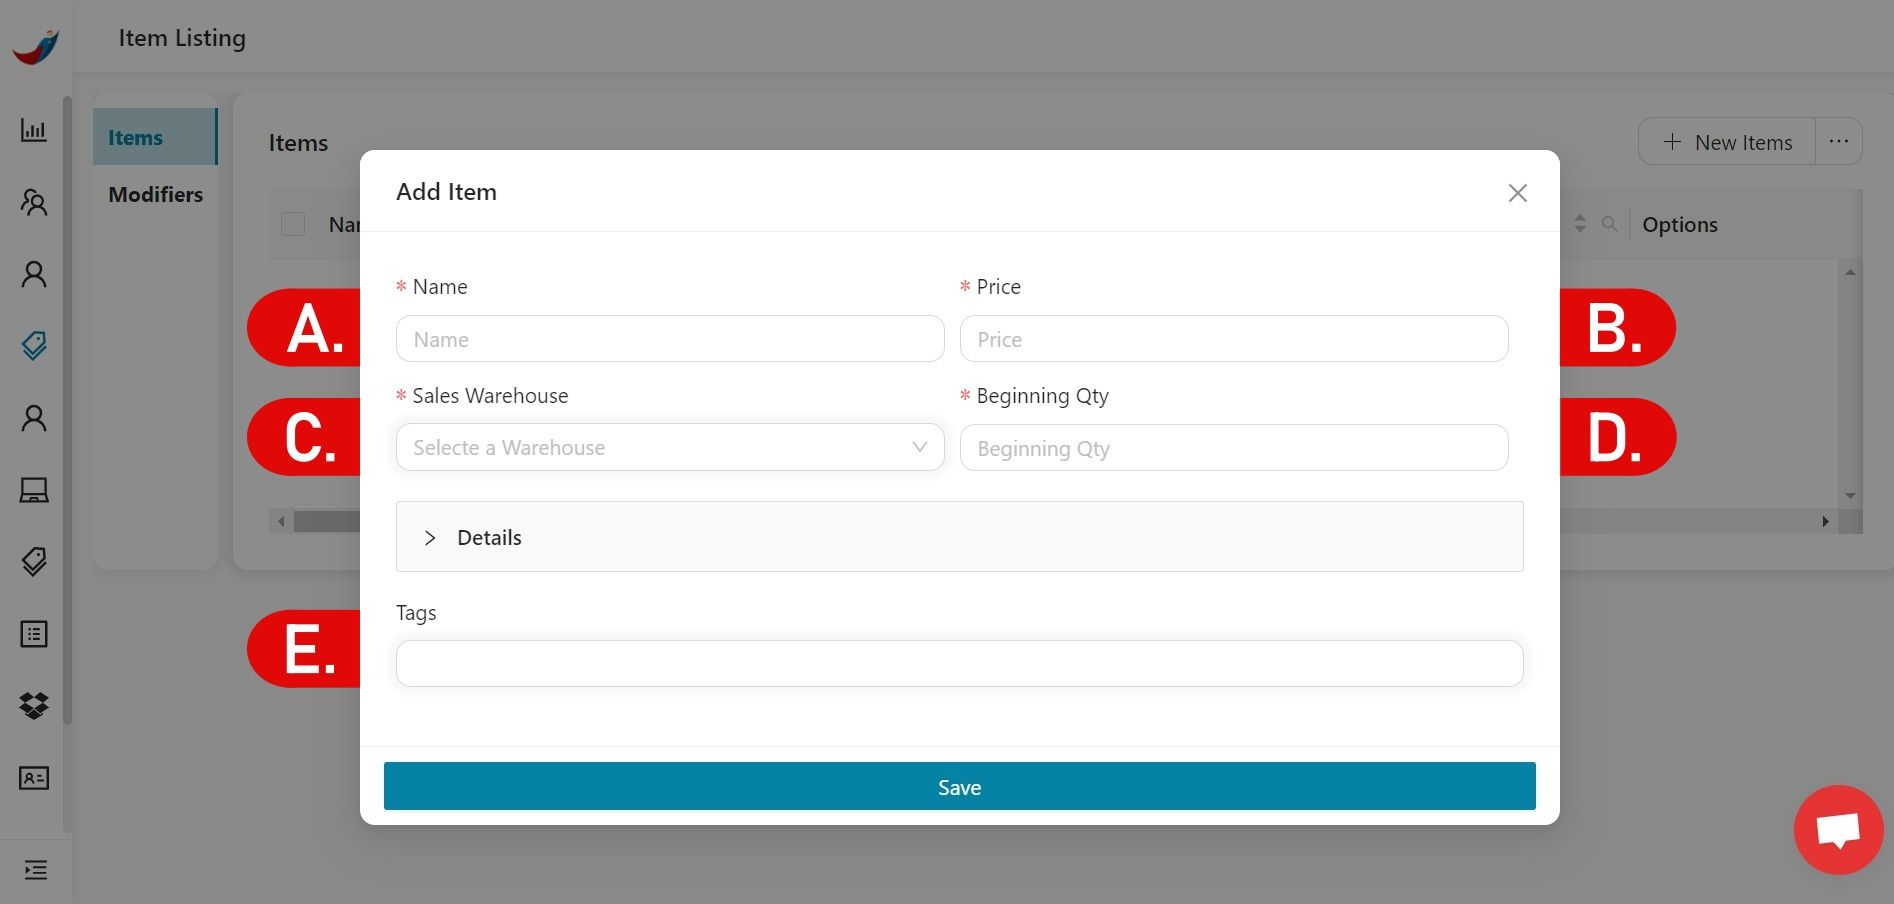
- Fill out the following text boxes inside the Add Item pop-up window.
A. Name - Set item's name to display on the register.
B. Price - Set item's price to display on the register.
C. Sales Warehouse - Set item's storage location. *
D. Beginning Qty - Set beginning item quantity upon input on the POS. *
E. Tags - Set item's Tag.
* Only visible when you added your Warehouse.
B. Price - Set item's price to display on the register.
C. Sales Warehouse - Set item's storage location. *
D. Beginning Qty - Set beginning item quantity upon input on the POS. *
E. Tags - Set item's Tag.
* Only visible when you added your Warehouse.
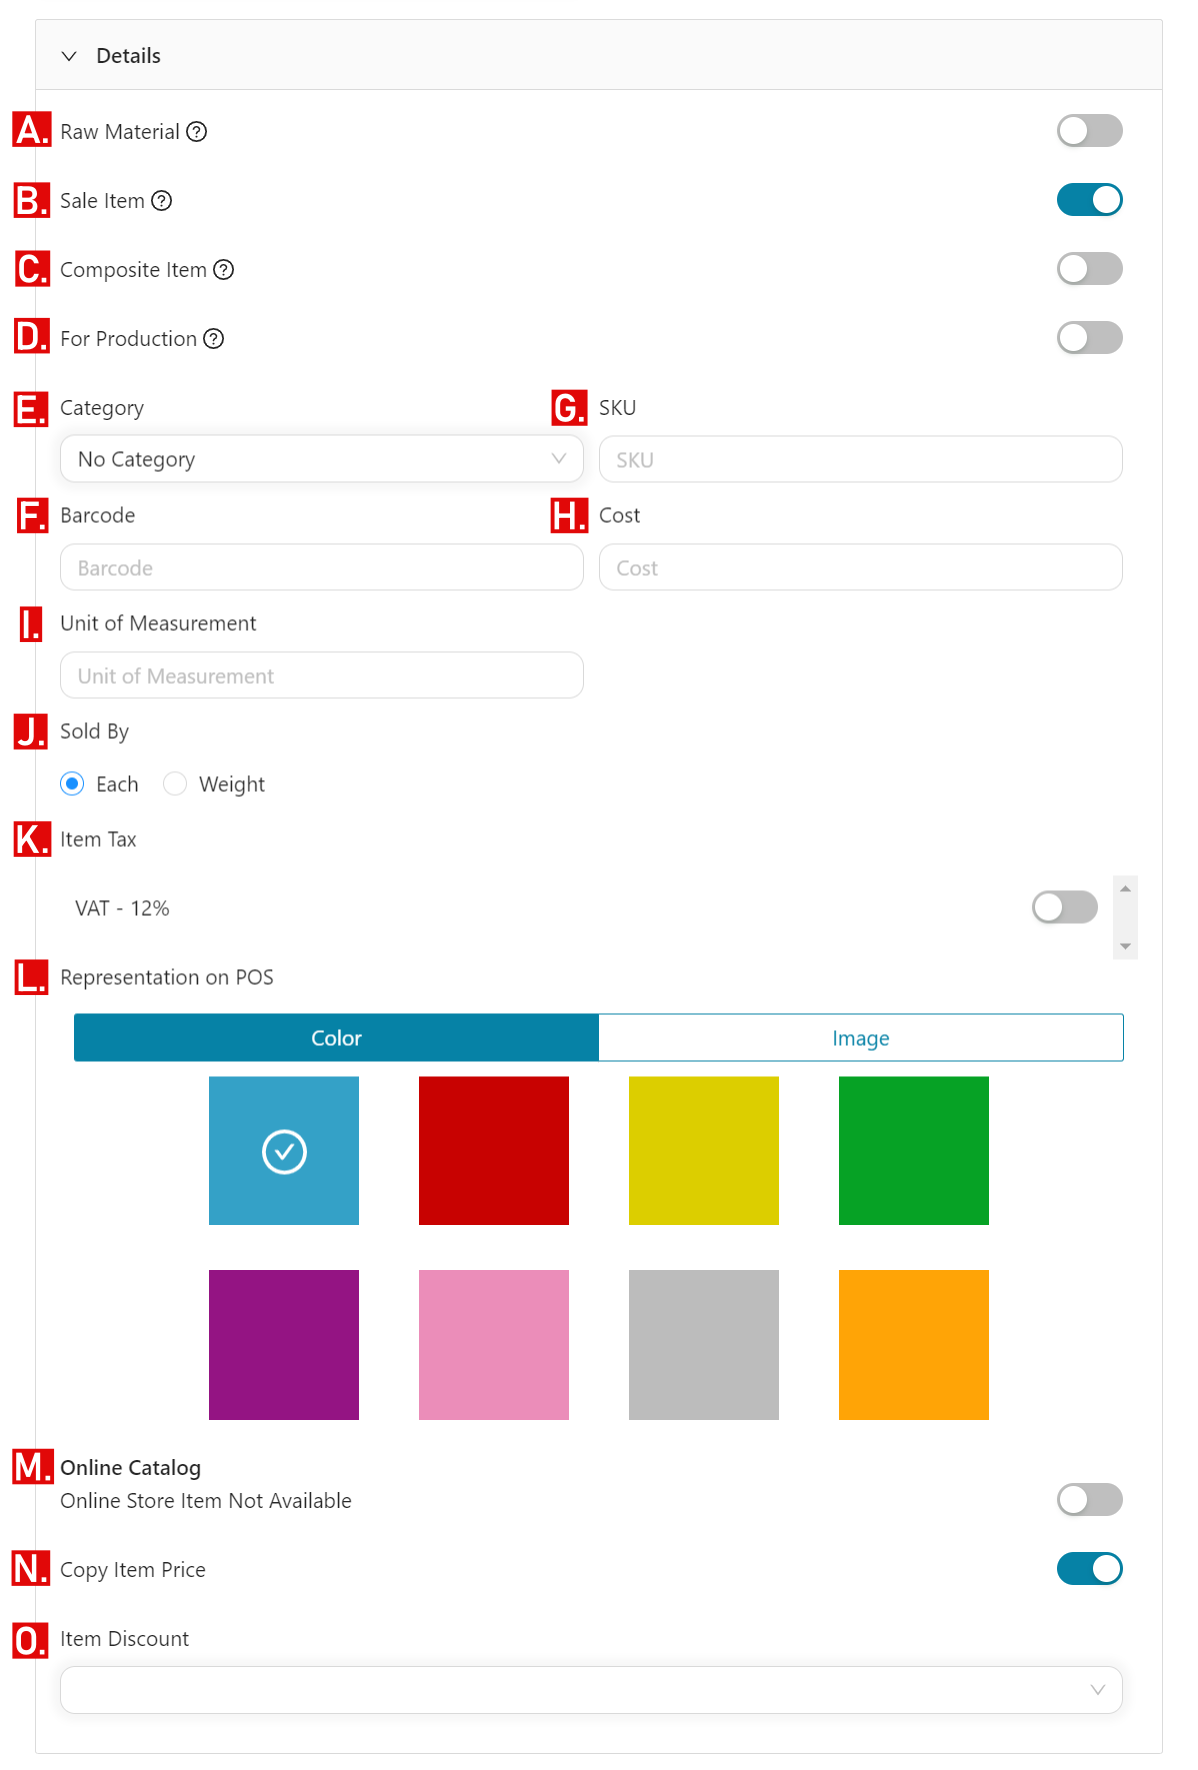
- Click on Details to open for more options.
A. Raw Material - Enable this if your item is a Raw Material.
B. Sale Item - Enable or disable if your item is a sales item or just a stock item.
C. Composite Item - Enable this if your item is a Composite Item. *
D. For Production - Enable to add production.
E. Category - Set your item's category to display on the register.
F. Barcode - Manually input barcode of the item.
G. SKU - Set item's Stock Keeping Unit to identify that item.
H. Cost - Input cost of item upon purchase for stock.
I. Unit of Measurement - Input your item's unit (ex. ML, Scoops, pcs).
J. Sold By - Set whether your item is to be sold by individually or by weight.
K. VAT - Set to activate the VAT on the item. **
L. Representation on POS - Assign a representation color or image to your item. This is how it will be displayed on your register screen.
M. Online Store Item Not Available - Enable this if you don't want this item to show on your Online Store. ***
N. Copy Item Price - Set this if you want the price of this item in the Online Store and Register (POS) be the same.
O. Item Discount - Set this if you want to put discount on this item.
* This is applicable for Production and Item Ingredients tab will be visible.
** Only visible when you setup your Taxes.
*** Only visible when you setup your Online Store.
- If done, click Save.
Adding Categories
To add categories through back office:
- Hover/click the Tag icon/Listings > Categories.
- Click New Category.
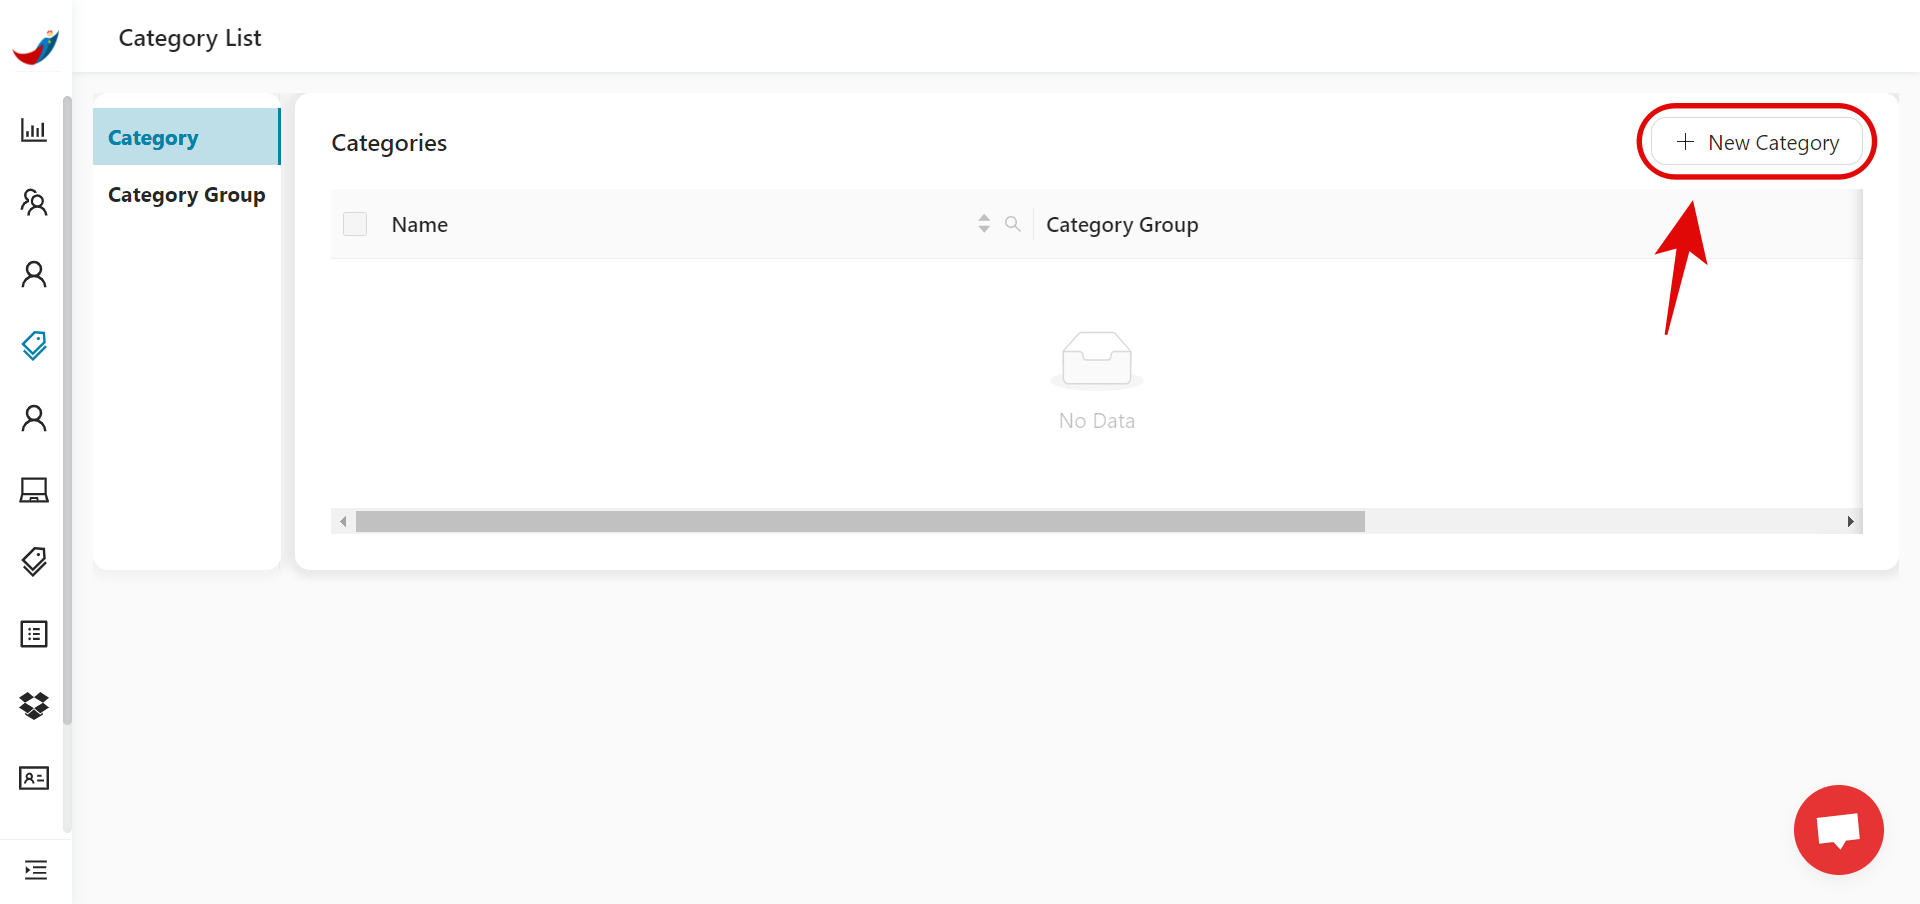
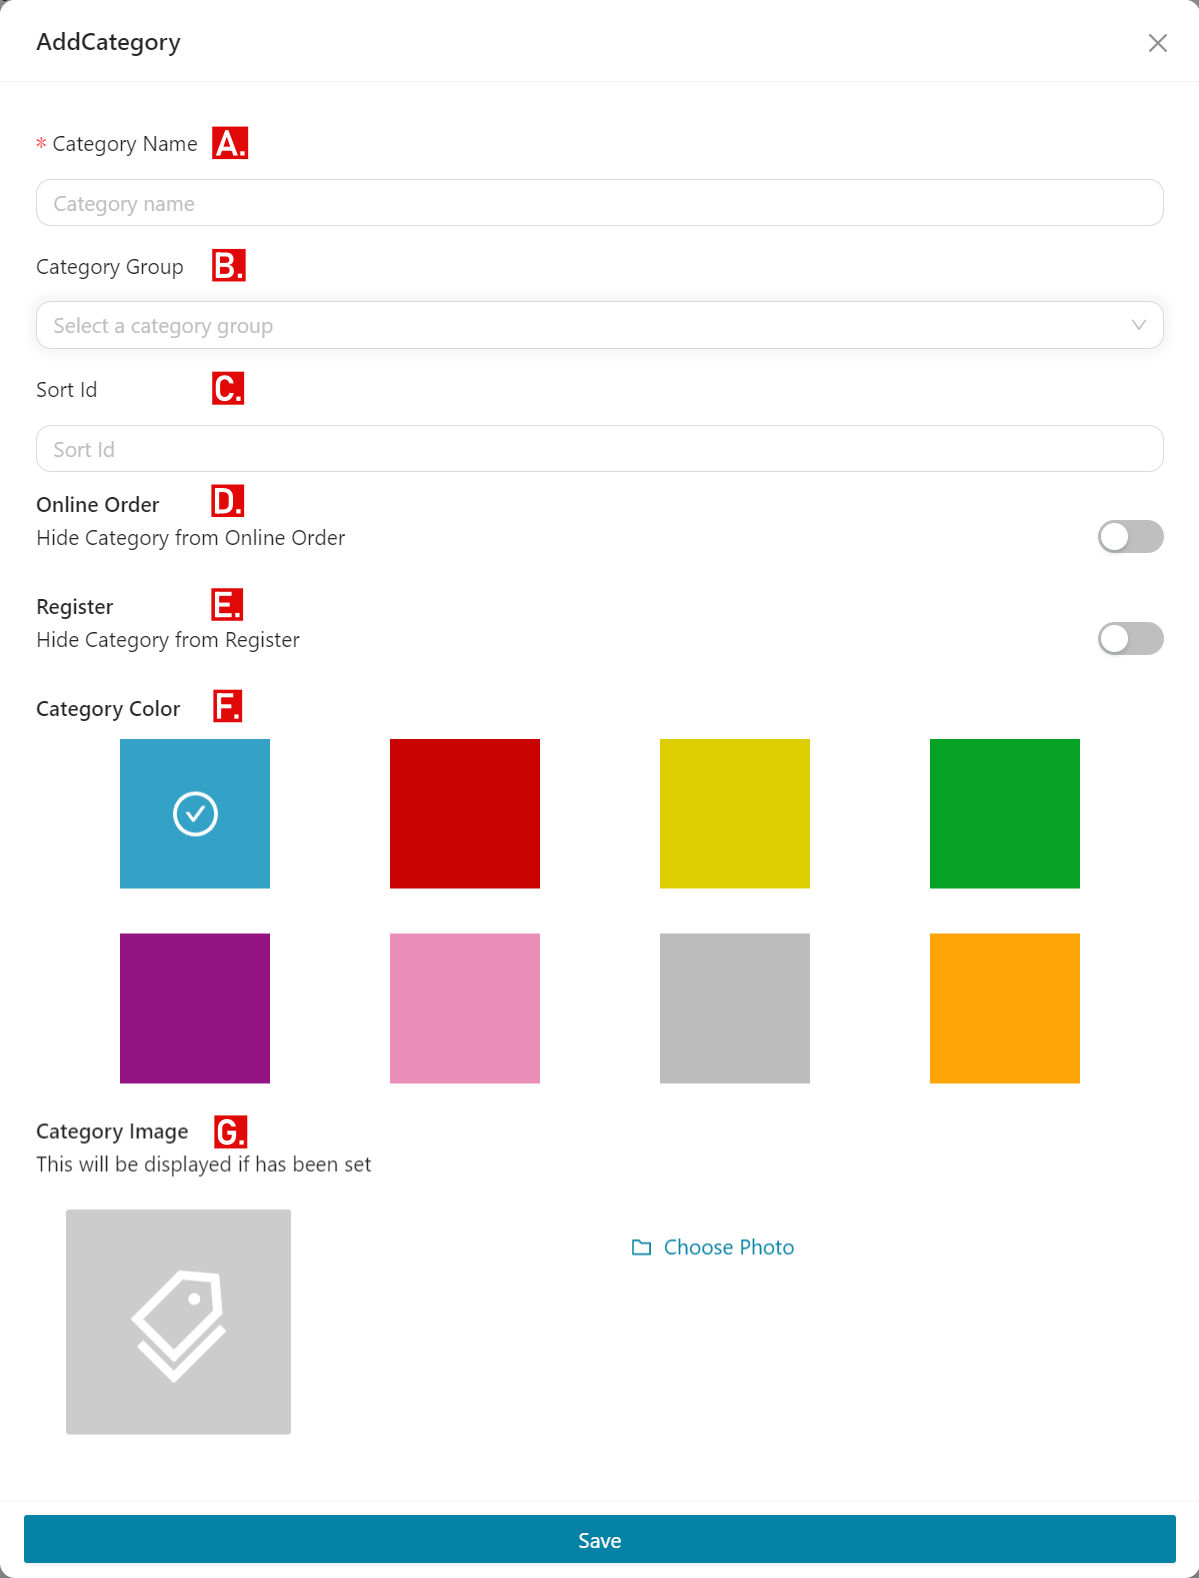
- Input your category details.
A. Category Name - Label your category.
B. Category Group - Input if you want this category under your category group.
C. Sort ID - Set your category ID for sorting with "1" as the highest.
D. Online Order: Hide Category from Online Order - Enable this if you don't want this category to show on your Online Store. *
E. Register: Hide Category from Register - Enable to hide your category in the Register.
F. Category Color - Assign a color for your category.
G. Category Photo - Sets an image for the Category.
* Only visible when you setup and enabled your Online Store.
💡
Setting up Sort ID allows you to quickly sort your categories based on which items are best-sellers.
- If done, click Save.
🤩
Nice! You have just added a new category through the back office.