KaHero POS allows you to scan items using scanning equipments.
Adding Barcodes on Items
Adding Barcodes on items made easy by our Kahero POS
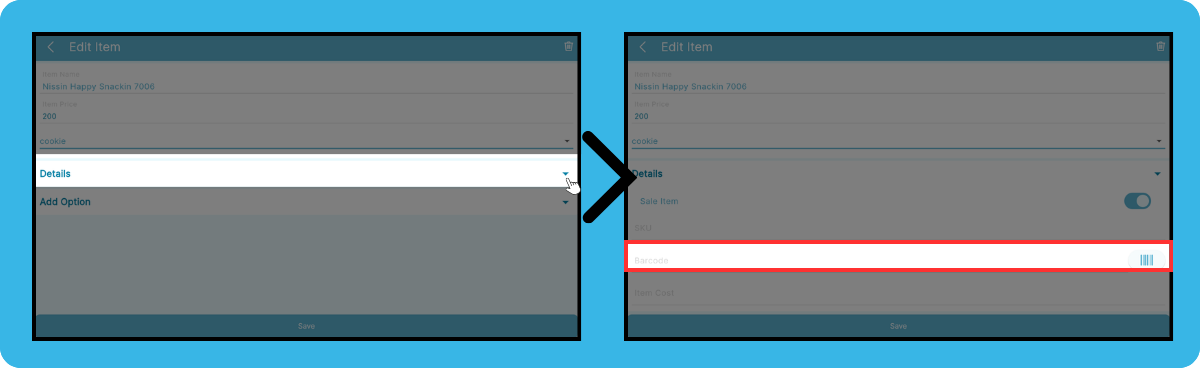
Simply edit the item of choice
Note: To add item, follow this instruction.
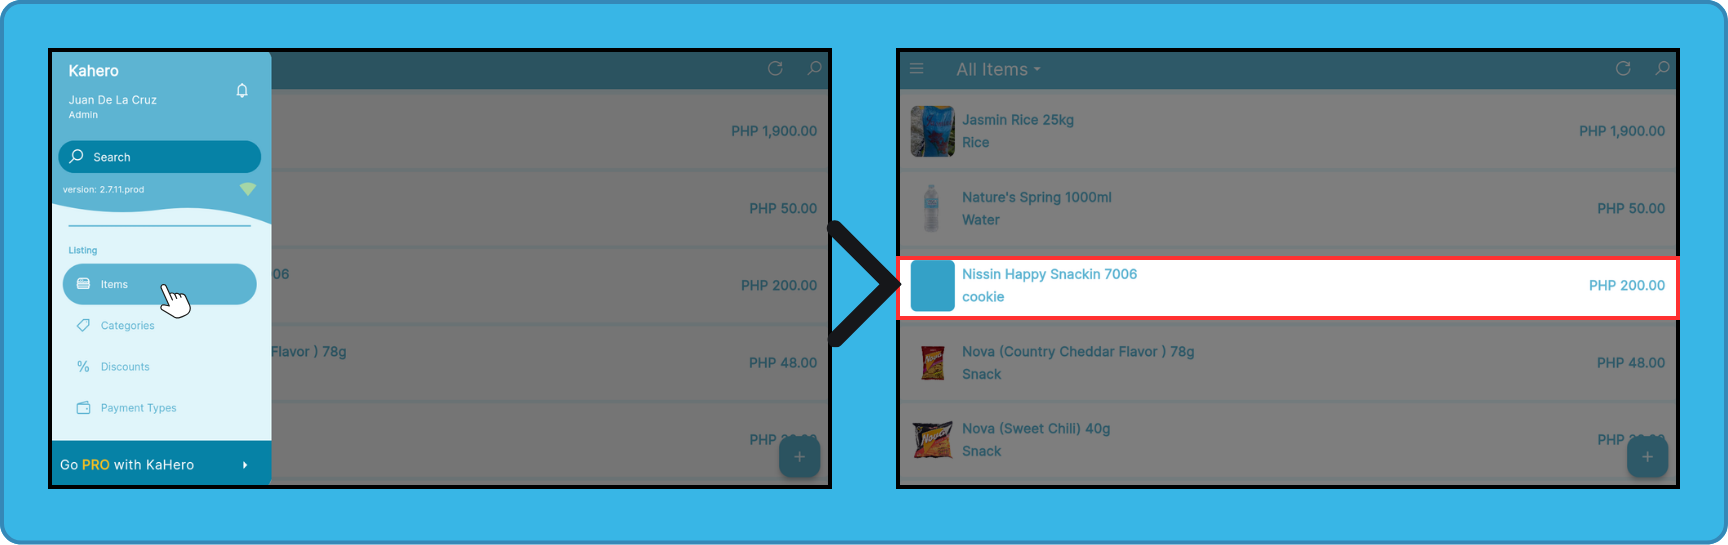
Navigate to the "Items" section, then select the specific item you wish to edit by clicking on it.
Click the drop-down button to show more options
You can then add the barcode.
There are Three ways to add Barcode on the Item
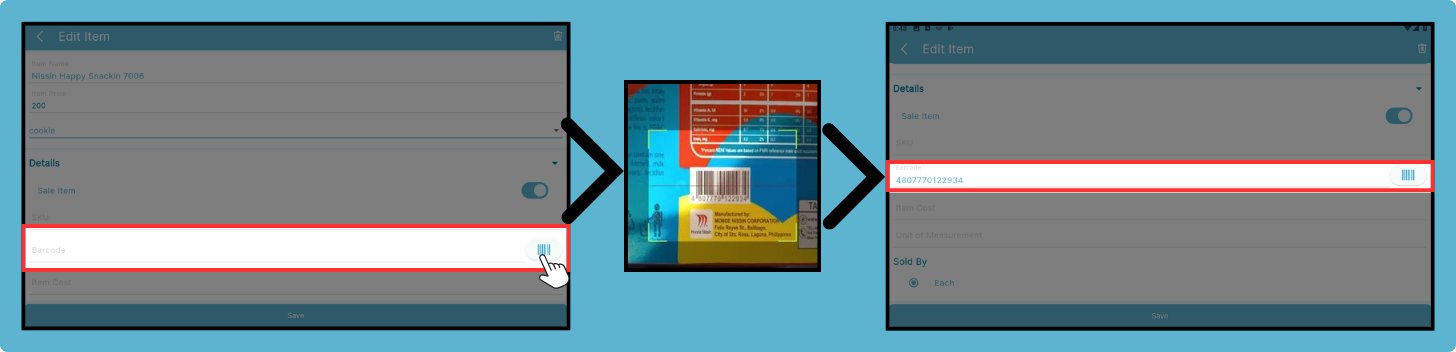
First is to Manually enter the Barcode number on the Blank space Provided
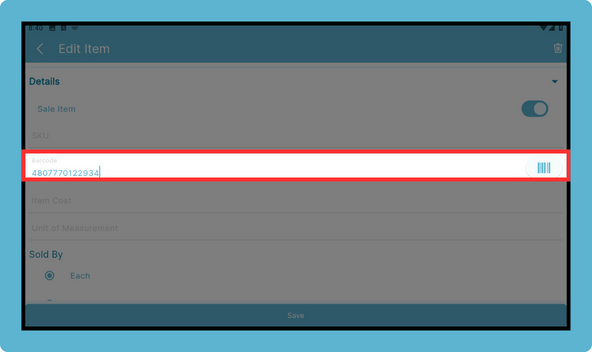
Second is to click the Barcode Icon , A scanning screen will then appear.
Center the item's barcode on the Scanning Screen, the item's barcode will then appear.
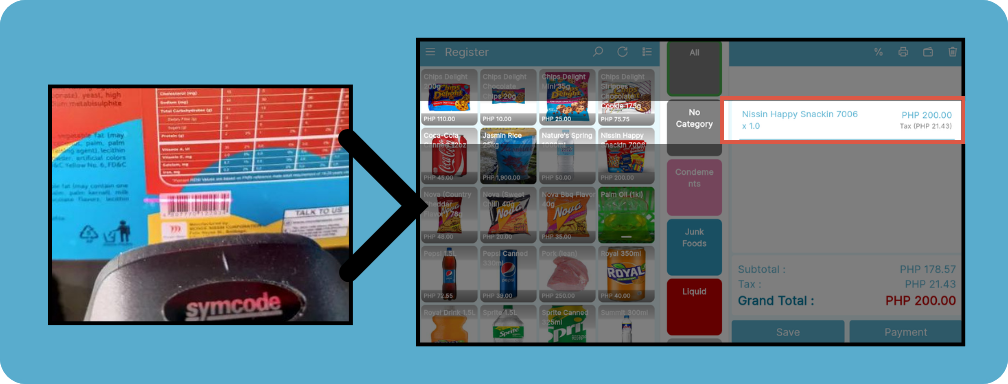
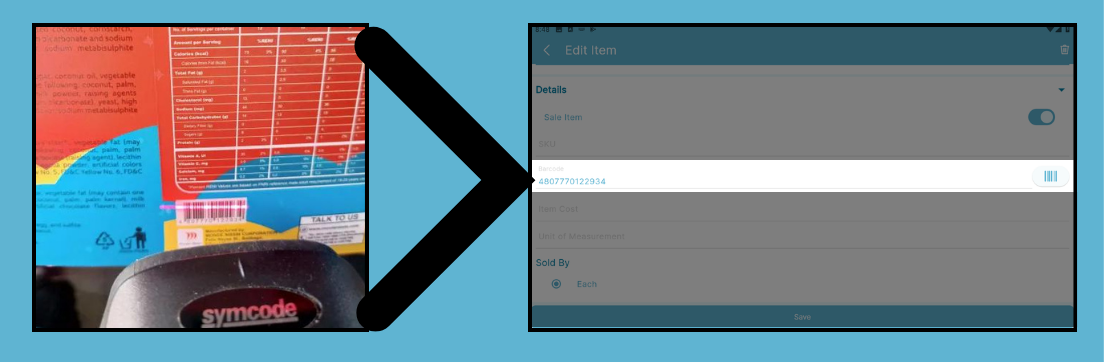
Third is to Scan the Barcode in the item using the Scanner.
Simply aim the scanner at the item's barcode, and it will be swiftly and automatically added .
Using Scanner on Register
There are two ways to scan an item on register
First is to use the Camera mode.
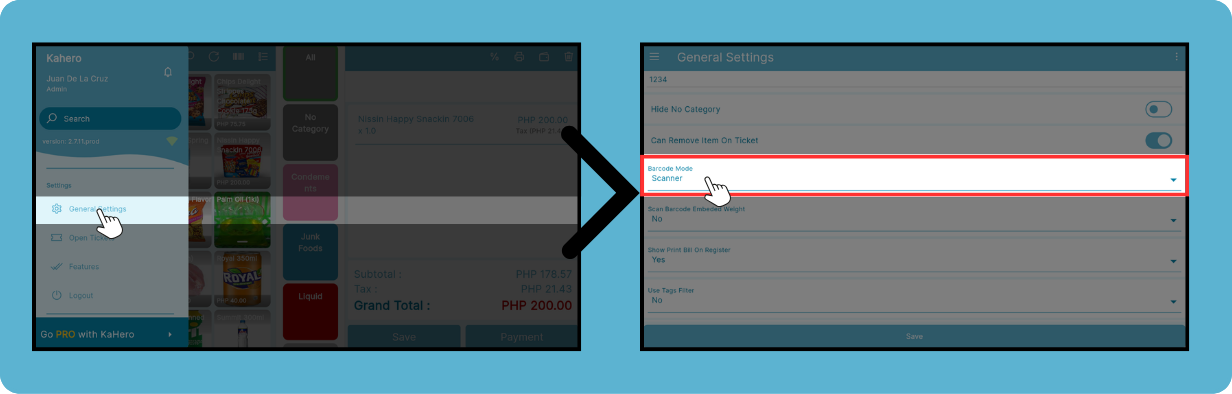
To use the built-in camera of the device set the Barcode mode to Camera .
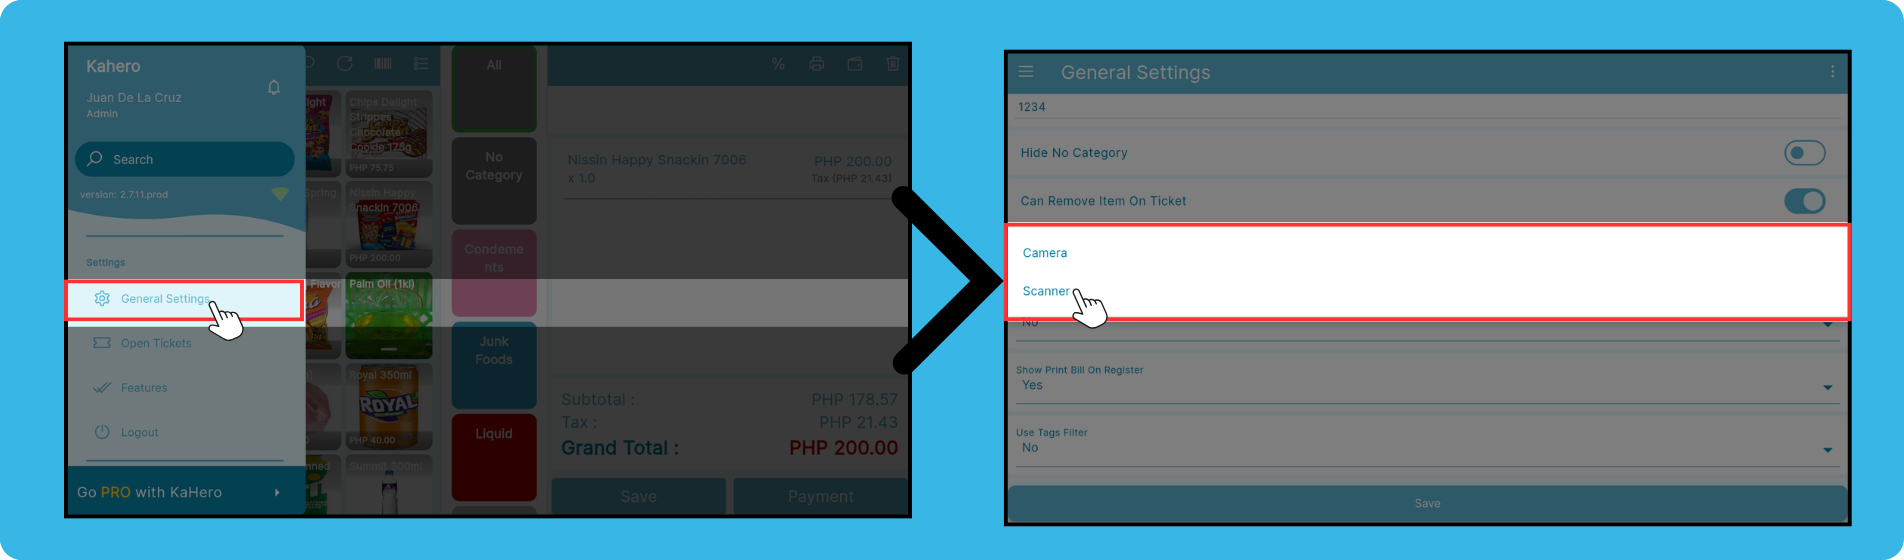
Go to the General settings , Locate the Barcode mode
Note:If shift management is Enabled. Close the shift and login again before making changes on the account
Click the Barcode mode and change it form scanner to camera.

Click save to save the changes.
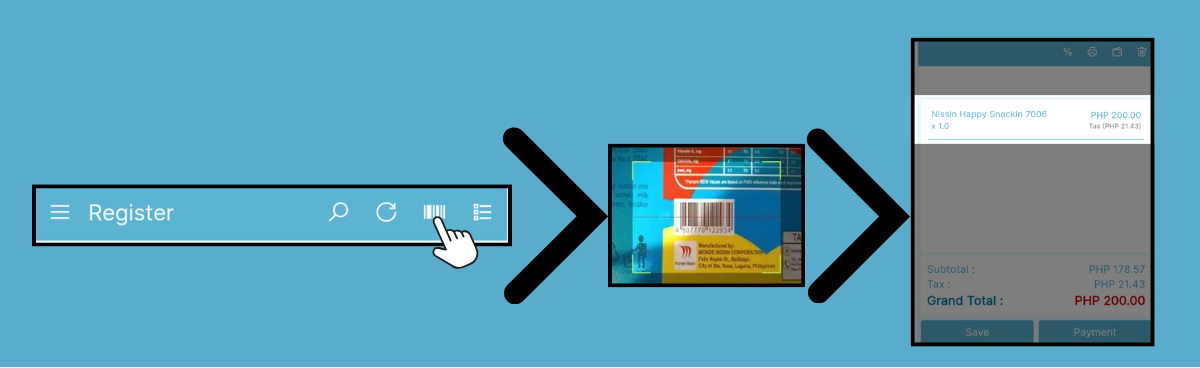
Go to the Register, click the Barcode Icon to add the item to the ticket .
A Scanning screen will then appear
After scanning ,the item will then be added on the Ticket.
Second is to Use the Scanner
Go to the General Settings , Select Scanner to set the Barcode Mode to Scanner.
Go to the register .
Upon returning to the register interface, observe that the barcode icon is no longer visible or accessible.
Simply Point the Scanner to the item's barcode. The item's information is then added on the ticket .