
Adding Item Options
Item Options under Item Listings allows you to add variants to your items. For example, if you're selling the same t-shirt with different sizes, you can set a parent item "T-Shirt", and add item options such as "Small", "Medium", or "Large". Item Options allows you to minimize the space taken up by your items.
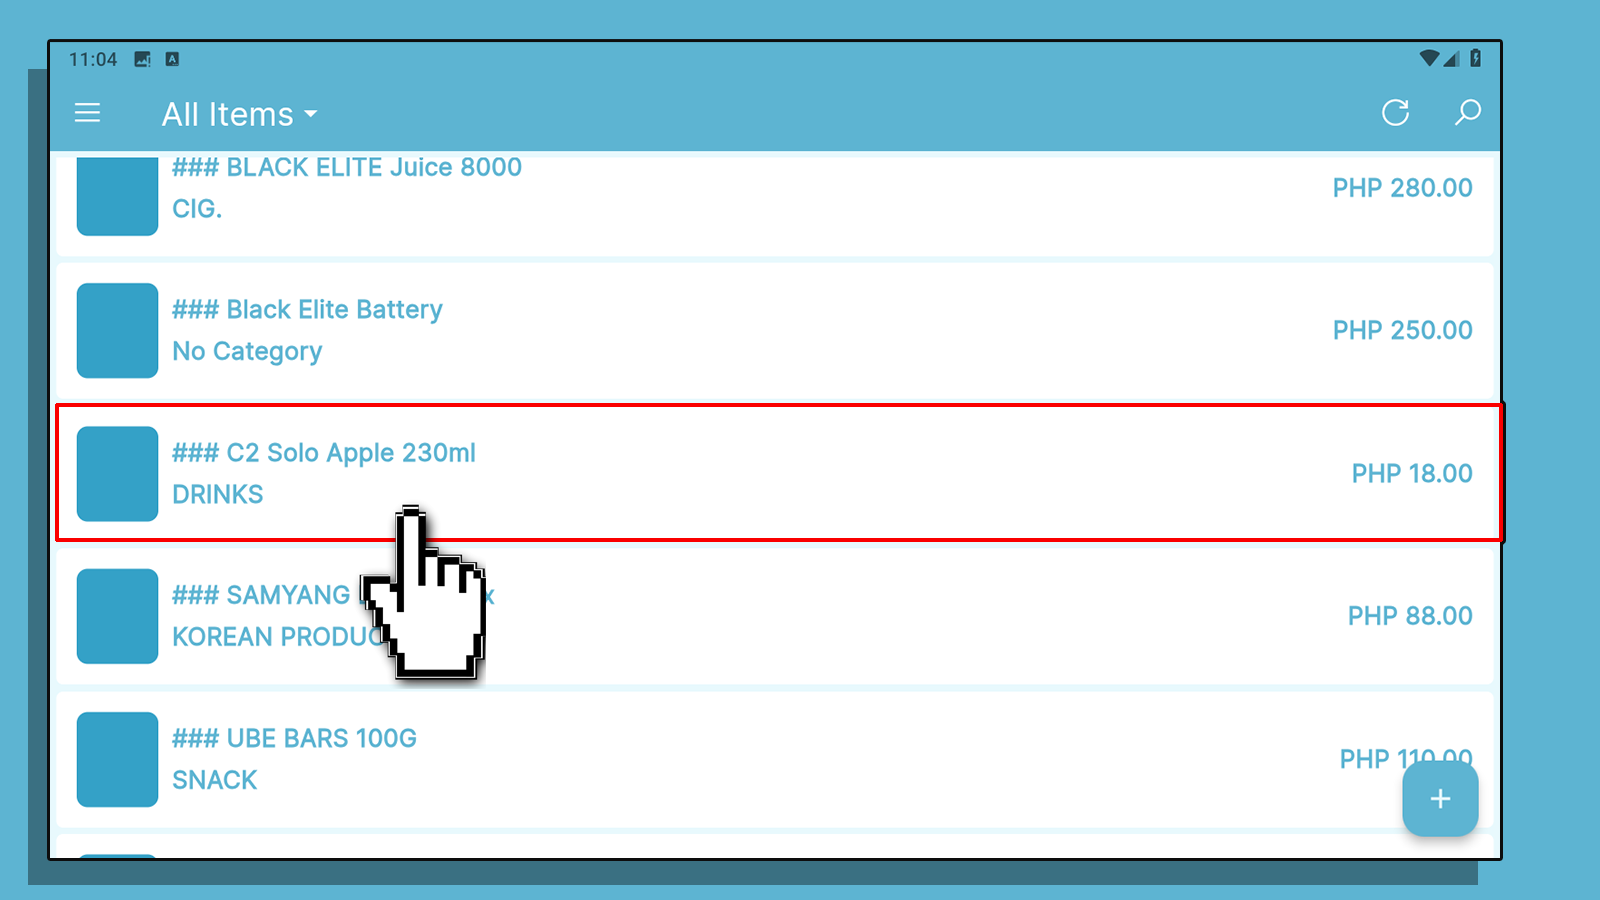
On the "Navigation Menu" under "Listings", select "Items".

This is your item screen. Click on the item you wish to add options
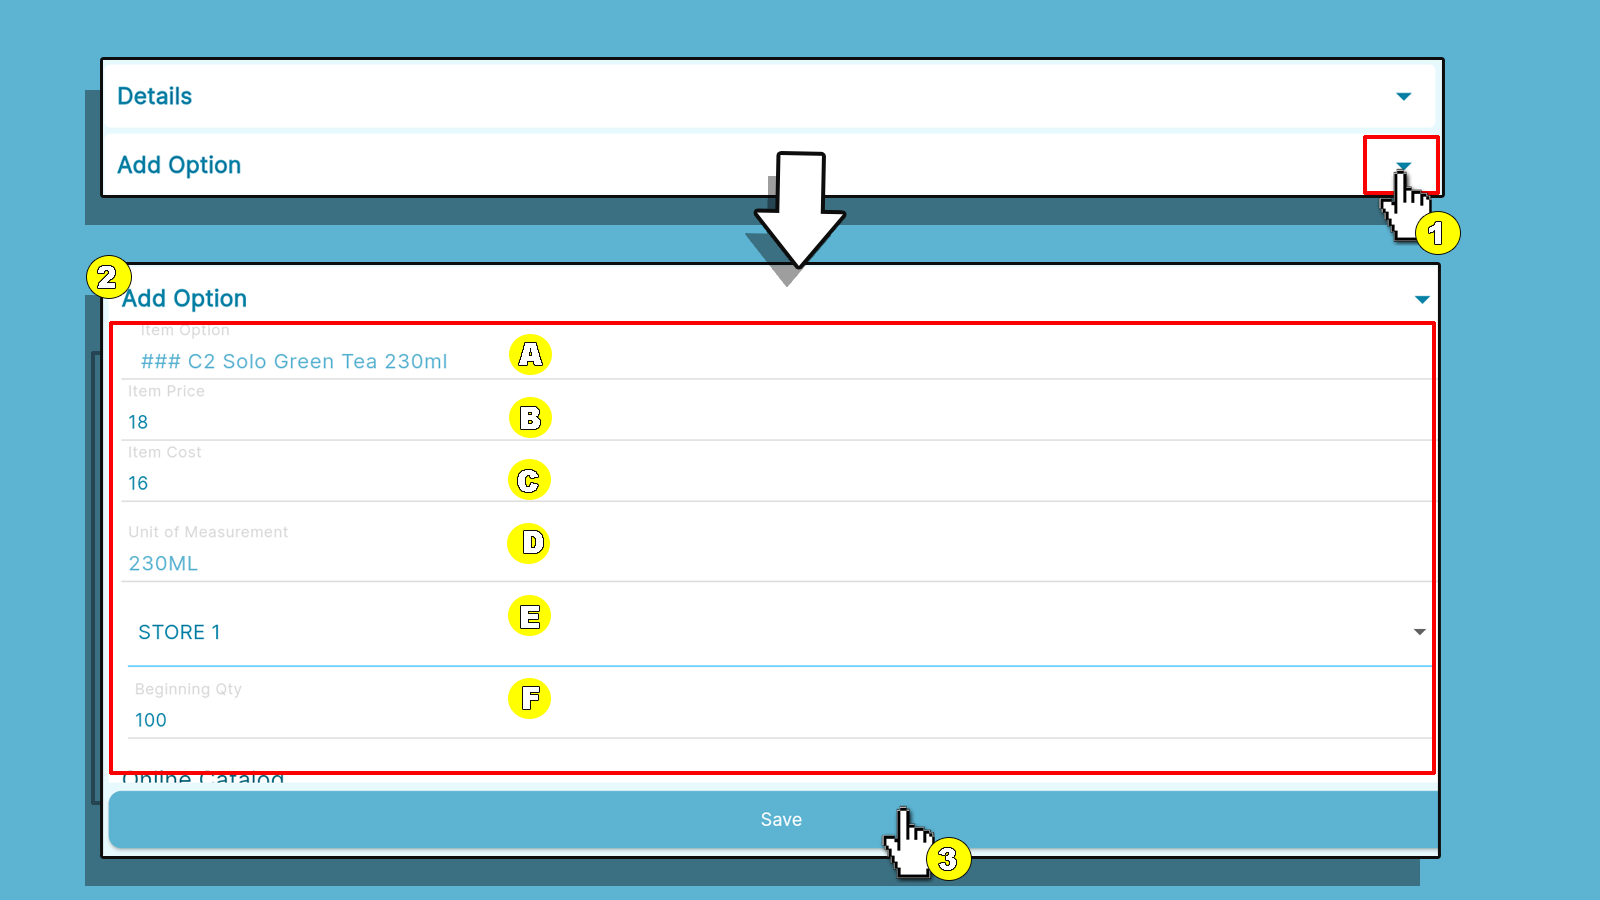
On the bottom part of the "Edit Item" screen, you can find the "Add Options" section.
1.Click the Drop-down button
2.You can then enter the additional information for the item's option
A. Label your item option. (Ex. T-Shirt (Small), T-Shirt(Large))
B. Set the price for that specific item option.
C. (Optional) Set the cost of the item option. Click "Save".
D. Unit for Measurement used for the Item.
E. Assign the warehouse from which the item's stock came.
F. Beginning quantity of the item's option.
Note: To assign the Warehouse and the Item's quantity, make sure to activate the Stock Management Feature (PRO)
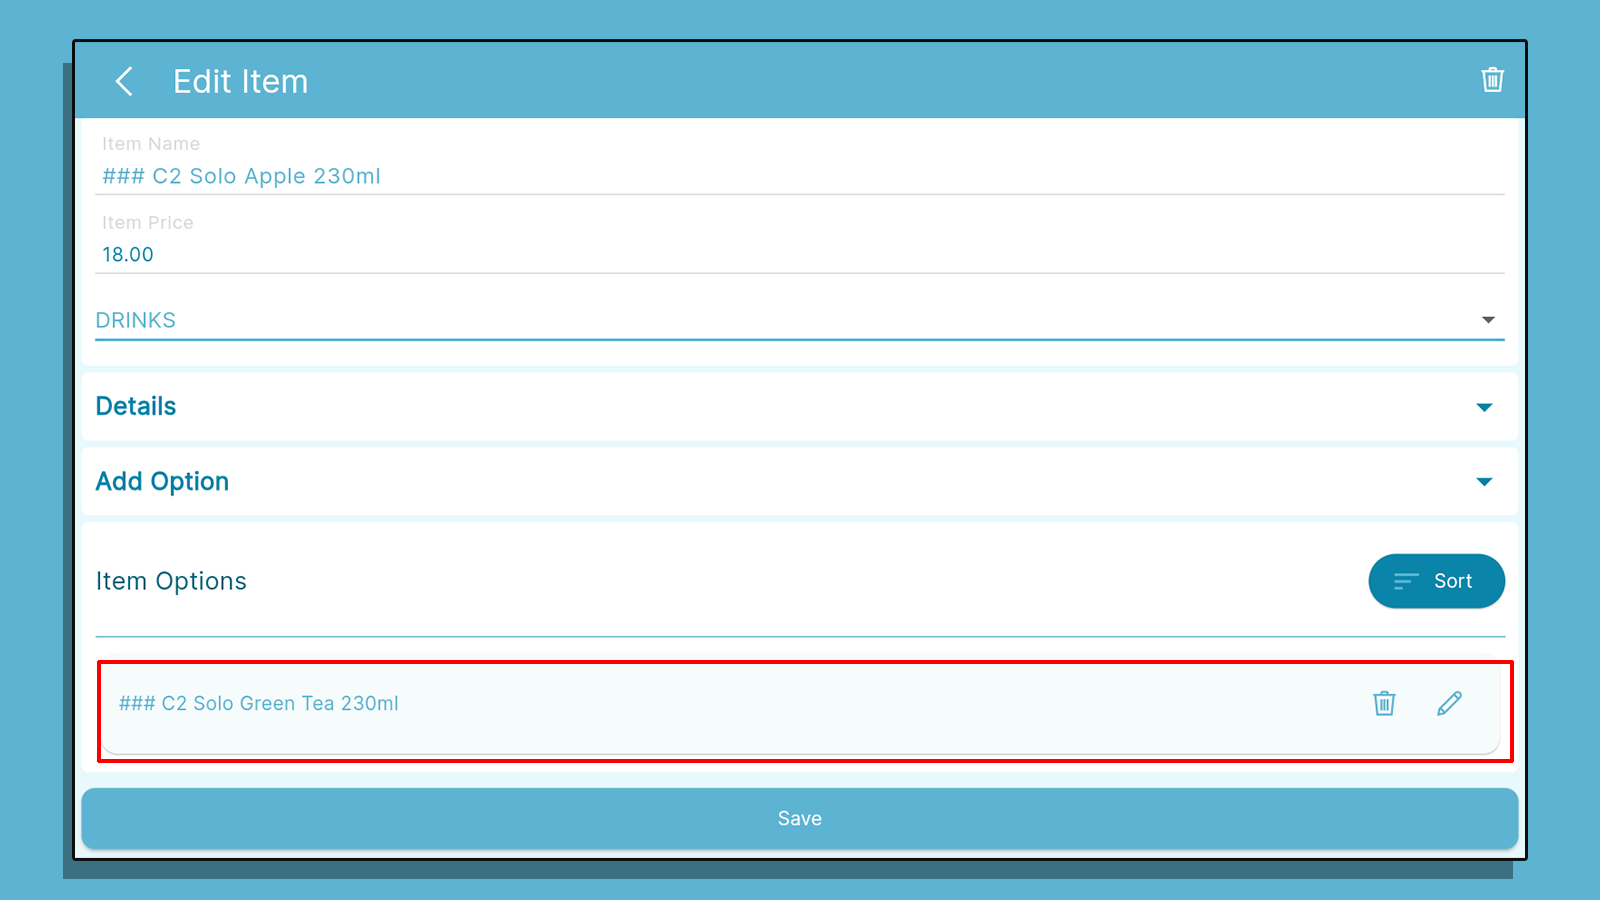
After saving, your item options will show on the bottom of your "Edit Item" screen once clicking the item again. . Click on the "Trash Icon" to delete the item option. Click on the "Pen Icon" to edit the item option.
Selling Item Options
On the "Register", select the product with the item option.
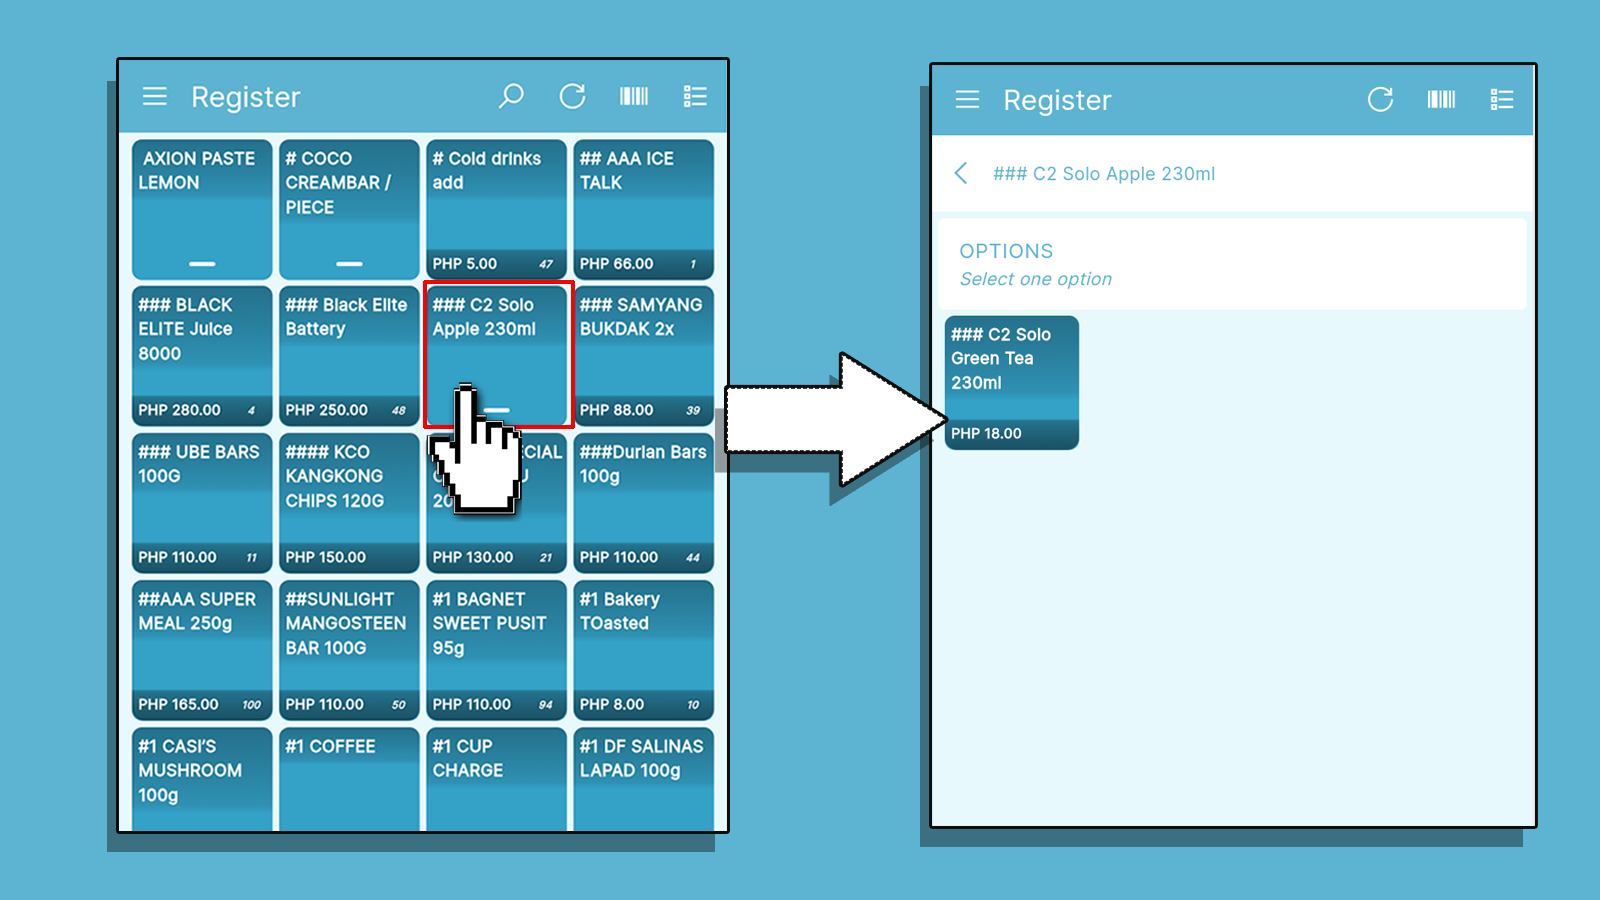
Click the item Option to proceed with the transaction.
