The Register is where the magic happens. Let's start ringing up those sales! 🛍️
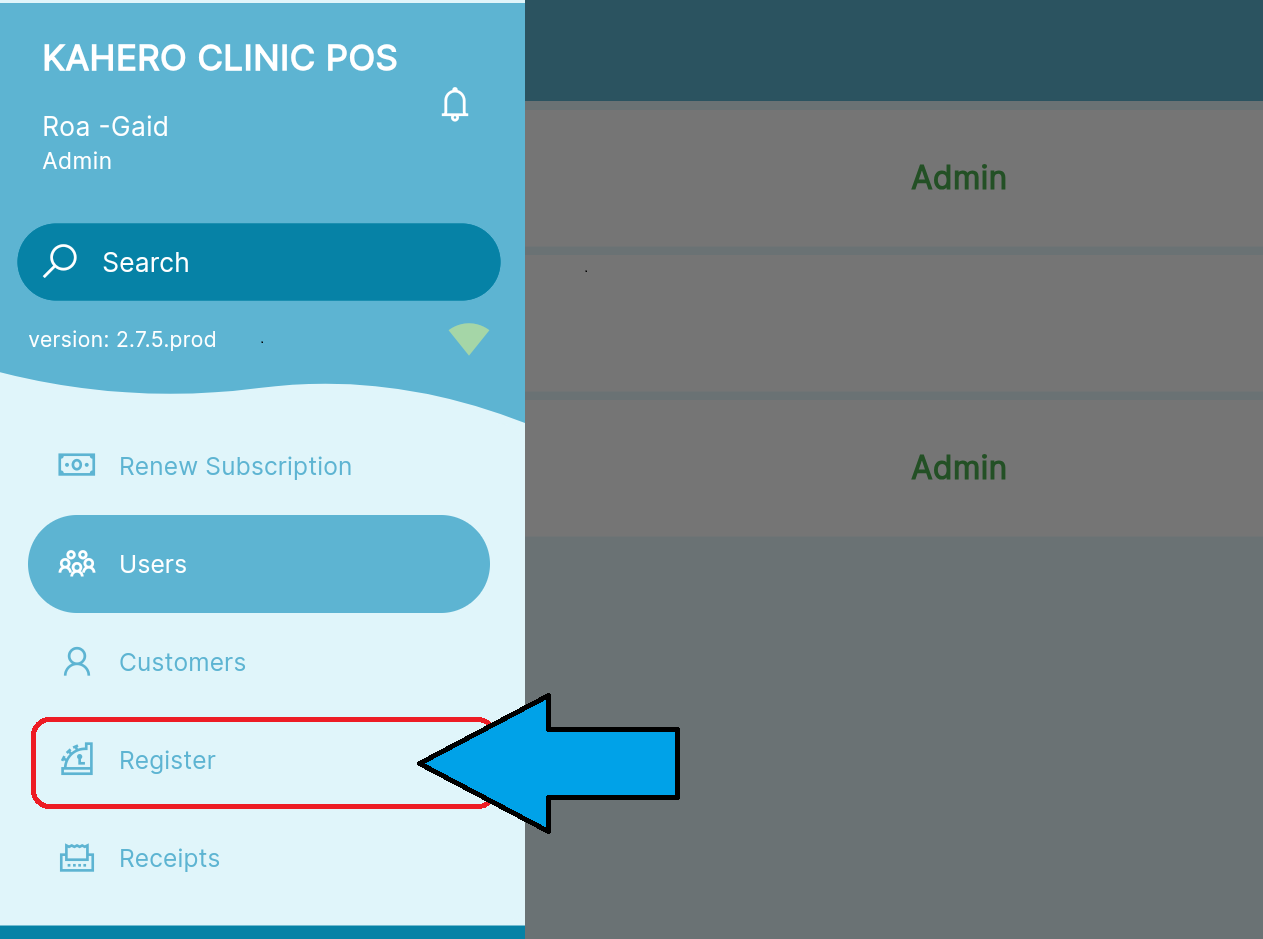
- On the Navigation Menu, select Register.
This is the interface of your register where all the magic happens ✨
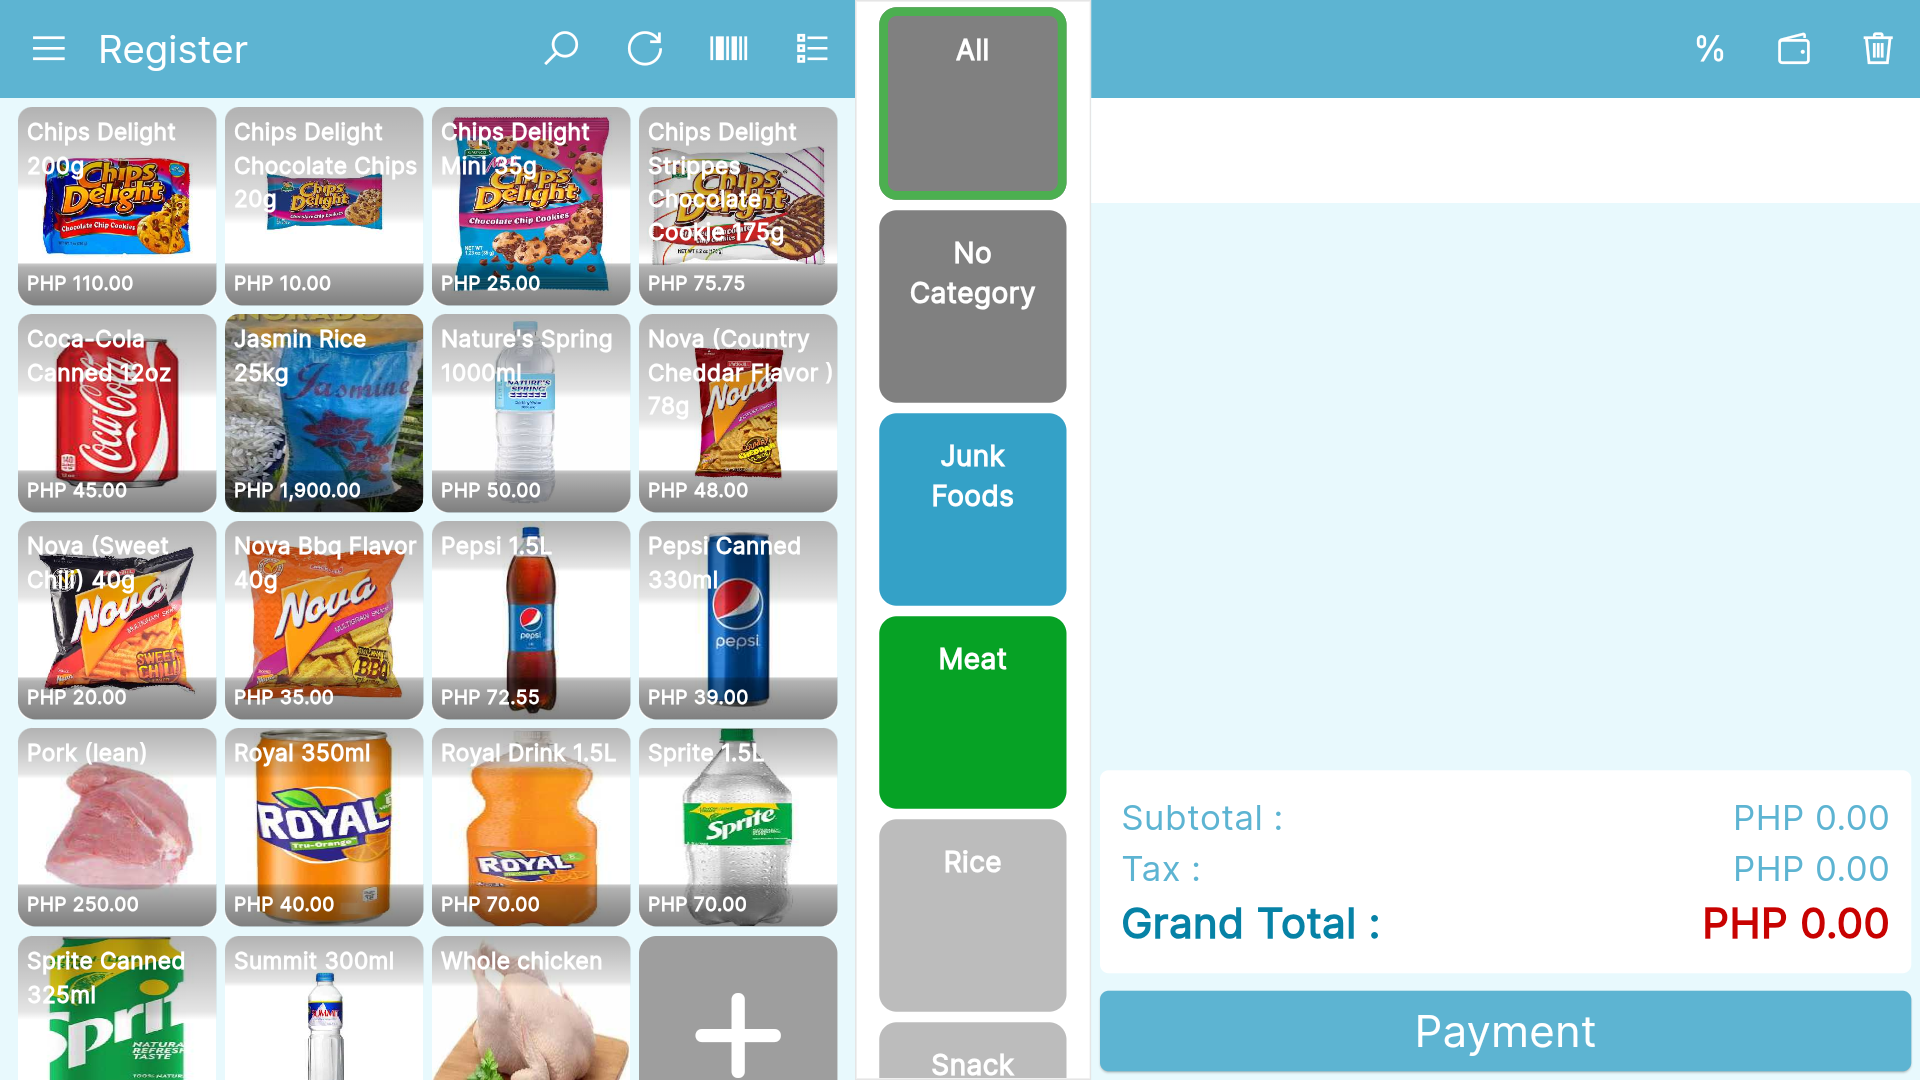
Getting to know the Register Features
Before we proceed with any transactions, let's take a moment to explore the features available on this interface
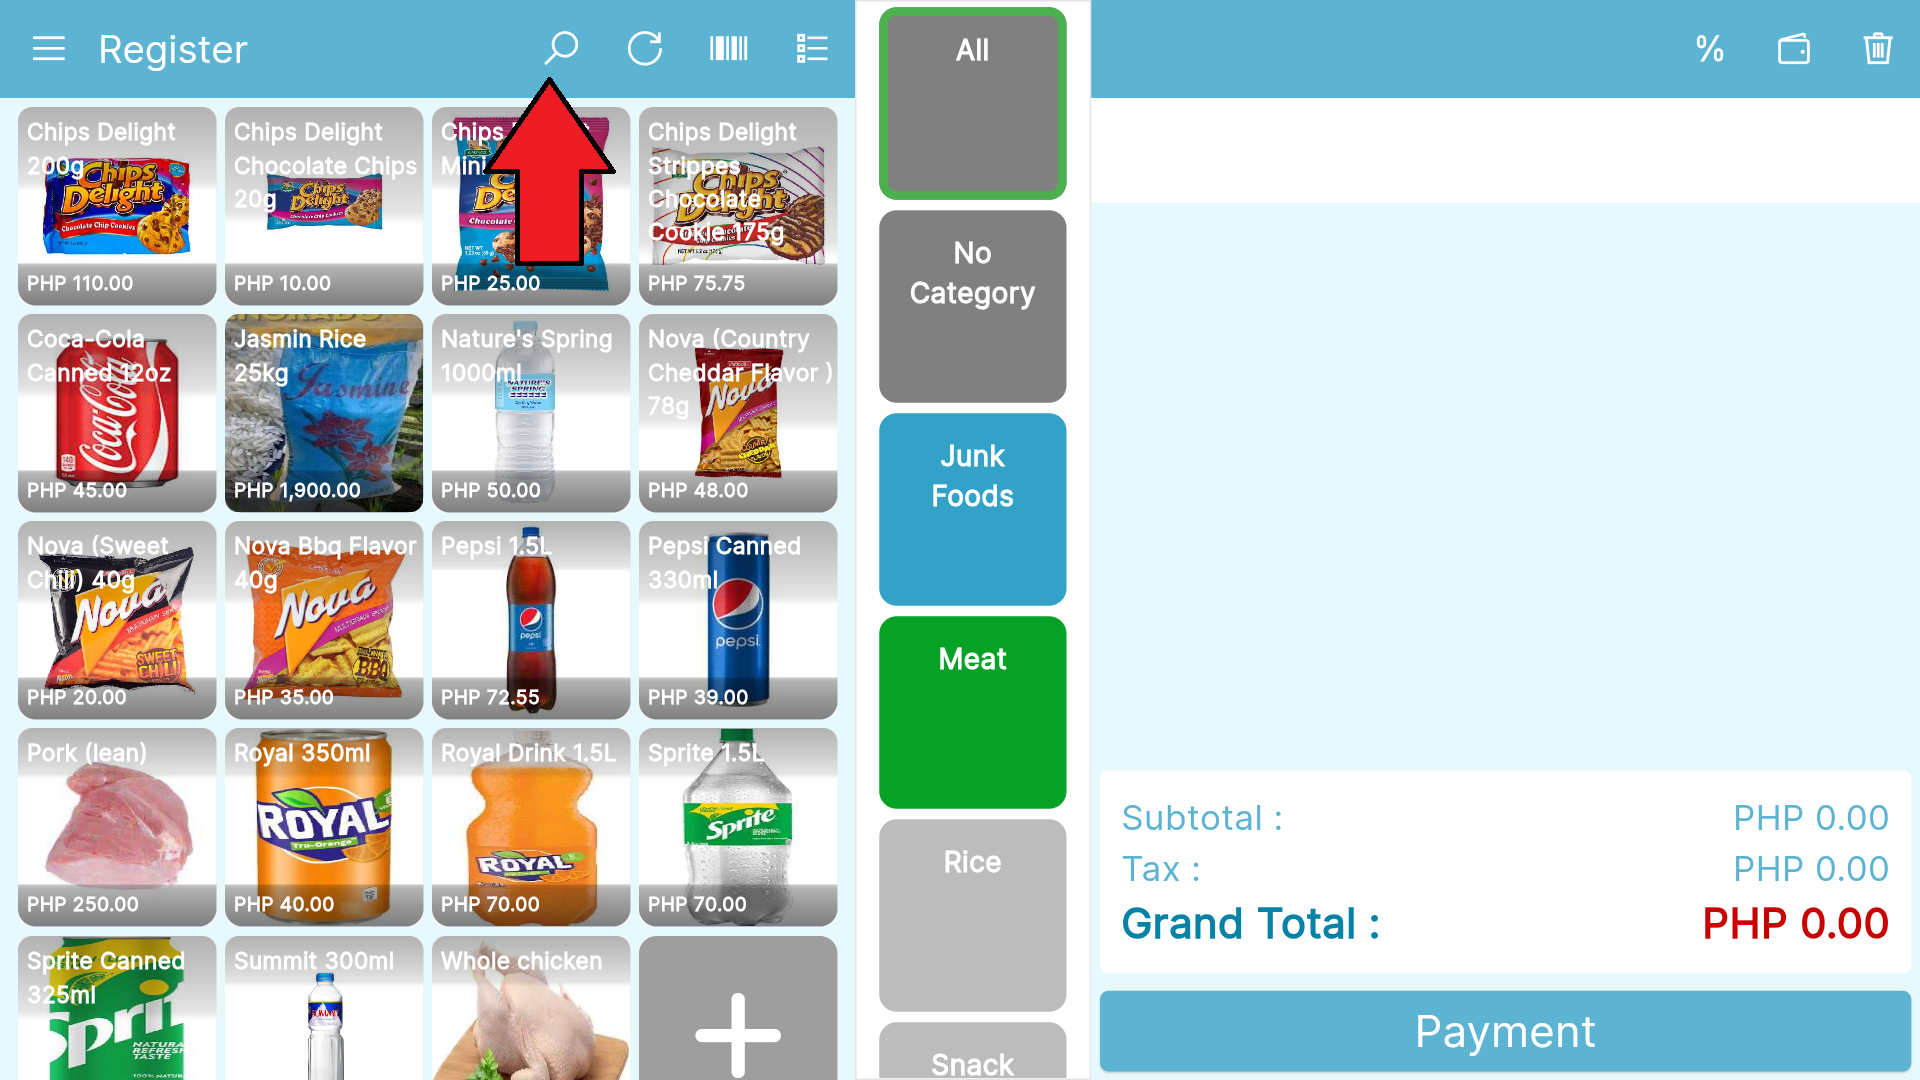
Searching For Items
Locate Your items Faster
To quicken the transaction process, utilize the search button to swiftly locate the item the customer wishes to purchase.
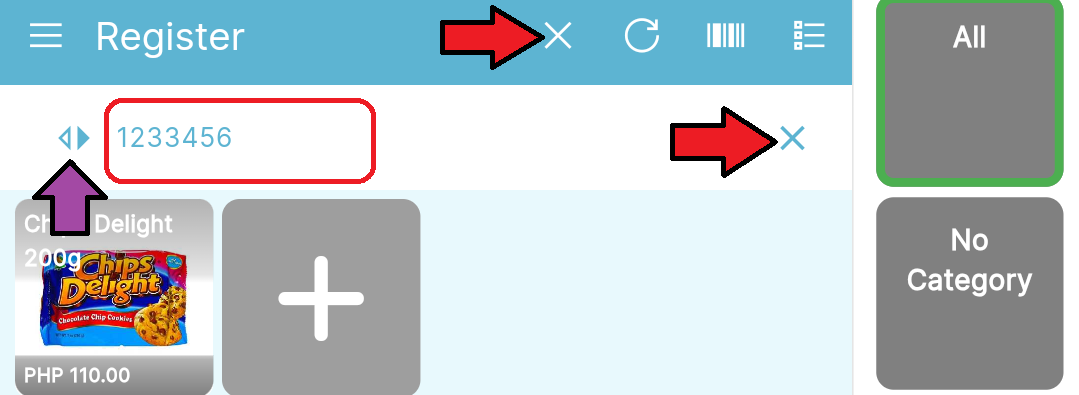
Click the small arrows to choose to either search by name or by barcode (Purple Arrow).
For Search by Barcode Number
Enter the Barcode Number of the item to locate it
Click the X icon(s) to close the search feature (Red Arrow)
For Search by Name simply enter the Name of the item
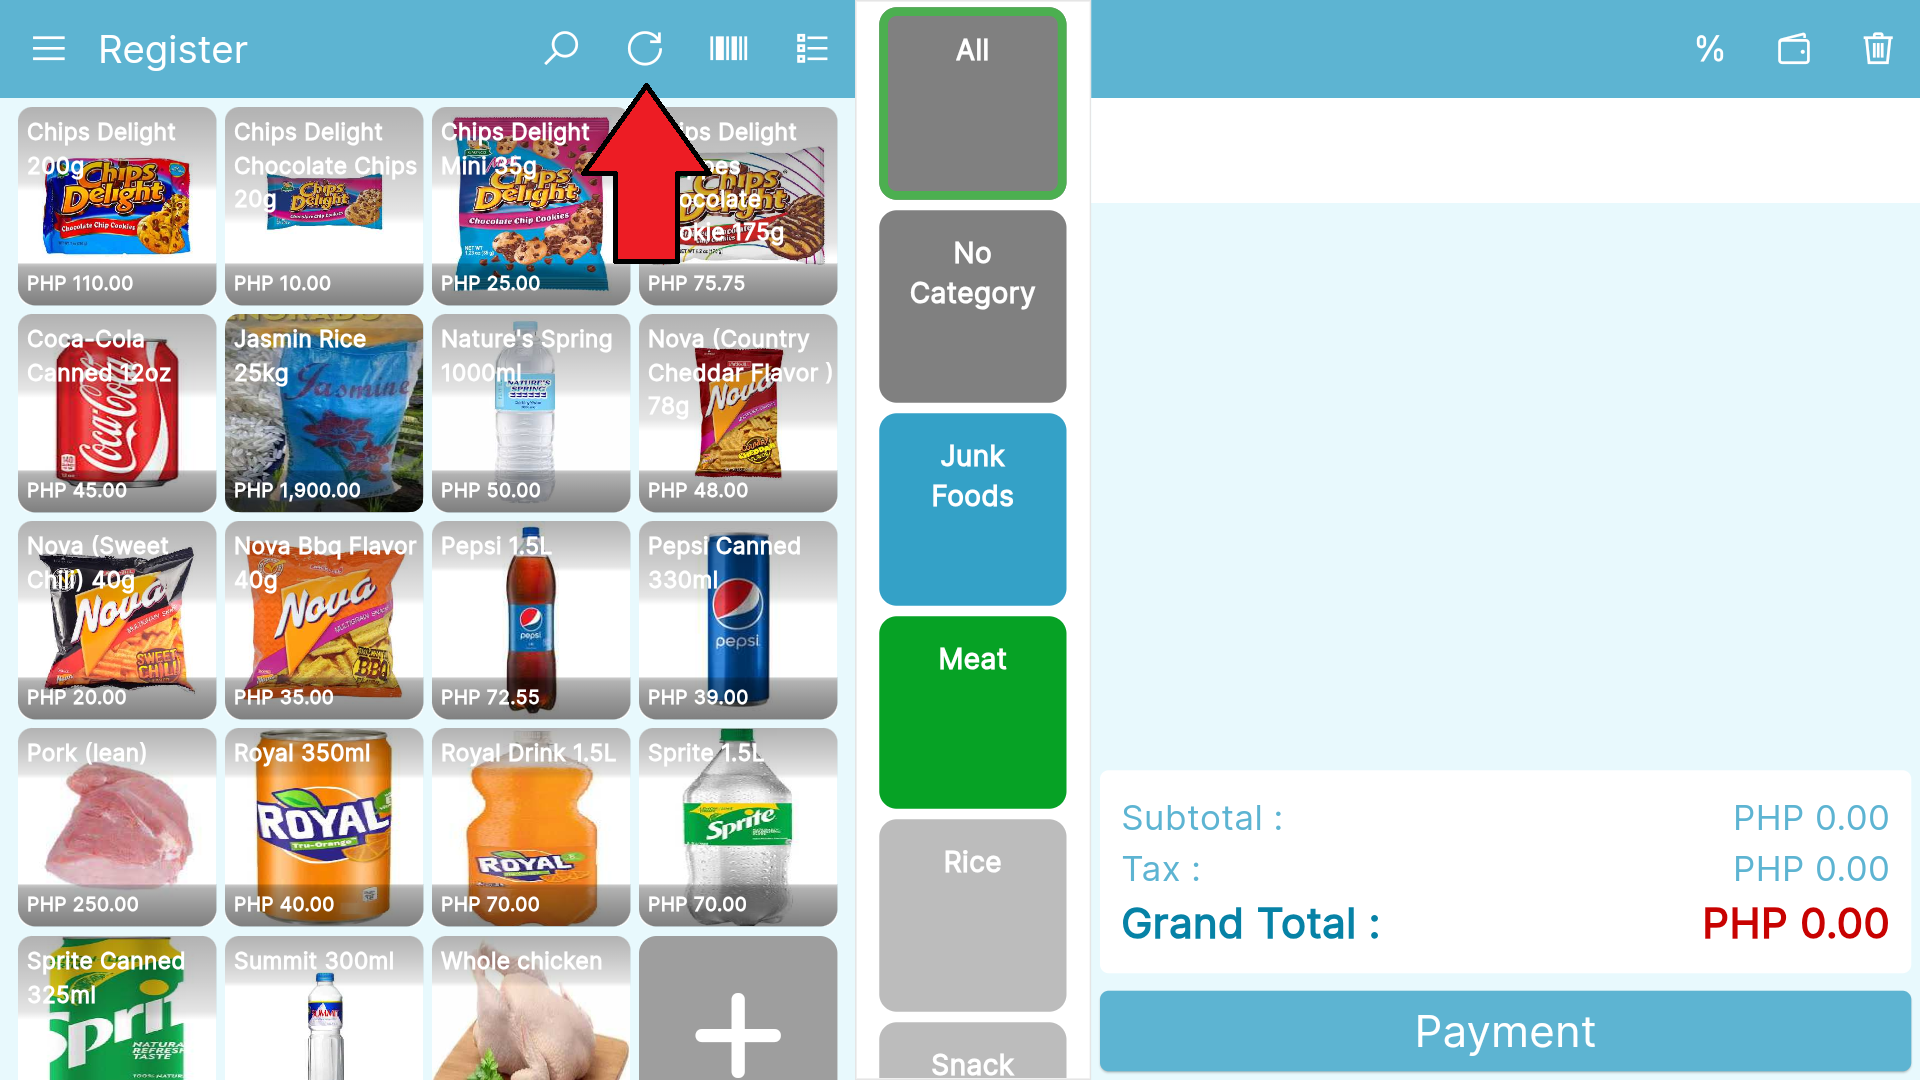
Reload/Refresh
Clicking the reload button allows you to refresh your Register interface and load more items.
Tips: If some of your Items are not showing on the Register, click the icon below to Refresh or Load More Items.
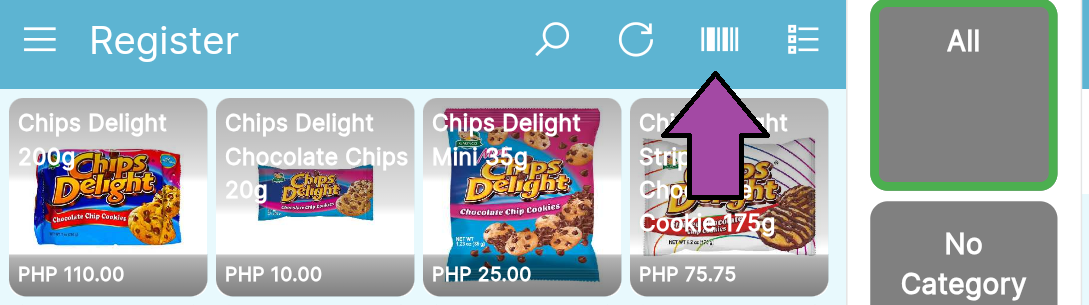
Scanning Items
The Barcode button allows you to scan the item .
A scanning screen will appear for you to scan your items using the camera once you click the barcode icon
Note: To use this feature , Set the Barcode mode to Camera, follow this instructions.
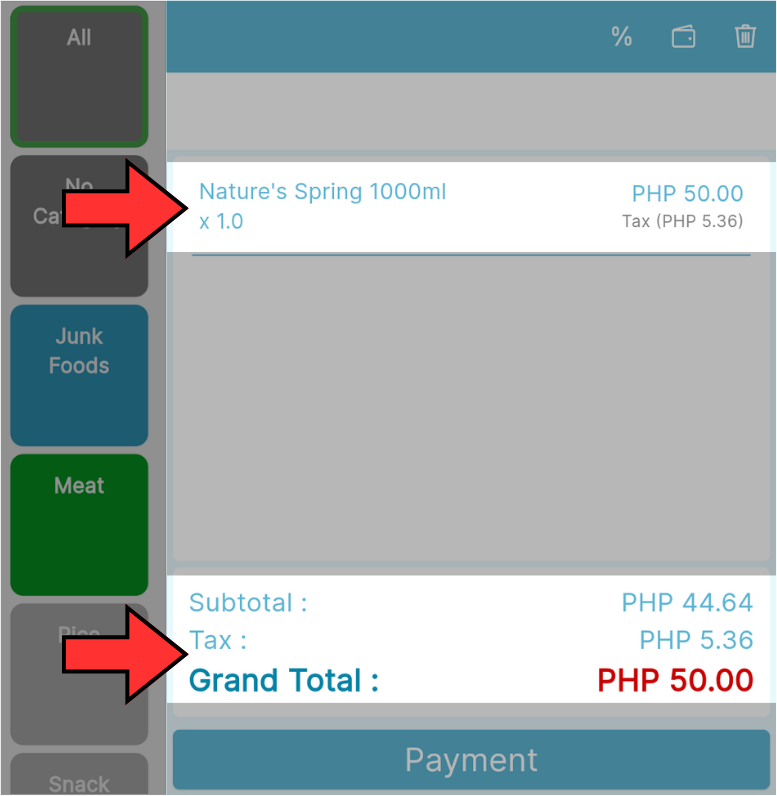
By pointing your Camera to the item's barcode , the Item will then be added to the Receipt.
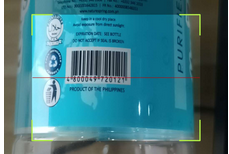
In this example, we scanned the barcode on the Nature's Spring 1000ML , the Item is then added on the receipt
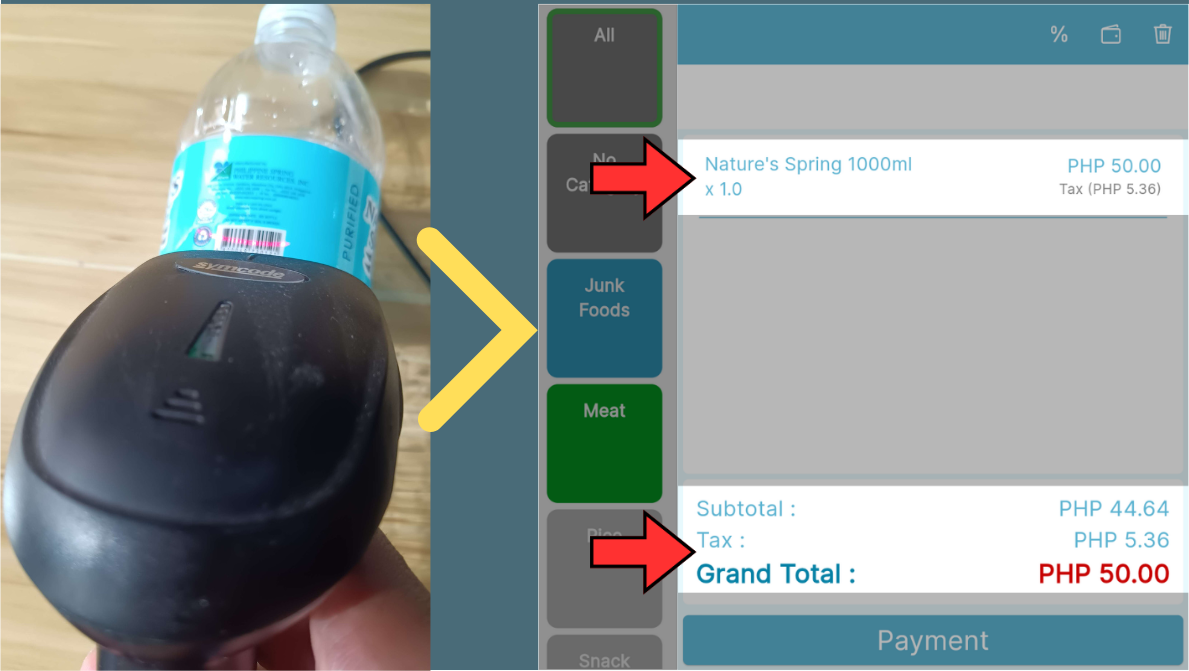
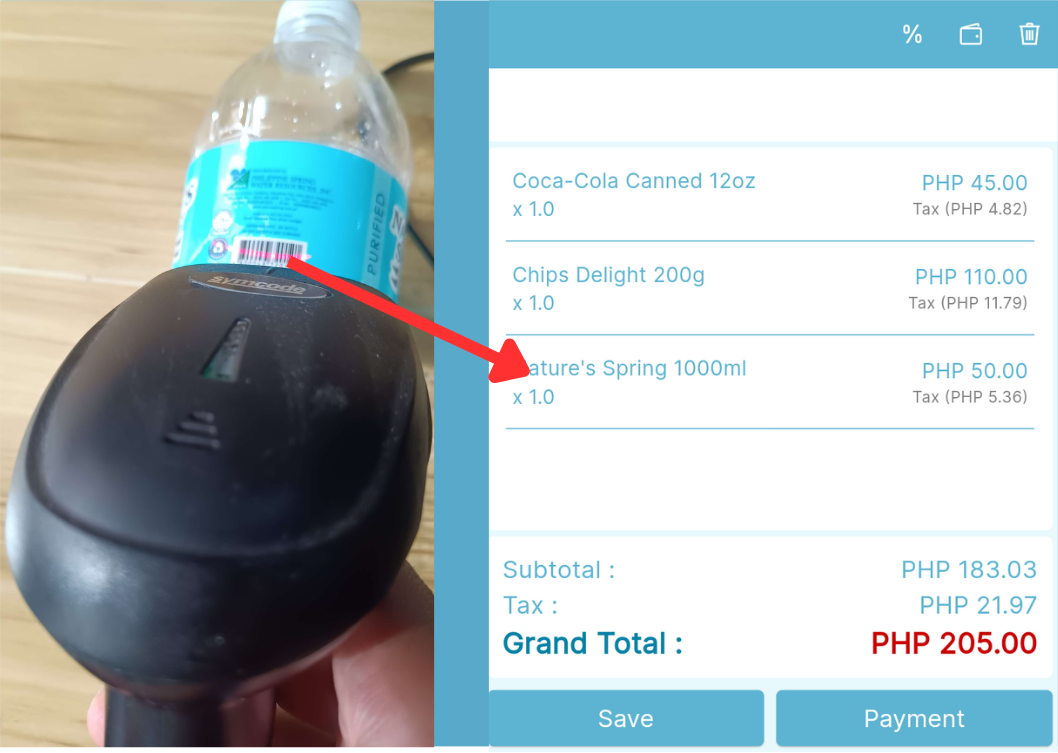
Scanning the Item using a Scanner is also possible.
Simply point your scanner to the item's barcode, the item's information will then show at the Receipt.
Note: To enable this feature, simply set your barcode mode to scanner by following this instructions.
Styling your Interface
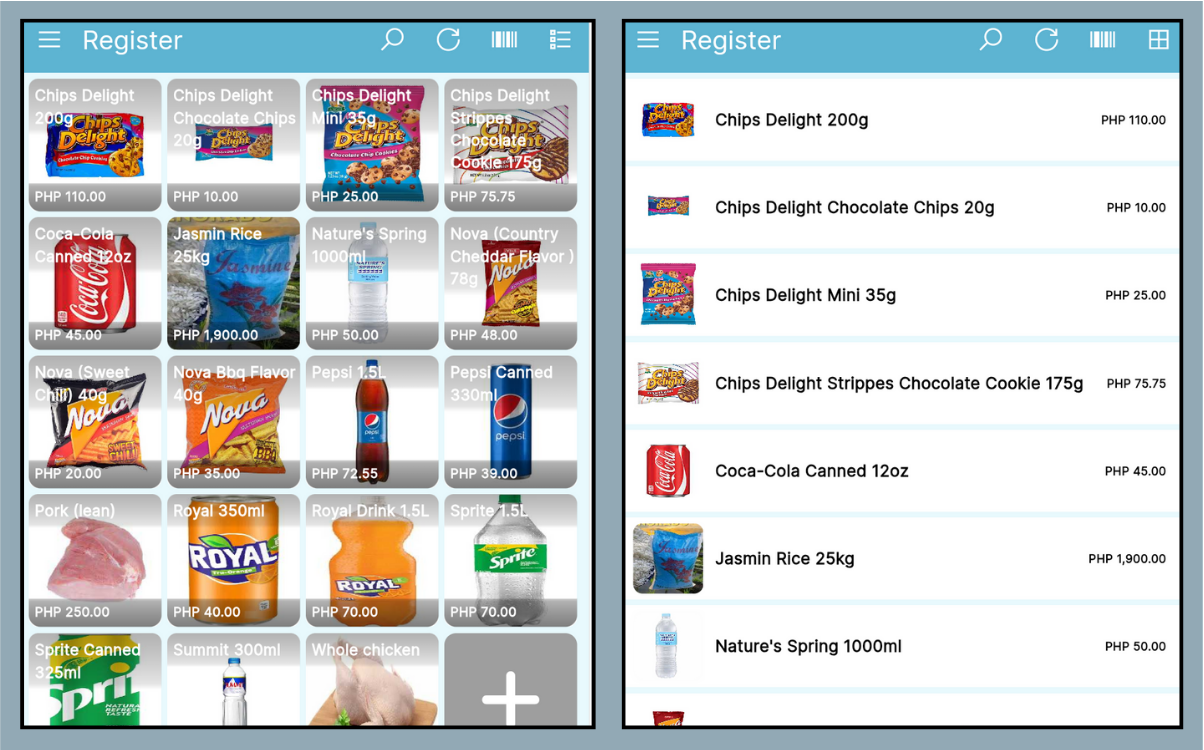
The List button allows you to change the lay-out of the screen to list style
Note: Items are already arranged alphabetically from A-Z.

You can either choose the Grid Style (Right) or List style (Left) according to your preferences
Categorizing Items
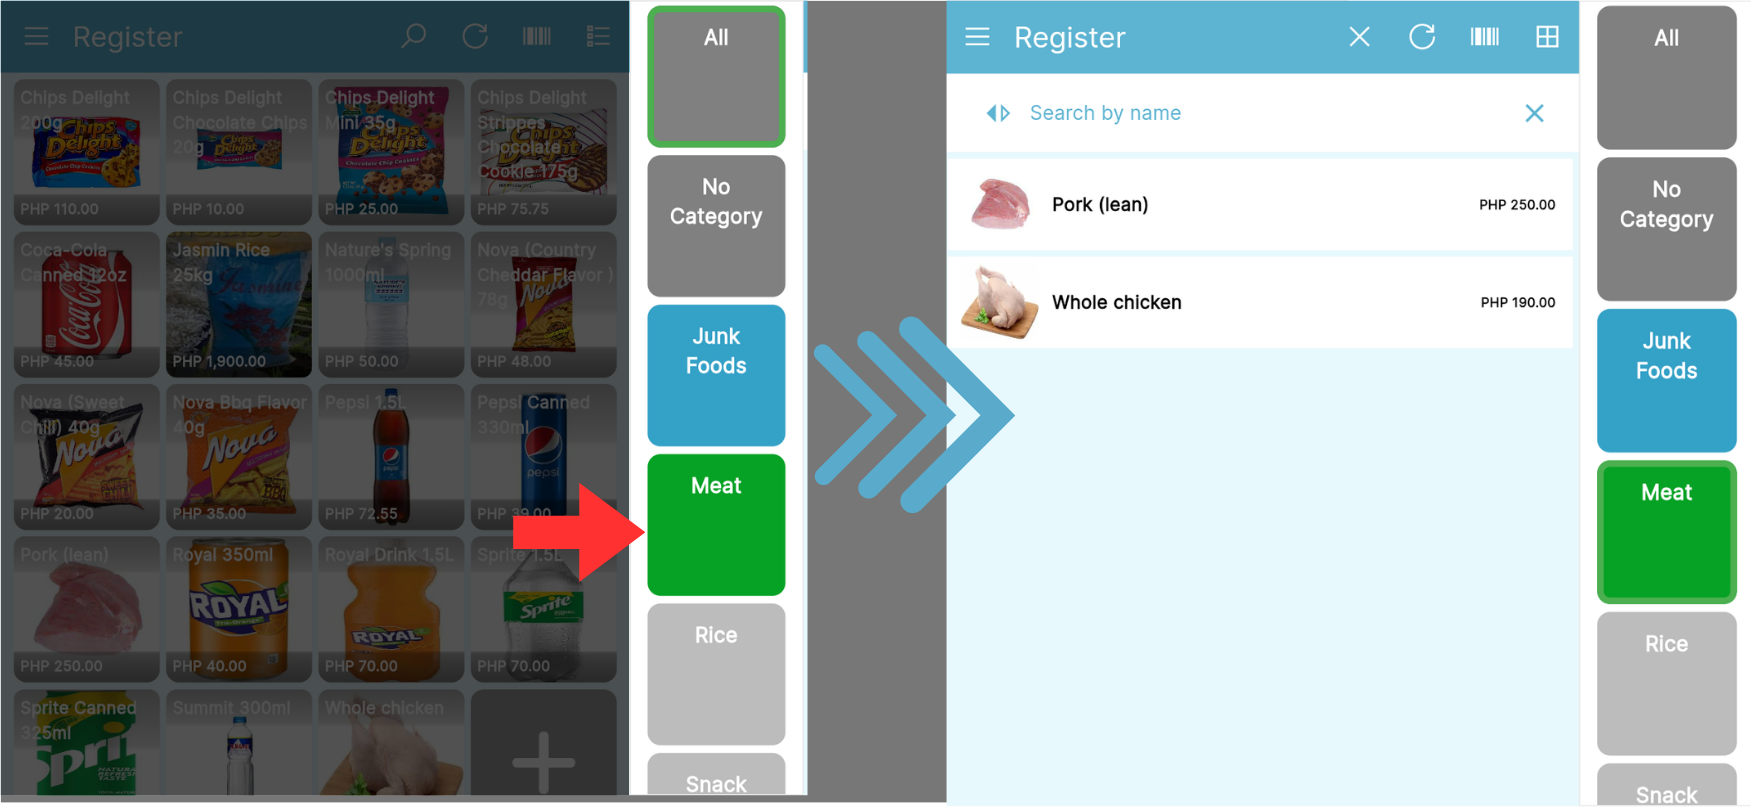
The squares in between the Layout and the Receipt is the Category feature.
Select which items you want to show in the interface by clicking the corresponding category.
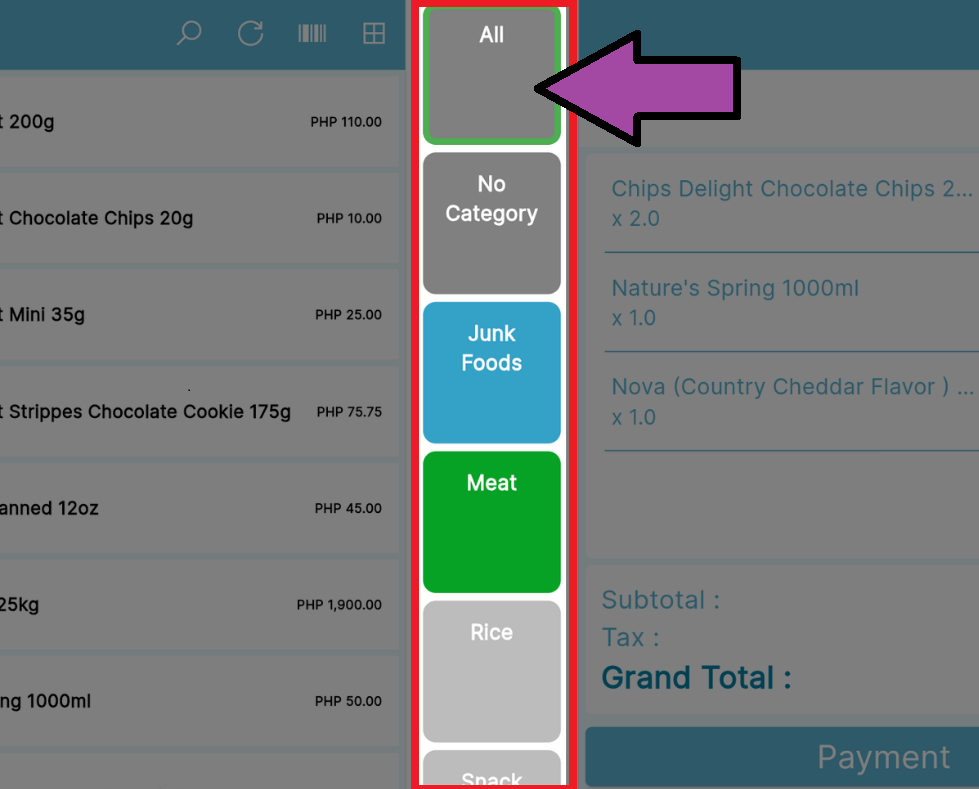
In this example, we've opted for the "meat category" to exclusively display items categorized under meat.
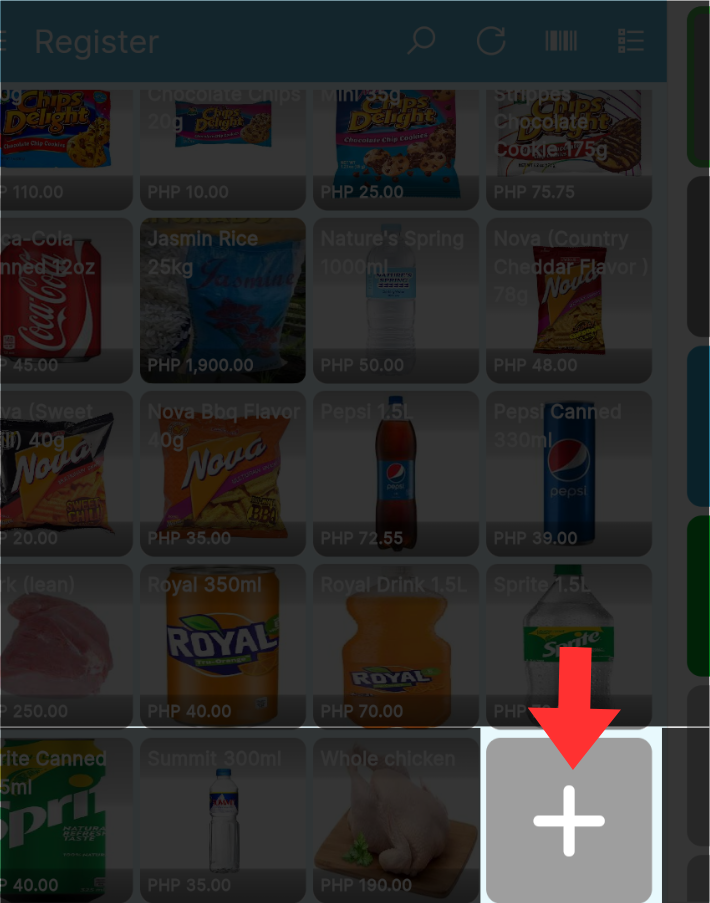
Adding your items on the Register
Adding item is also possible on register simply click the PLUS icon (+)
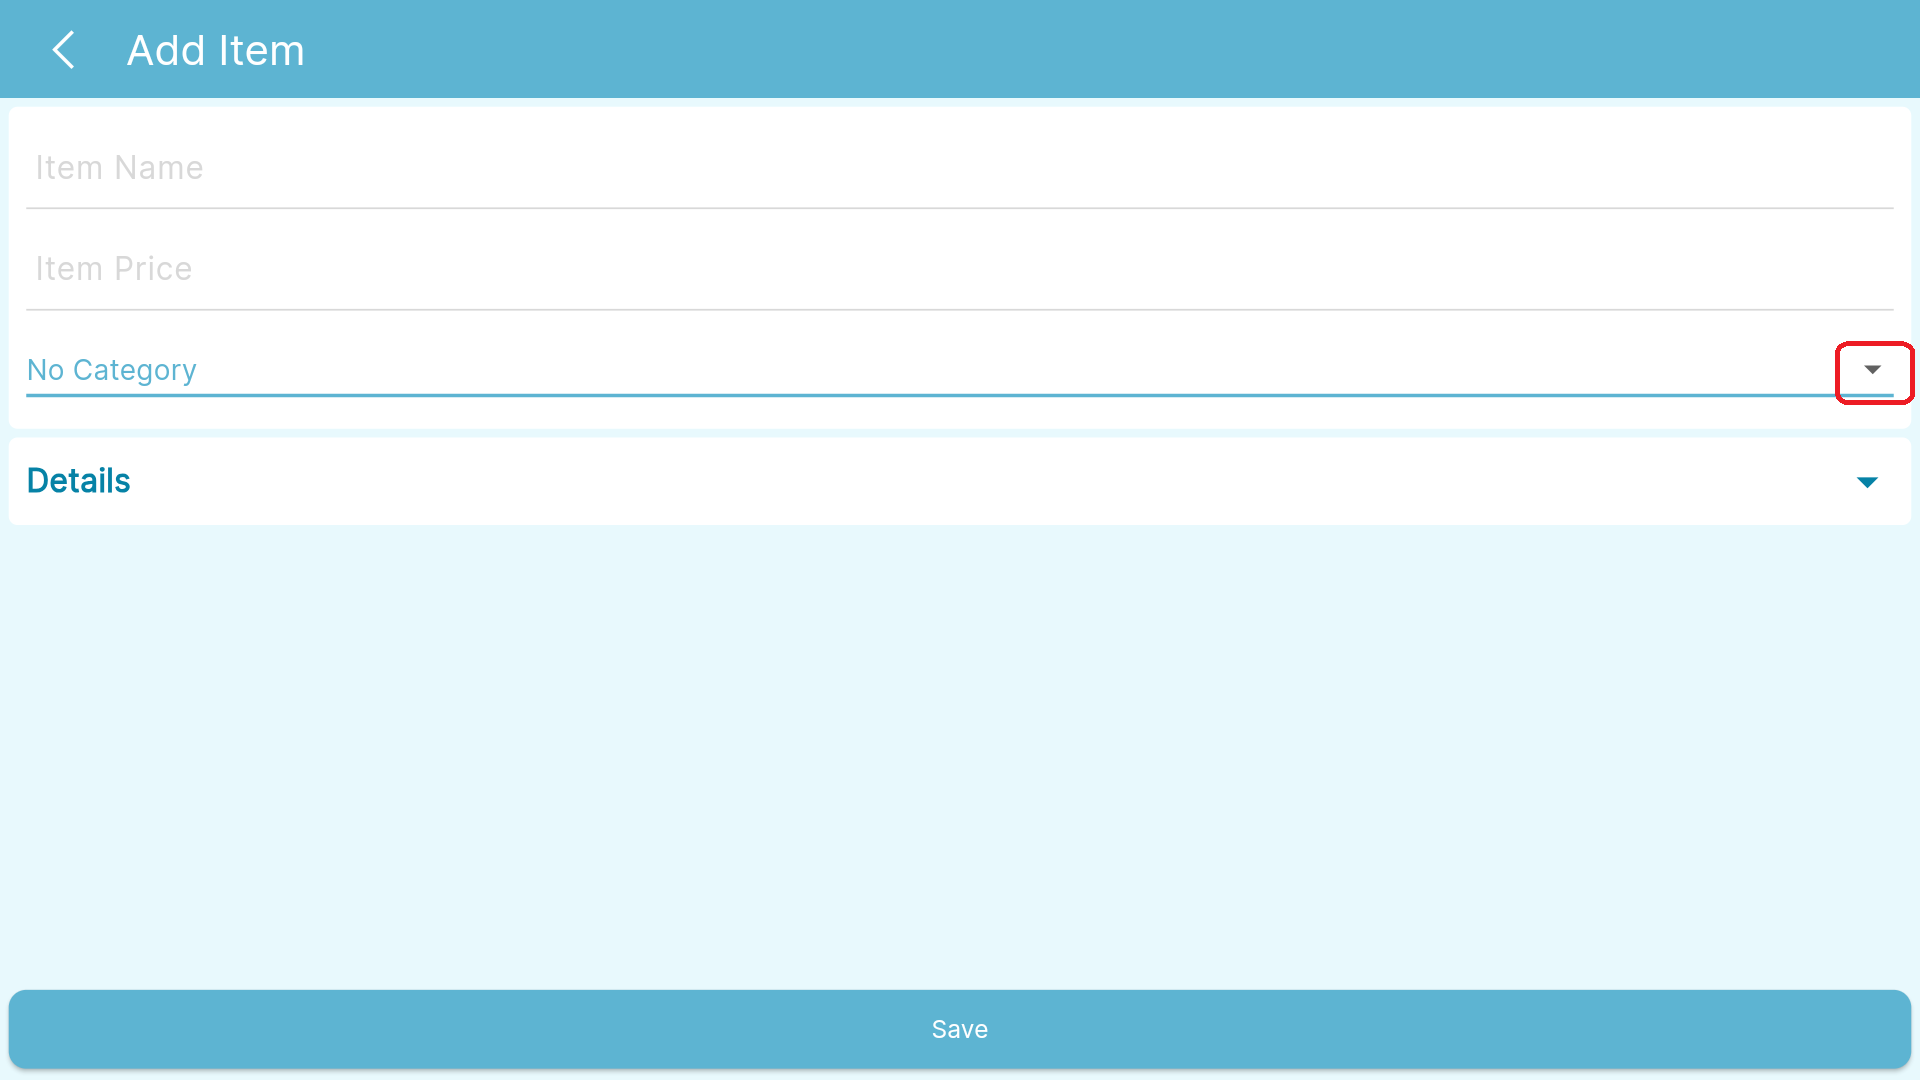
After clicking the plus(+) button you will then be redirected to the Add item interface .
Follow this instruction and click save to add the item.
Applying Discounts
To apply a discount simply click the percentage icon(%)
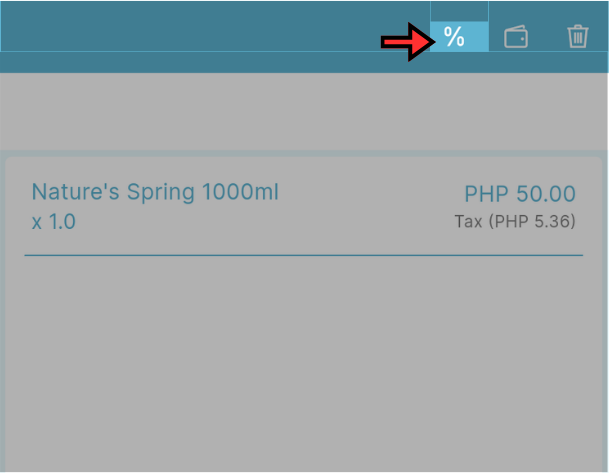
After Clicking the percentage icon , a pop up will appear.
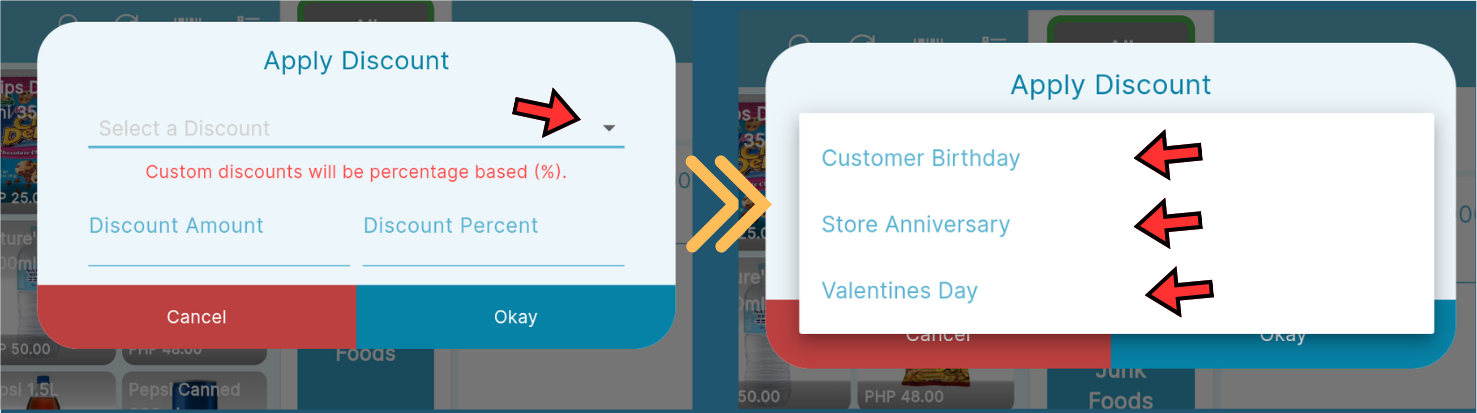
Click the drop-down button , a choice will then present itself
You can then choose the Discounts you wish to add.
Note: The discounts presented are based on the discounts that you added on the discounts section . Follow this instruction if you wish to add/edit your discount .
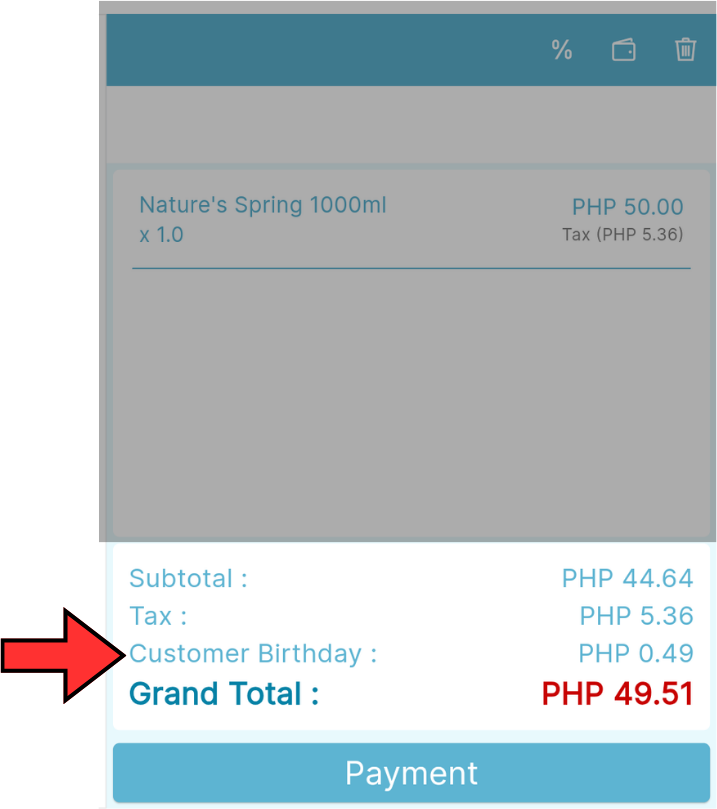
Click the discount that you wish to add and it will then show on the Receipt.
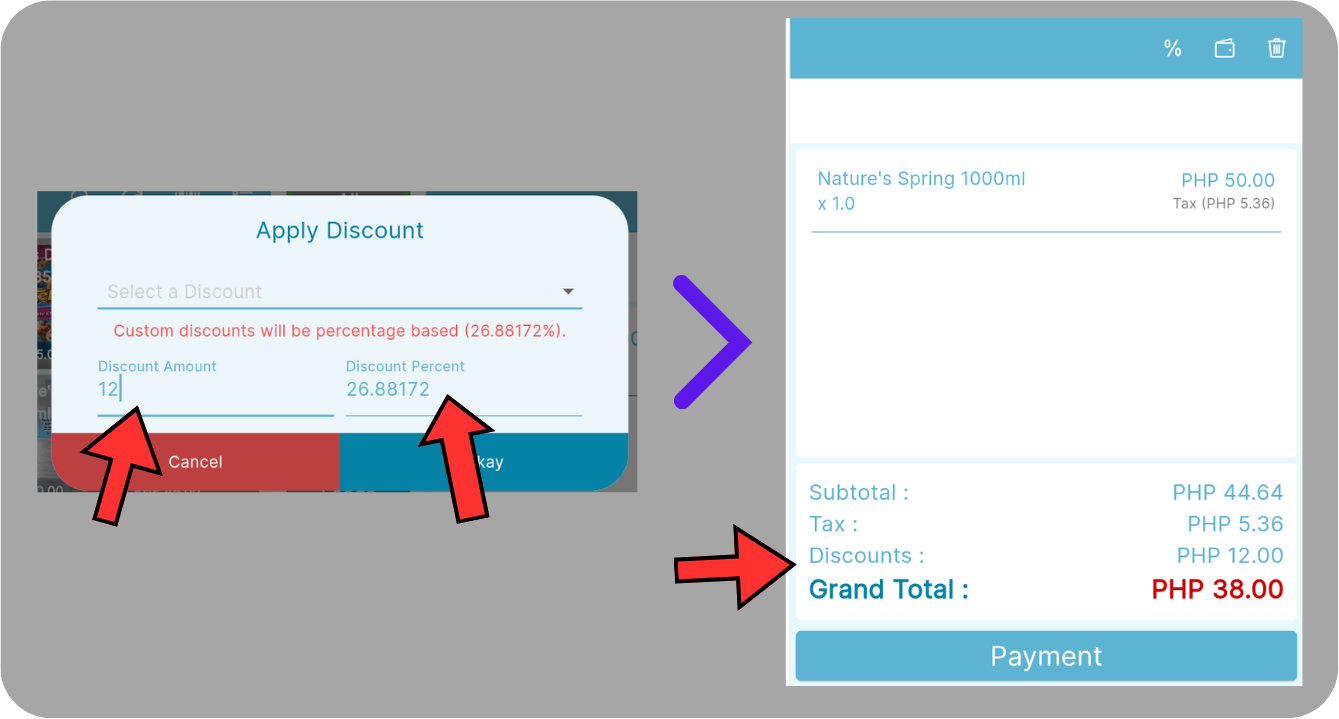
Additional note: You have the option to apply your own discount, regardless of whether you make a selection from the available choices or not.
Simply input the desired amount , the amount percentage will also reflect.
Click okay to add the discount to the customer's item.
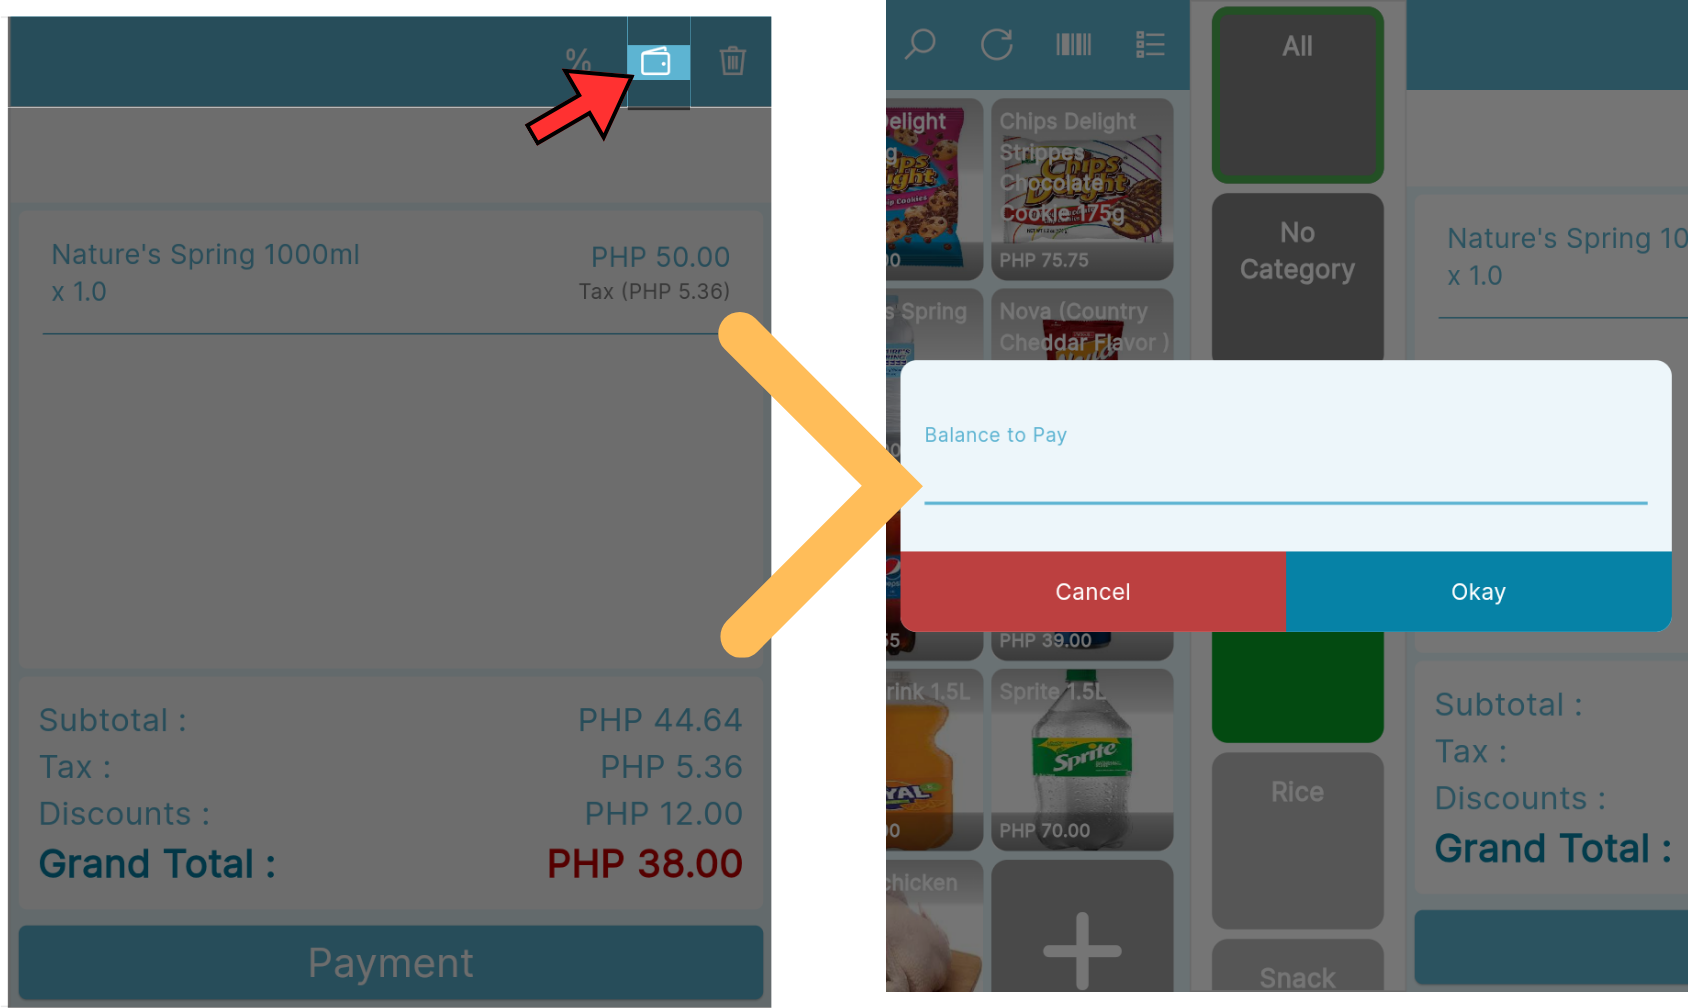
Balance To Pay
This feature is where you collect your customer's remaining balance after they've requested for a partial payment.
Note: Click this link to know more about Partial Payment.
Click the wallet icon located at the top right of your screen
Once clicked , a pop-up screen will appear
Enter the remaining balance of the customer . You can access the customer's balance by accessing the customer on the Customer section.
Additional note: To know more about Customer account click this link .
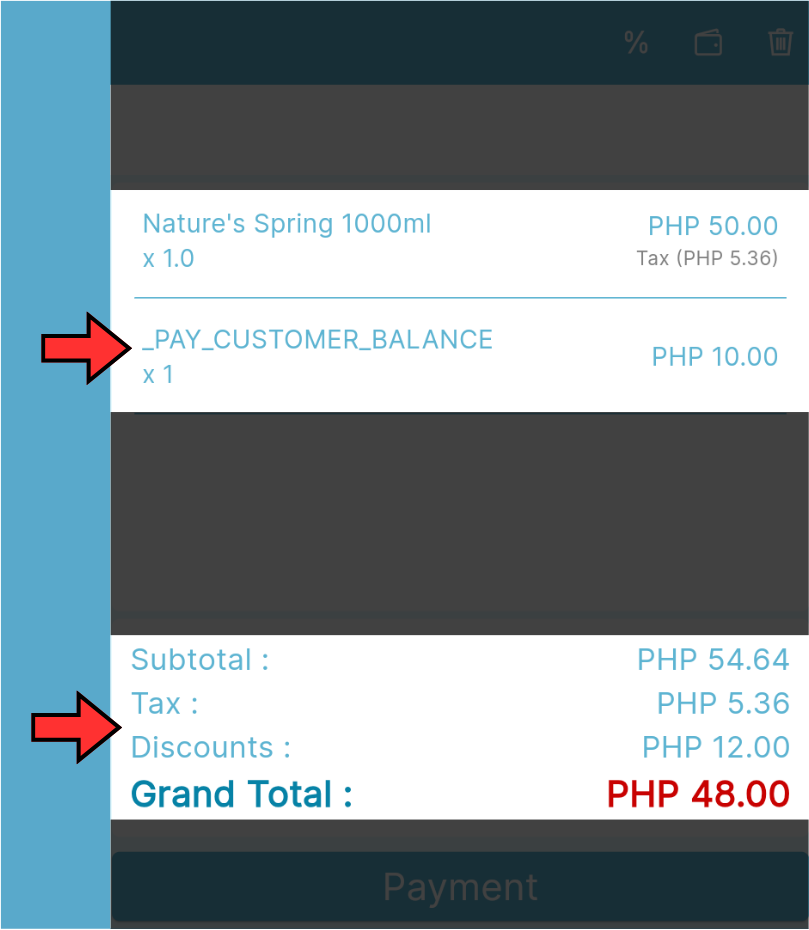
After entering the customer's balance, it will be added to the total amount due for the customer to pay.
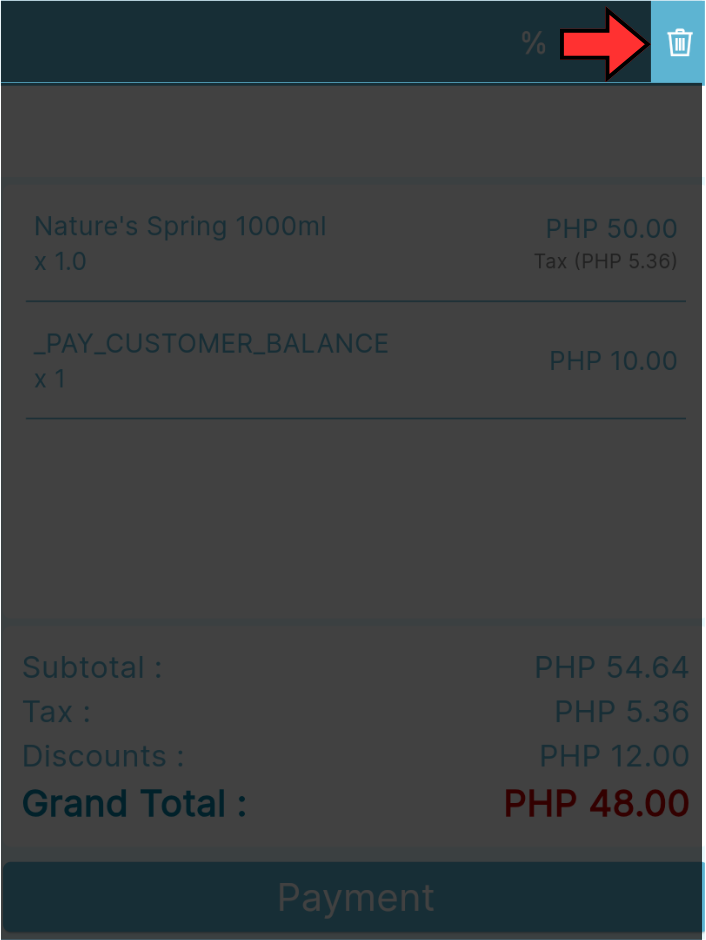
Clear Items
This button enables you to remove the current transaction and start afresh.
Simply click the Trash icon located at the right side of the screen
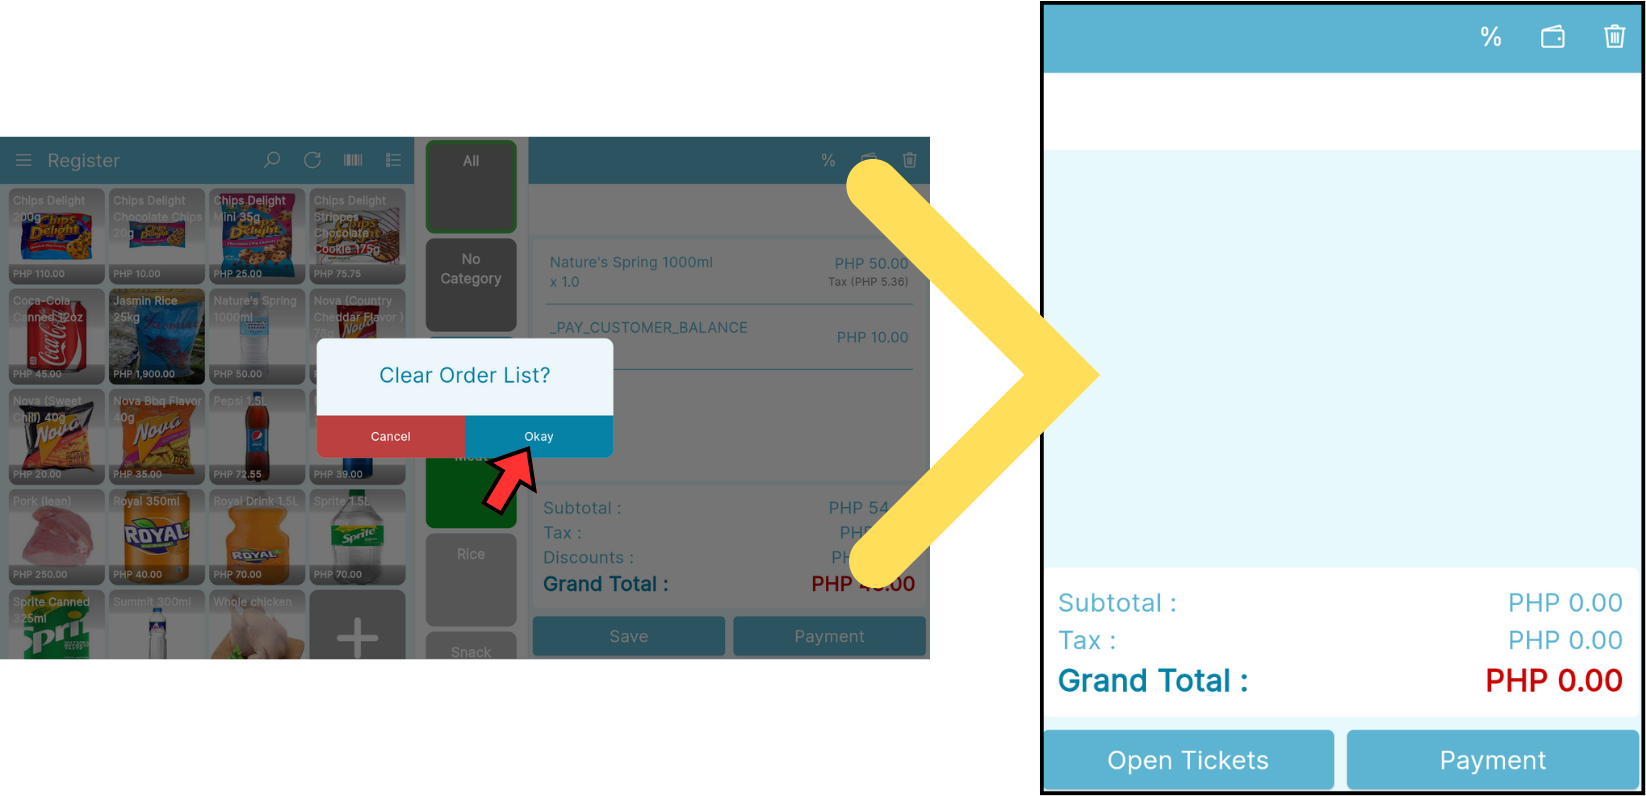
After clicking the icon a prompt will appear confirming whether you want to clear the transaction or not, click Okay to proceed or click Cancel if not
Tickets and Predefined Tickets
This feature allows you to save your current receipt for later use and more. You can activate this feature by following this instructions.
Note: To know more about this feature , simply follow this link.
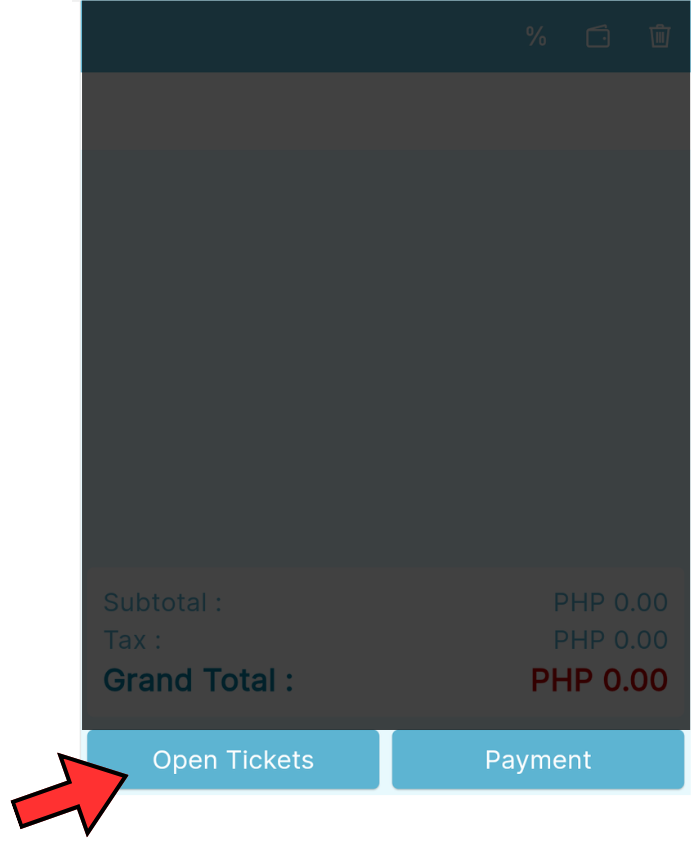
Simply click the Open Tickets button if you don't have any transactions ongoing
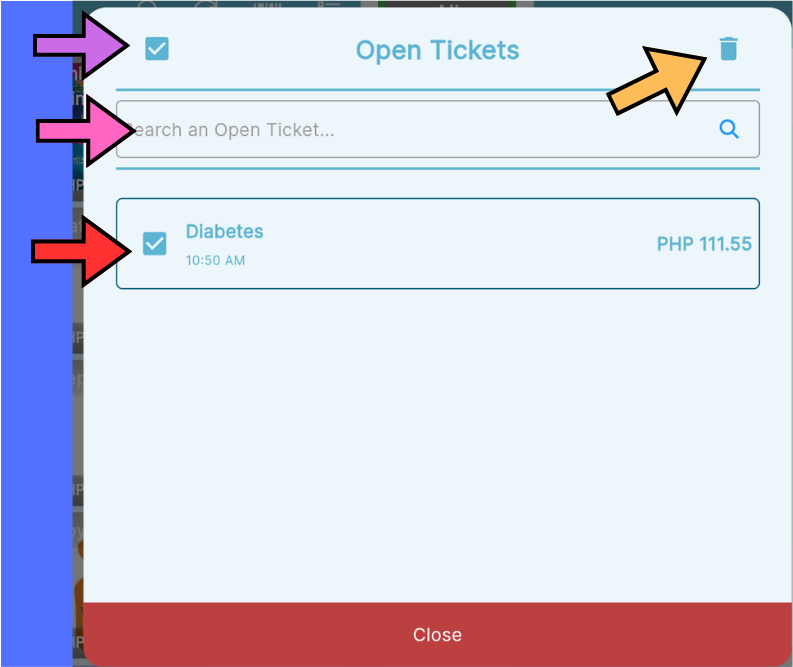
After clicking the Open Tickets button You are then presented with this screen.
By Clicking the checkbox (pointed by the purple Arrow) the tickets will all be selected , you an option to delete(pointed by the yellow arrow) all the available open tickets will be presented.
You can also search for the Open Ticket , simply click the blank space (pointed by the pink arrow )
To Select an open ticket simply click the name of the Open ticket (pointed by the red arrow)
Note: To know more about the open tickets , follow this link.
Click close to cancel the process.
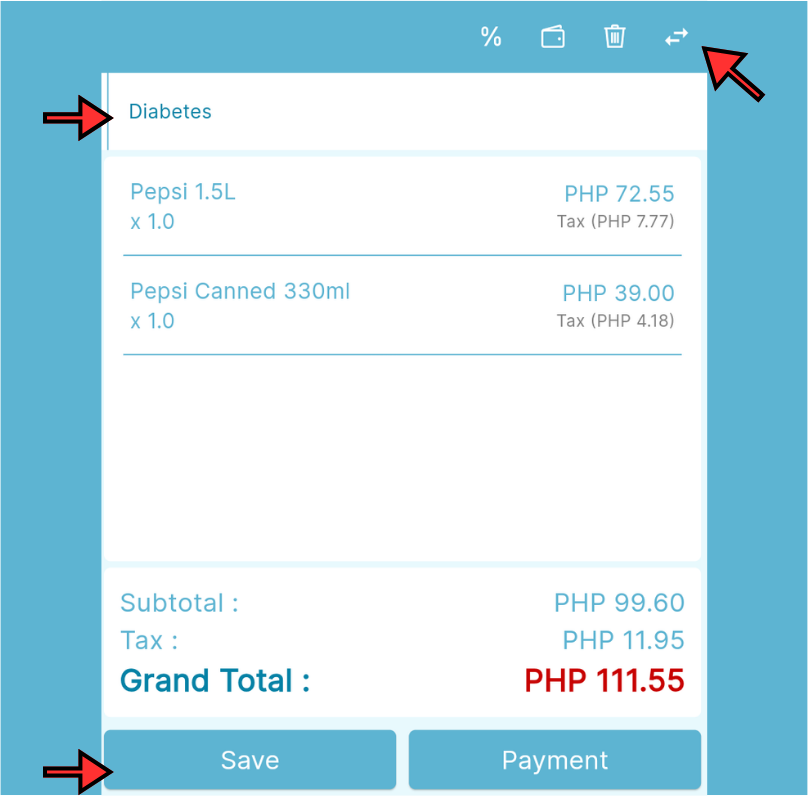
After selecting the desired open tickets, the pre-saved items will then show on the transaction so is the ticket's name.
By Clicking the arrow icon located on the right-side of the screen you can have the option to move your tickets to other existing tickets.
Click save to save the changes made in the ticket.
Note: To know more about the open tickets , follow this link.
Items
By clicking your items on the checkout interface, you can also edit the item's quantity and add discounts individually.
To add quantity, simply click the plus(+) button , click the Minus(-) button to reduce quantity
For adding discounts, simply follow this instructions.
Adding a note to the item/s is also possible, simply input your desired note.
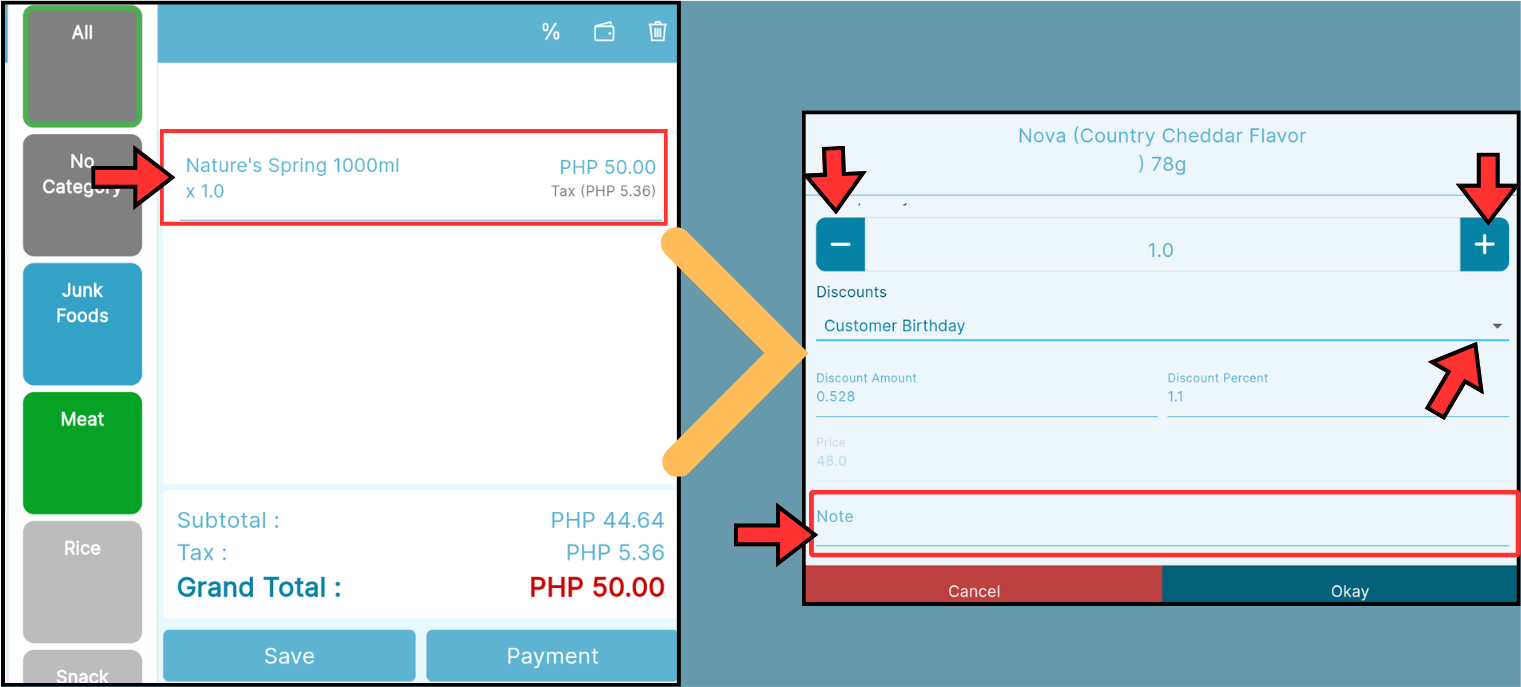
Click Okay to proceed and Cancel to cancel the process.
Transaction
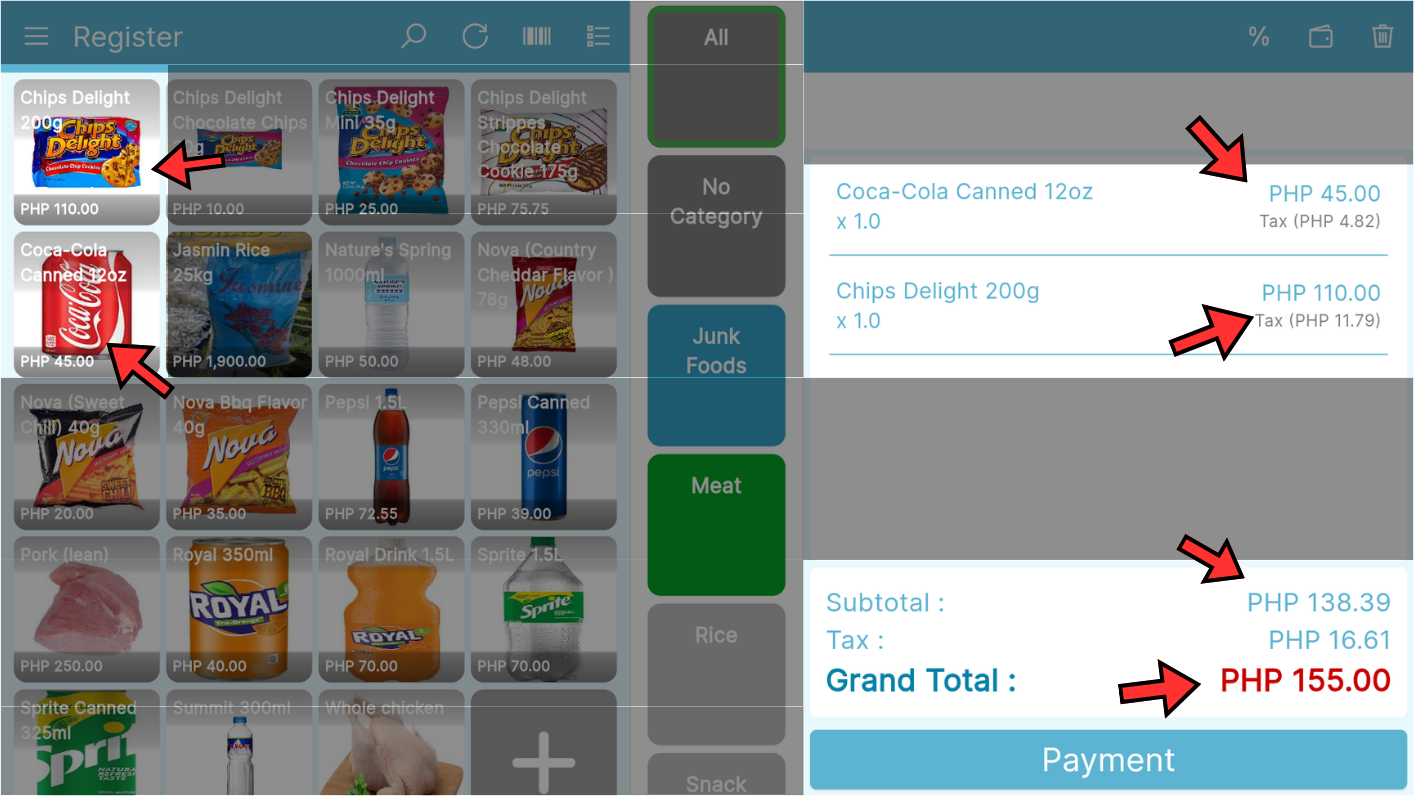
To initiate the transaction, just click the items that the customer wishes to purchase.
You also have the option to use a scanner (In-built camera/ Hardware) to add item on the transaction , simply follow this instruction.
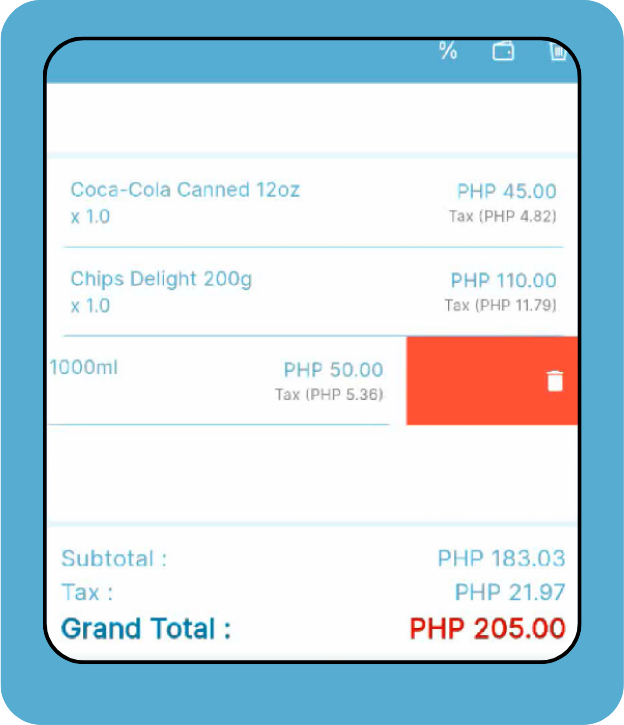
If customer wants to remove the item , you can simply delete the item by swiping left
After making sure that there are no more changes, let's proceed with the payment.
Click the payment button to proceed with the transaction.
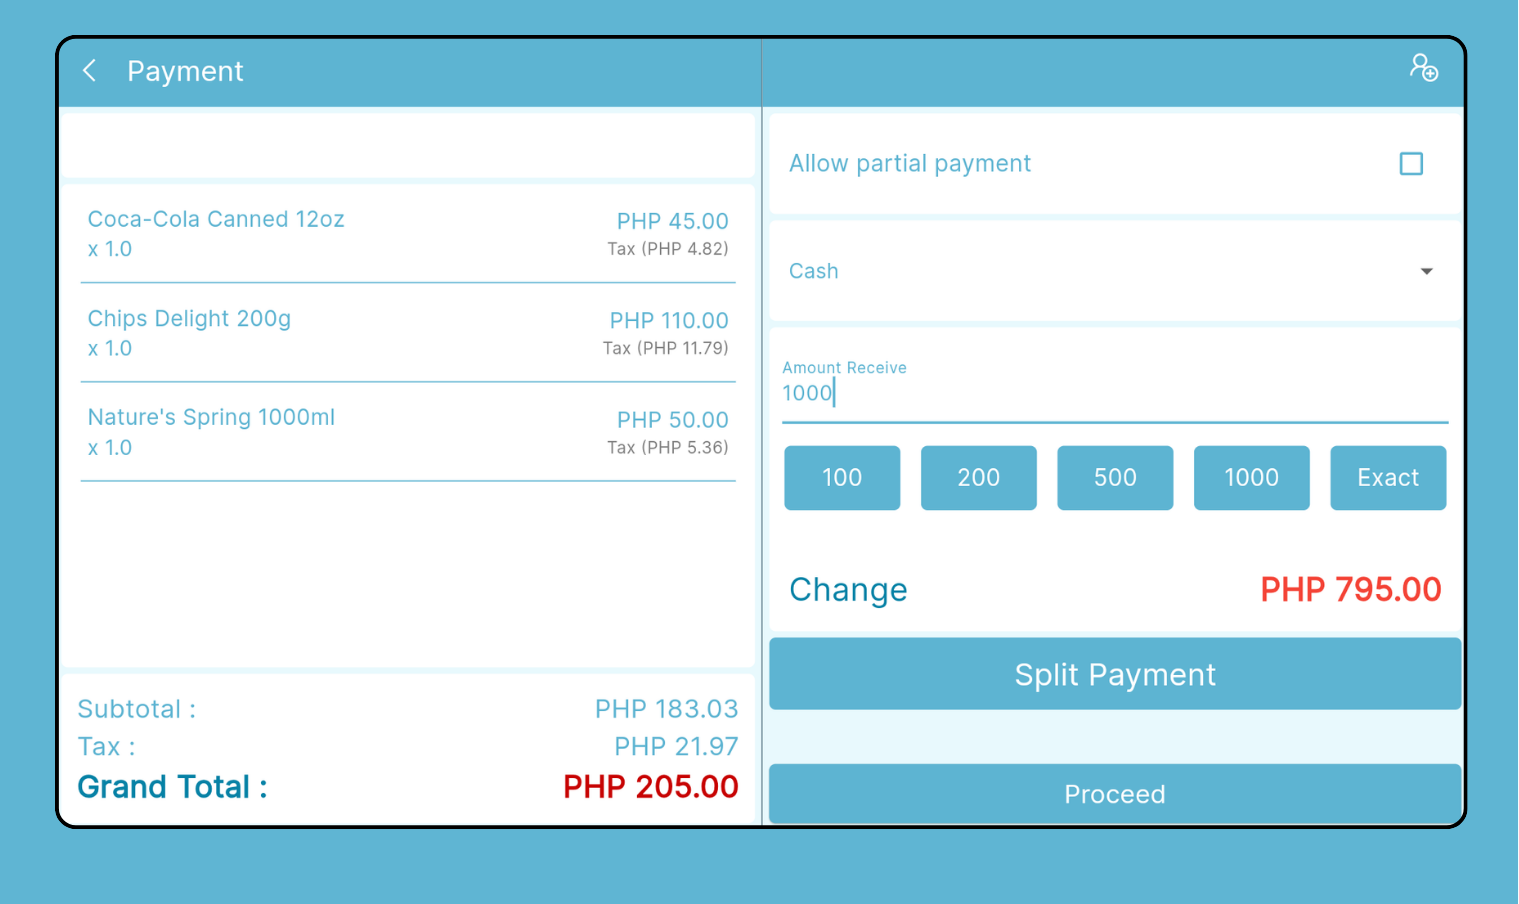
The Payment interface will then appear
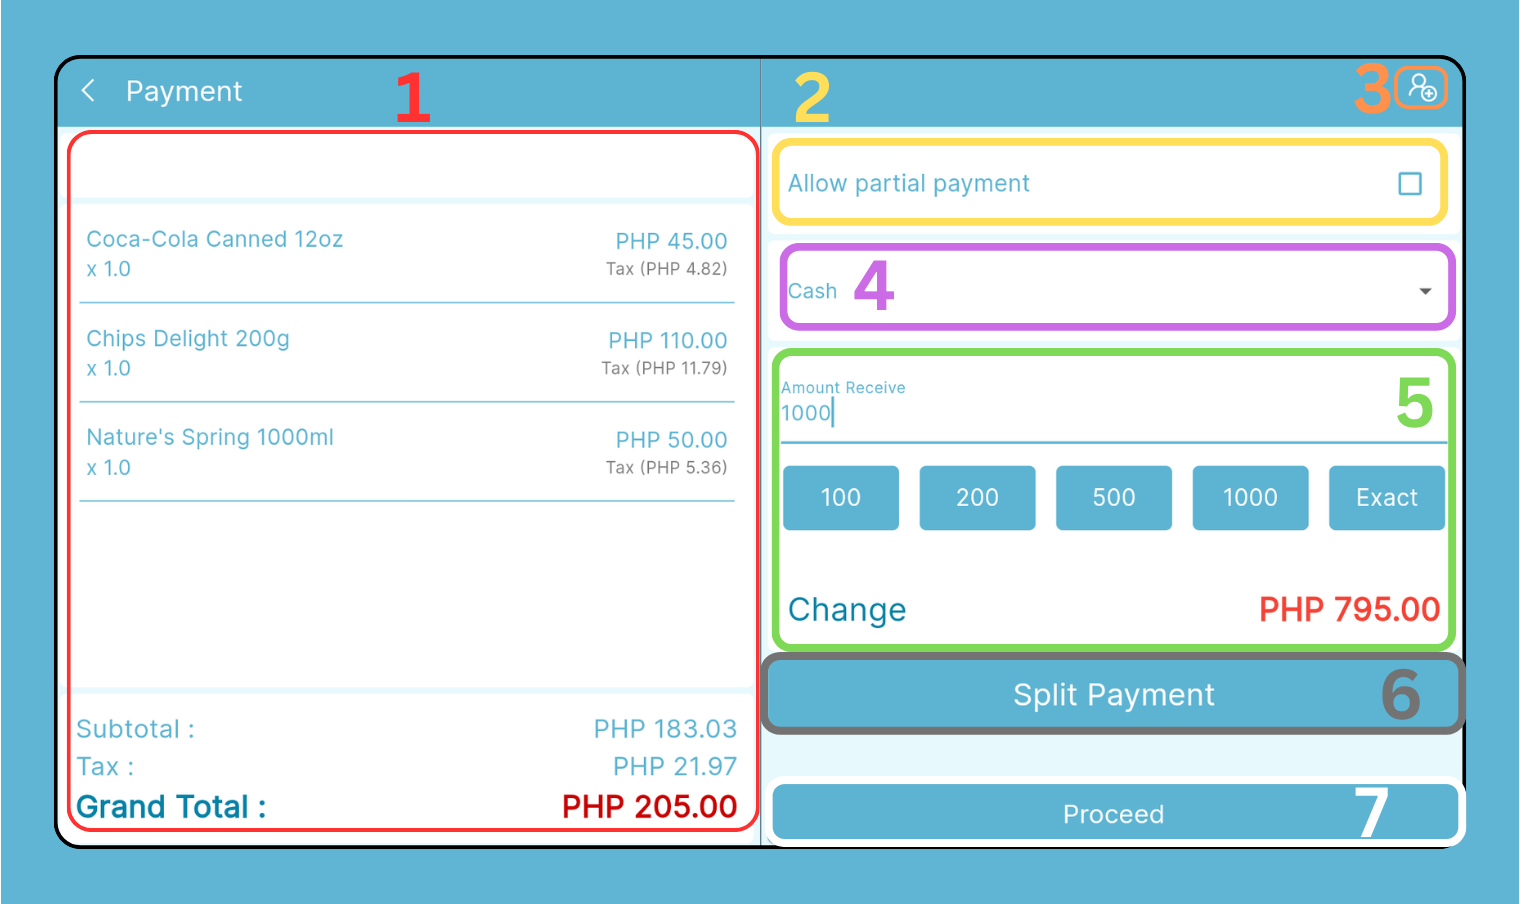
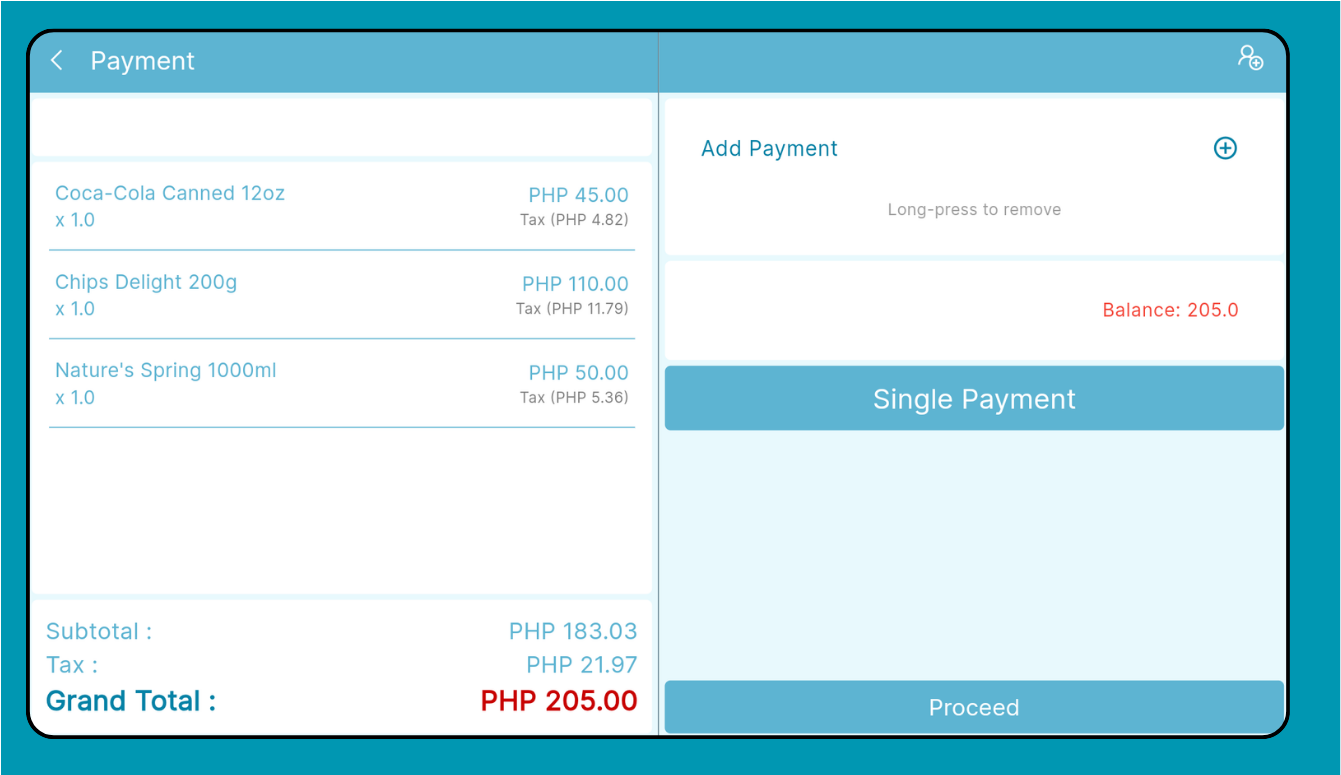
Payment Interface
This is how the payment interface looks like.
- Shows the Customer's transaction (Checkout Interface)
- Partial Payment
- Adding Customer to ticket
- Payment Types
- Payment amount and Change
- Split Payment
- Proceed
Checkout Interface
The customer's total purchase is displayed including the tax. To edit the tax simply follow this instruction.
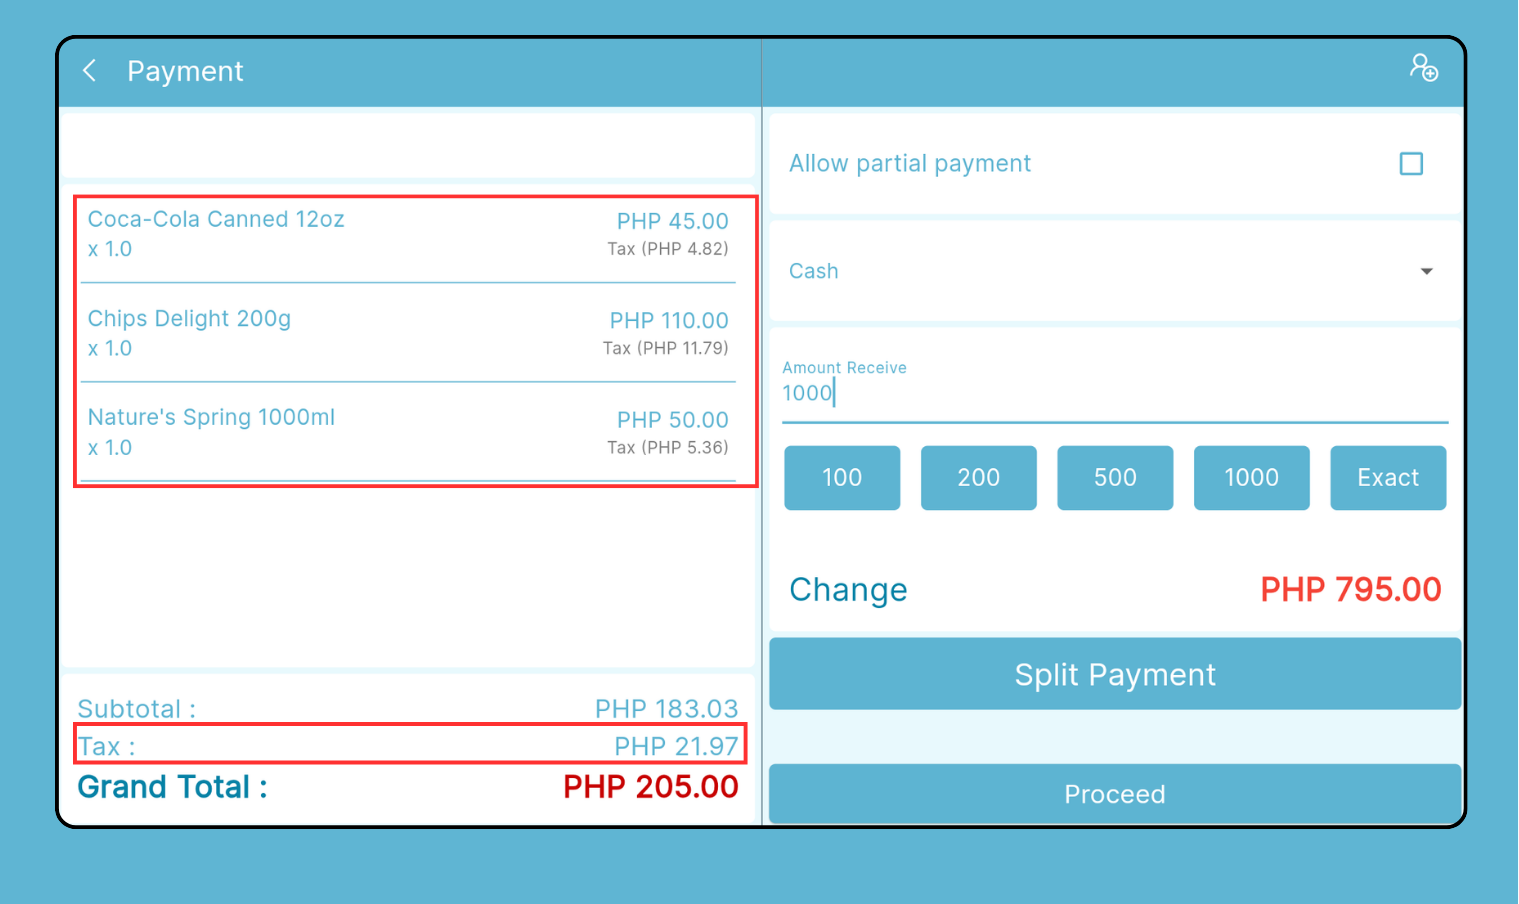
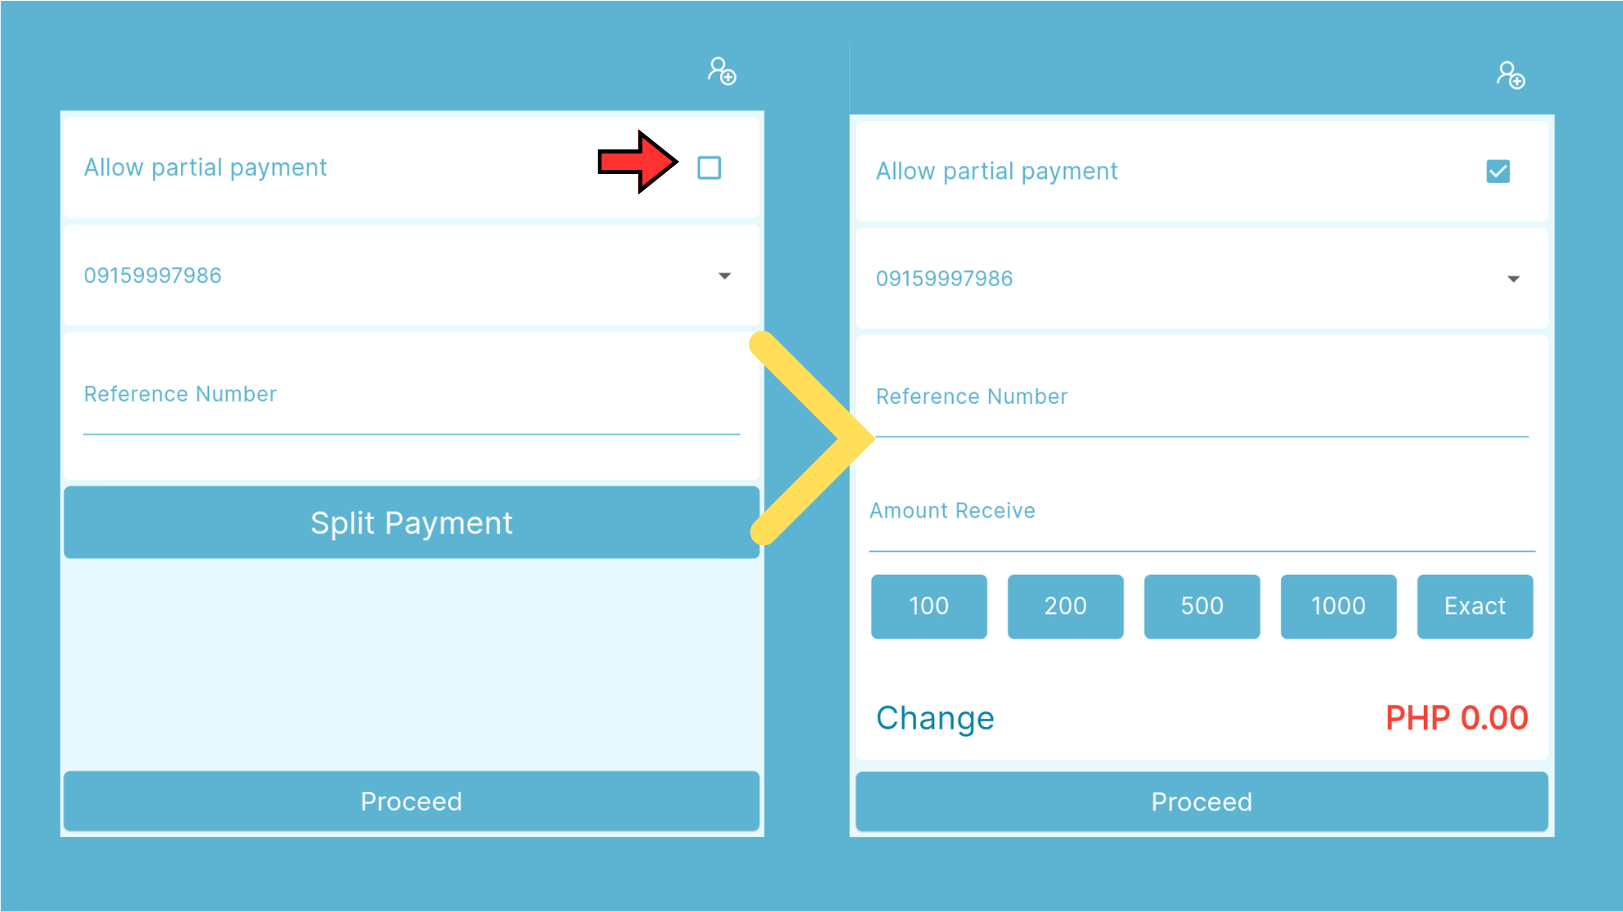
Partial Payment
By clicking the checkbox , the customer is then allowed to make a partial payment ,
Note: to know more about the partial payment, follow this link.
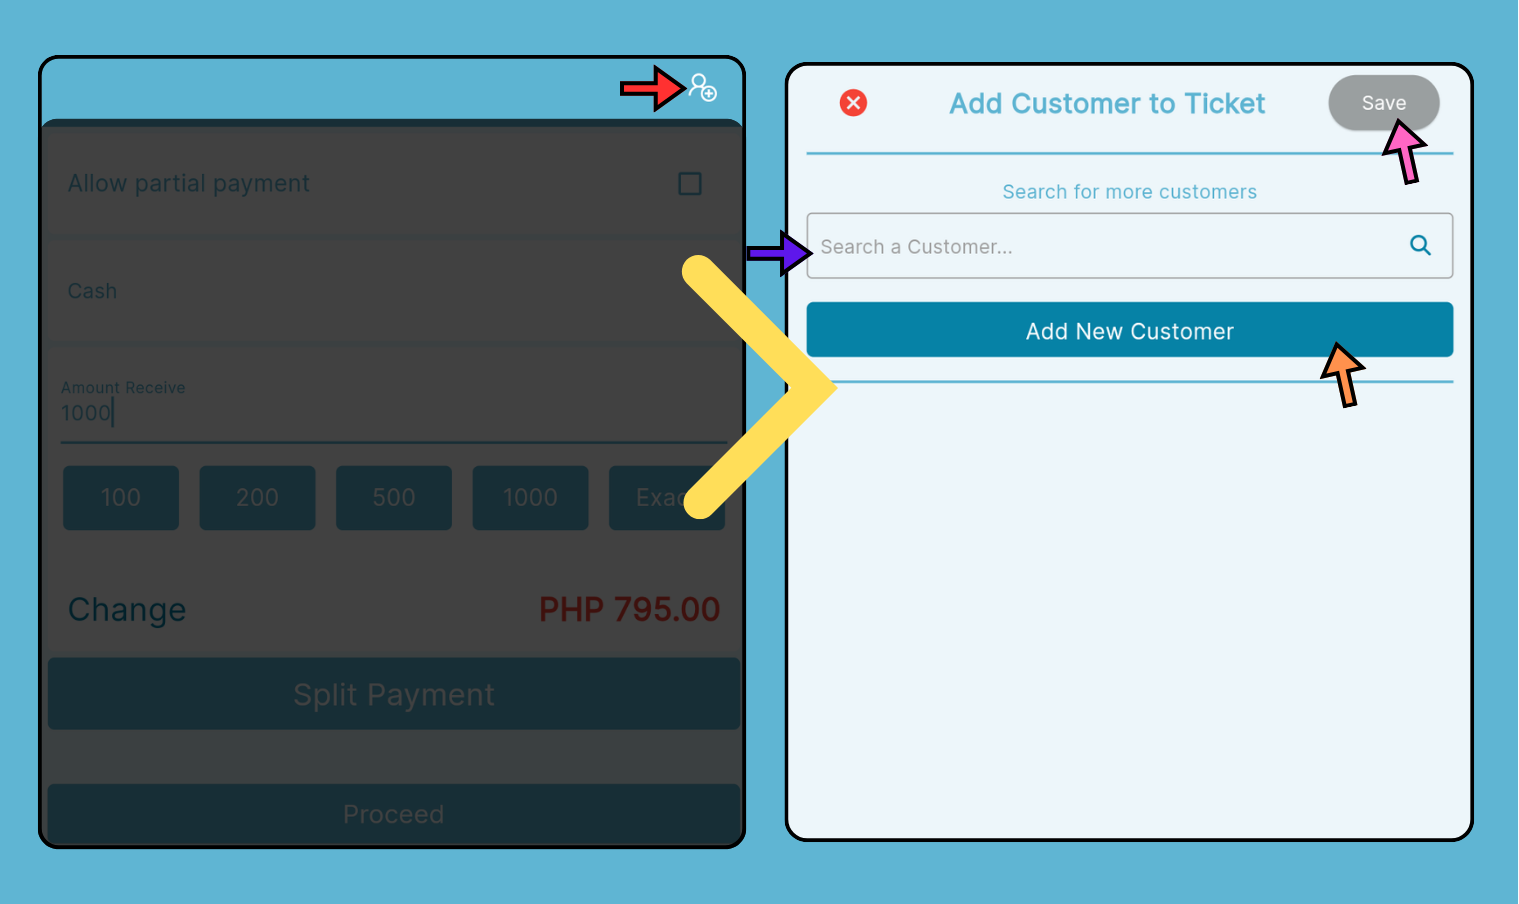
Adding Customer to ticket
This feature allows you to add this ticket to the customer's account.
After clicking the Icon indicated by the Arrow (Red), A pop up interface will appear , prompting you to choose the customer that you want to add the ticket to
By clicking the blank space indicated by the Purple Arrow allows you to search for customers using their name .
If there' no customer account available, simply click the button indicated by the Orange Arrow
Note: To know more about this feature , simply click this link
Click the save button indicated by the Pink arrow once done.
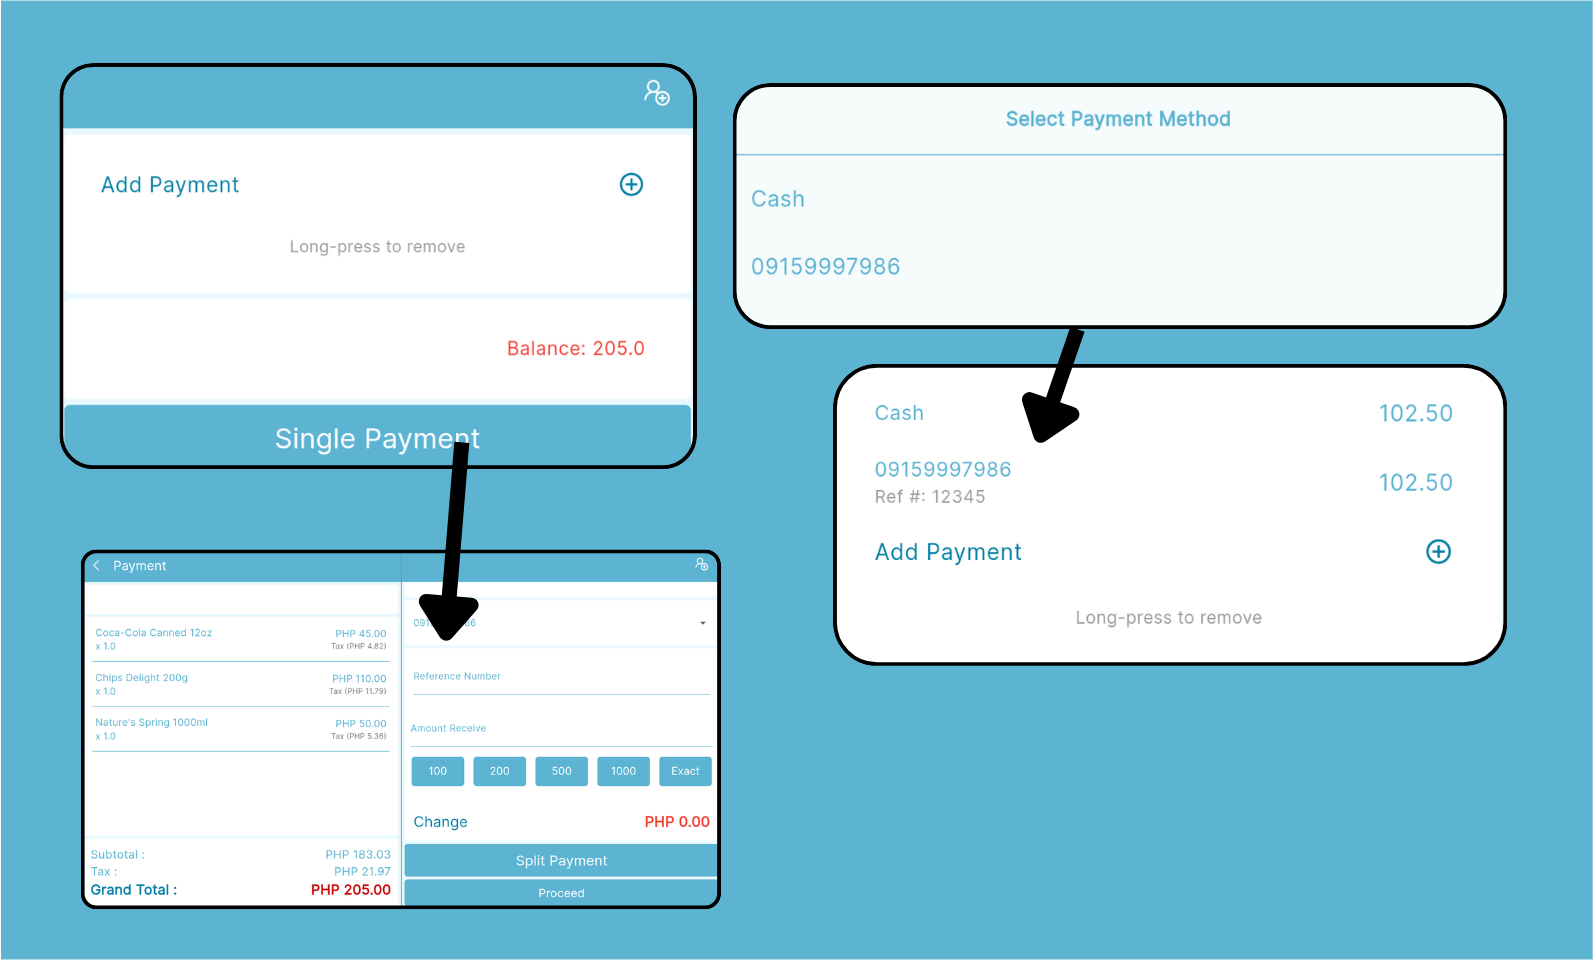
Payment Types
If your store accepts various payment methods, you can easily add multiple payment types to KaHero POS.
Simply click the drop-down button and Choose accordingly
In this example , we selected the Mobile Wallet payment method

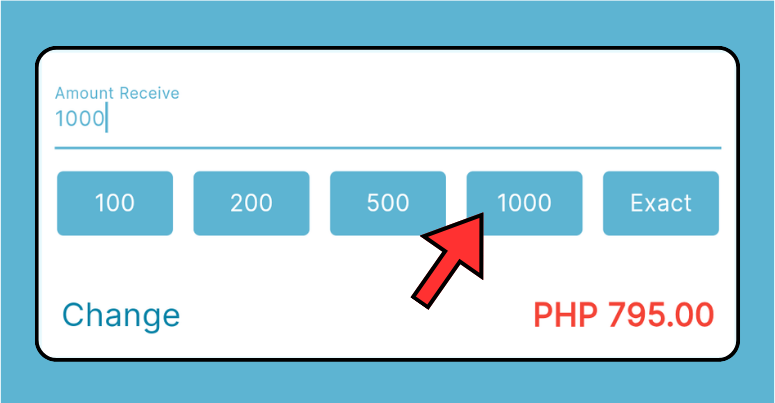
Amount Received
This section allows you to either input the amount you received through the payment method , or to select the amount according to the choices presented.
The change will be automatically calculated based on the customer's total purchase amount.
Split Payment
Allows customer to split the payment by using different payment methods.
Note: To know more about the Split payment, simply follow this link.
After clicking the split payment button this interface will then show.
Clicking the plus icon (+) allows you to select Two (2) Payment Methods
After clicking the payment methods the bill will then automatically be divided by two (2)
In this example we used Cash and Mobile wallet as to split the payment.
Note: To delete payment methods , long press the choice of payment methods
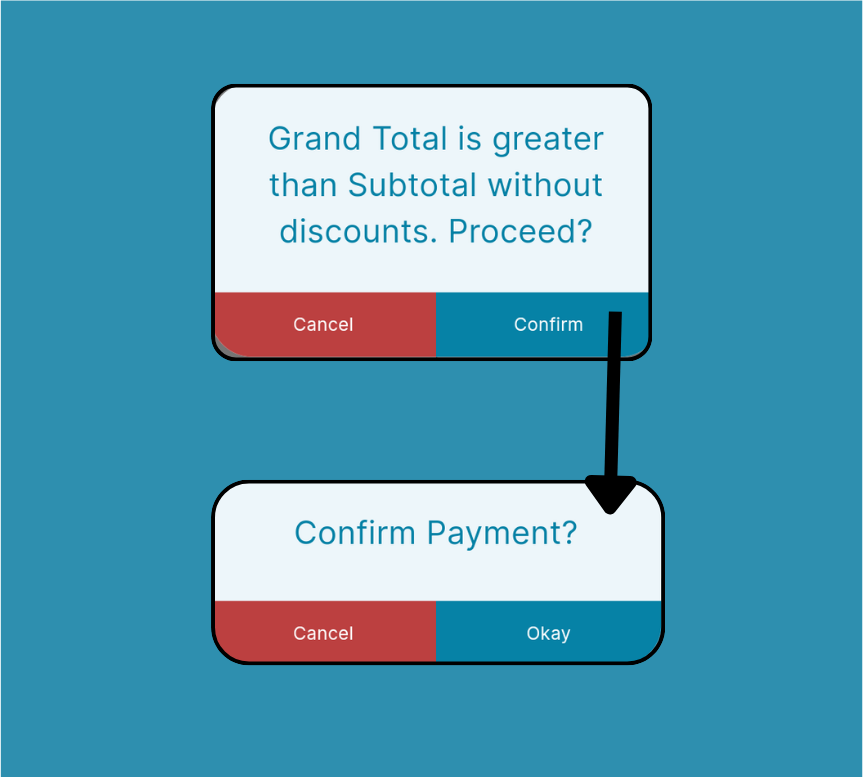
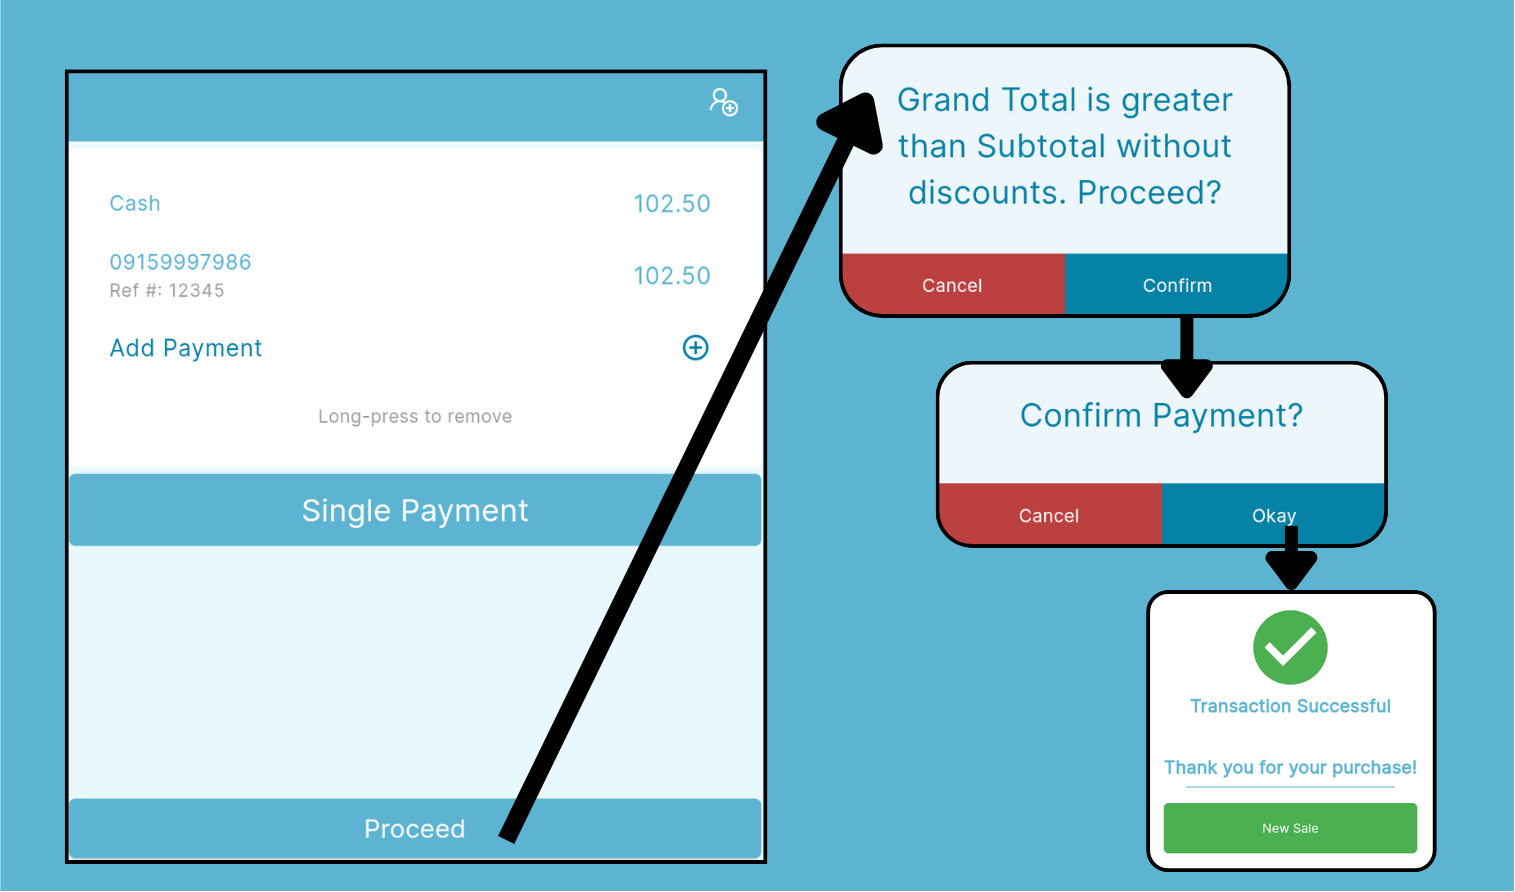
Click Proceed to continue the transaction, a confirmation prompt will pop-up , click confirm to proceed.
Transaction Cont.
After learning the features within the Payment interface , we can now continue our transaction.
Input the amount received and ensure that the payment method used matches the received amount.
In this example , we received a Php500 as a payment, hence no need for Split payment, the Payment method that the customer used is cash.
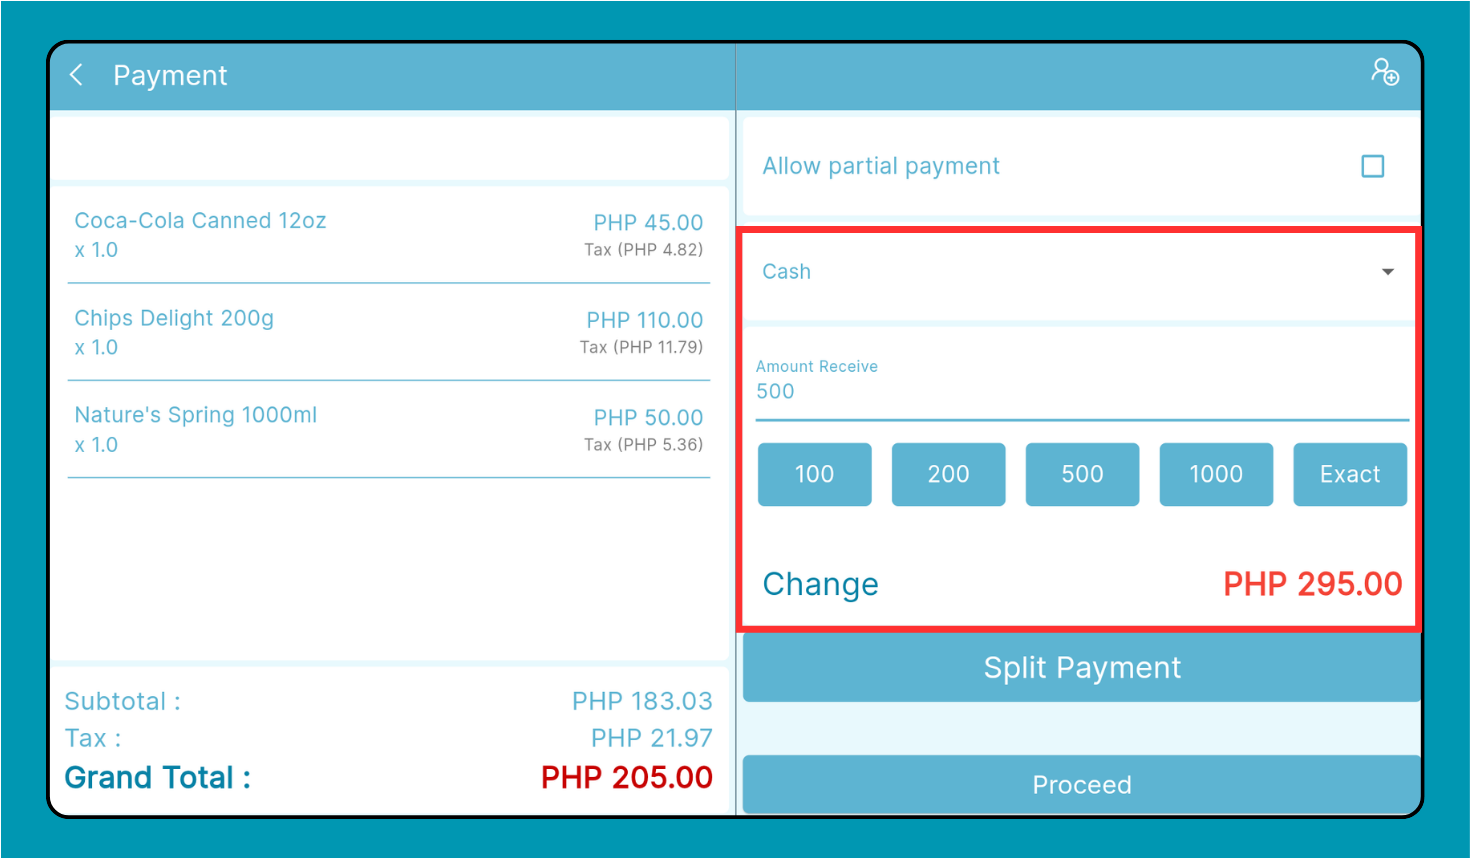
Click Proceed to finish the transactions
Make sure to confirm the prompts asking for confirmation if you wish to proceed