
Adding Items
Items plays a crucial role in businesses, serving as essential components for operations and sales. Adding items to your account is effortlessly and swiftly accomplished within the KaHero POS system.
To add an item to your listing:
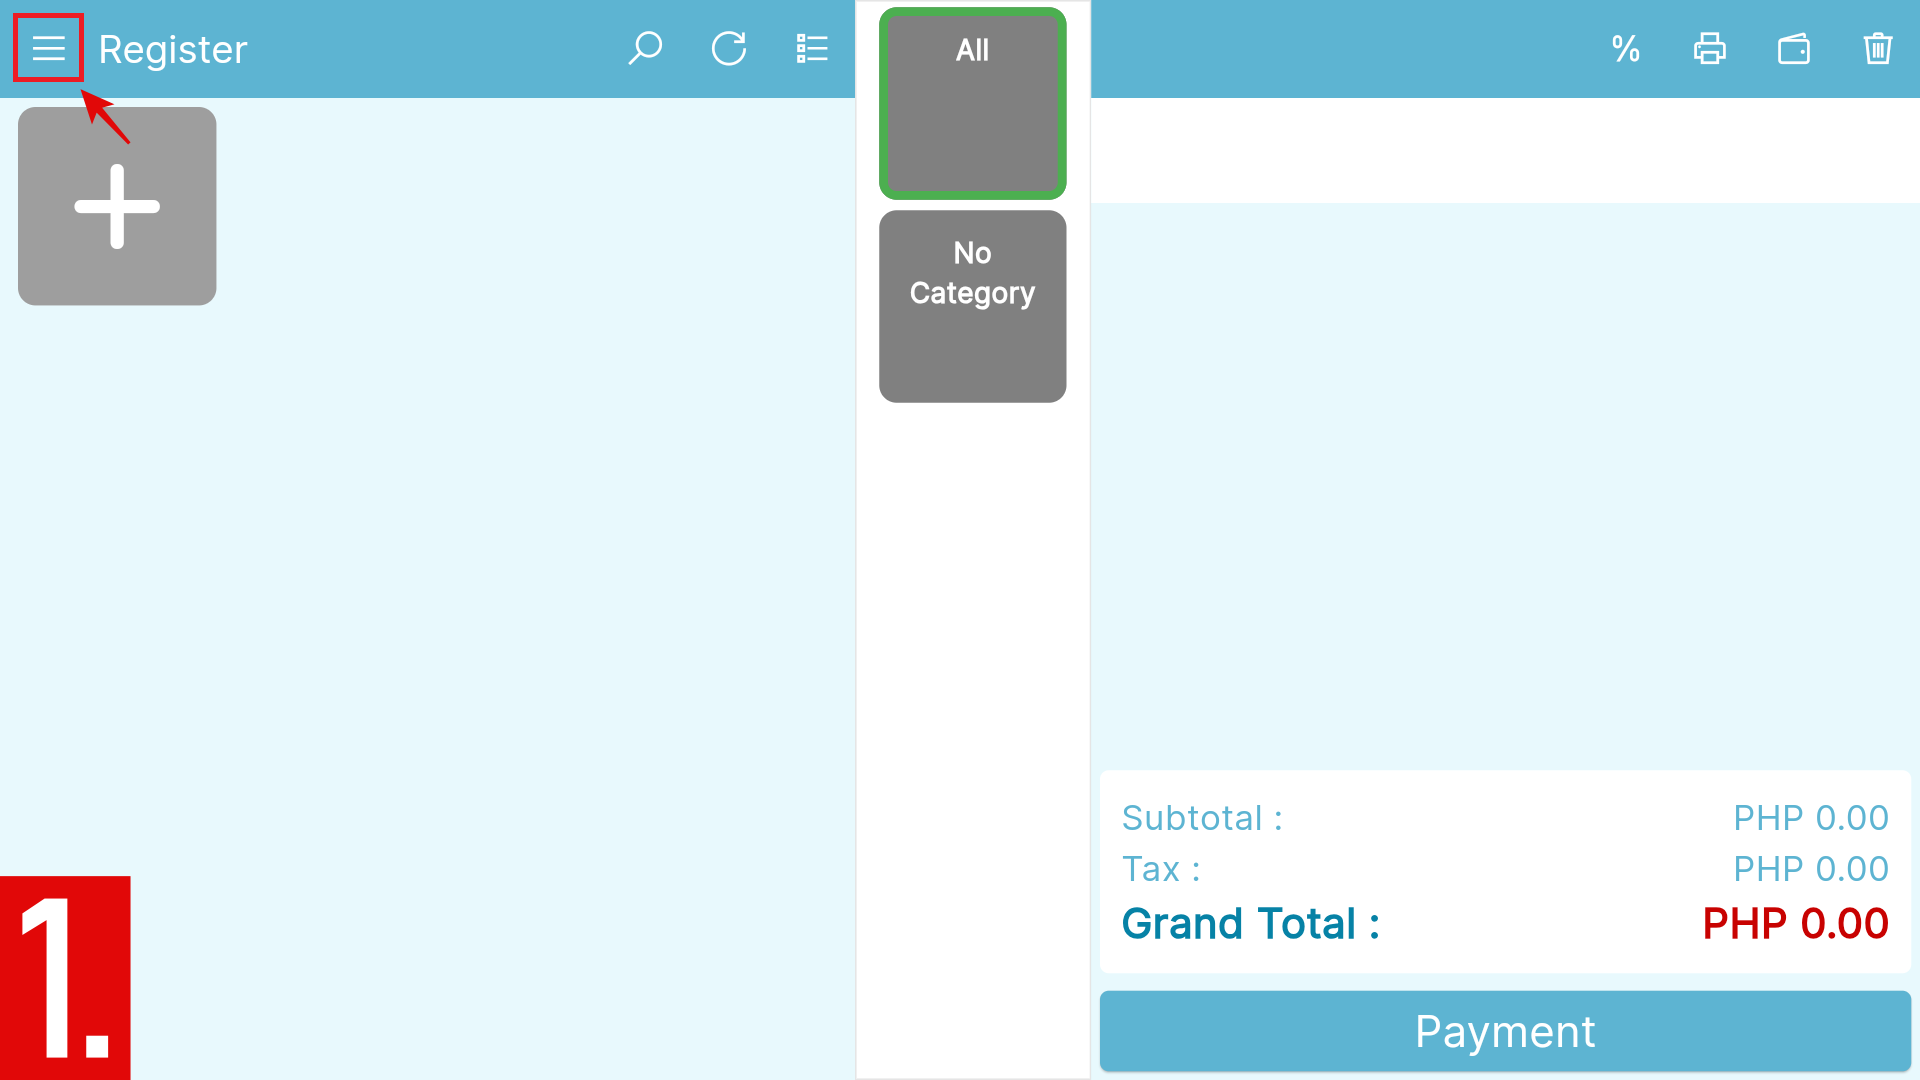
- Press the Navigation Menu icon.
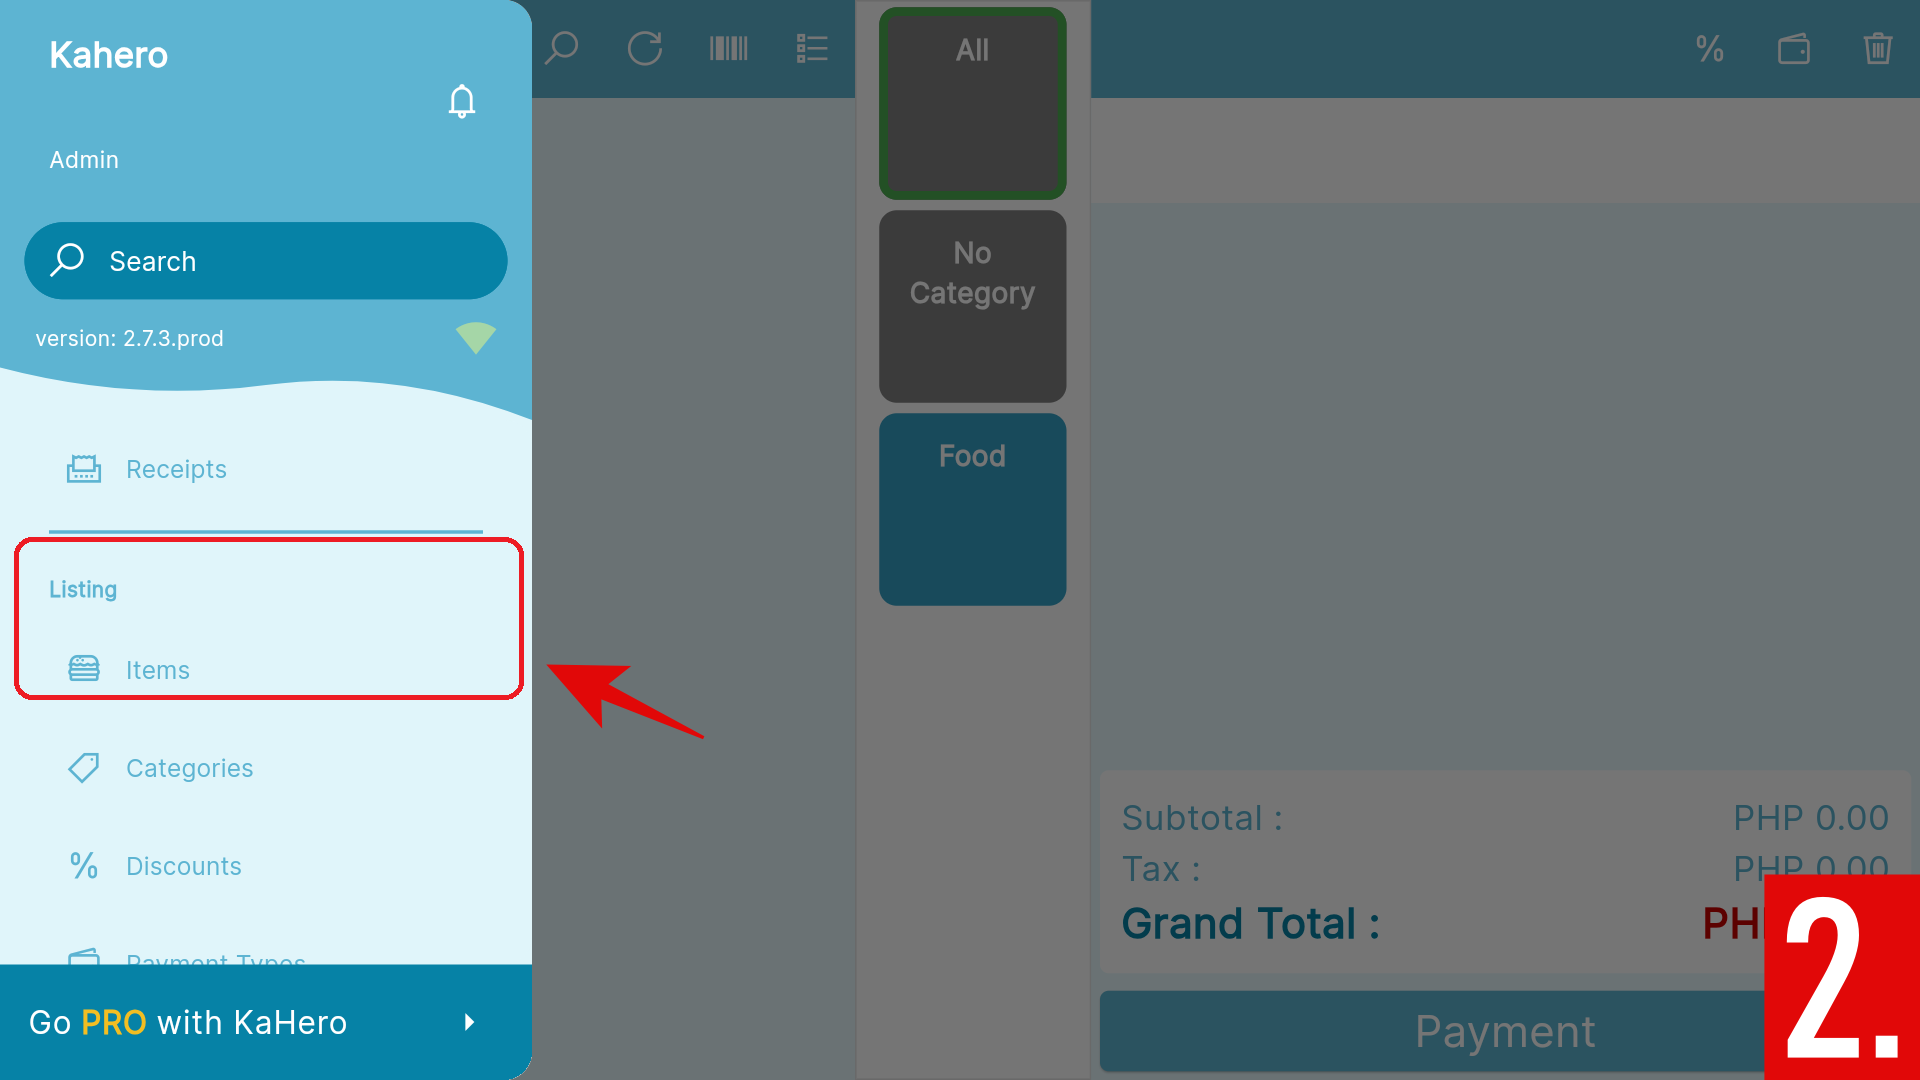
- Scroll all the way to Listing, and press Items.
- Click the plus (+) icon at the bottom right of your screen.
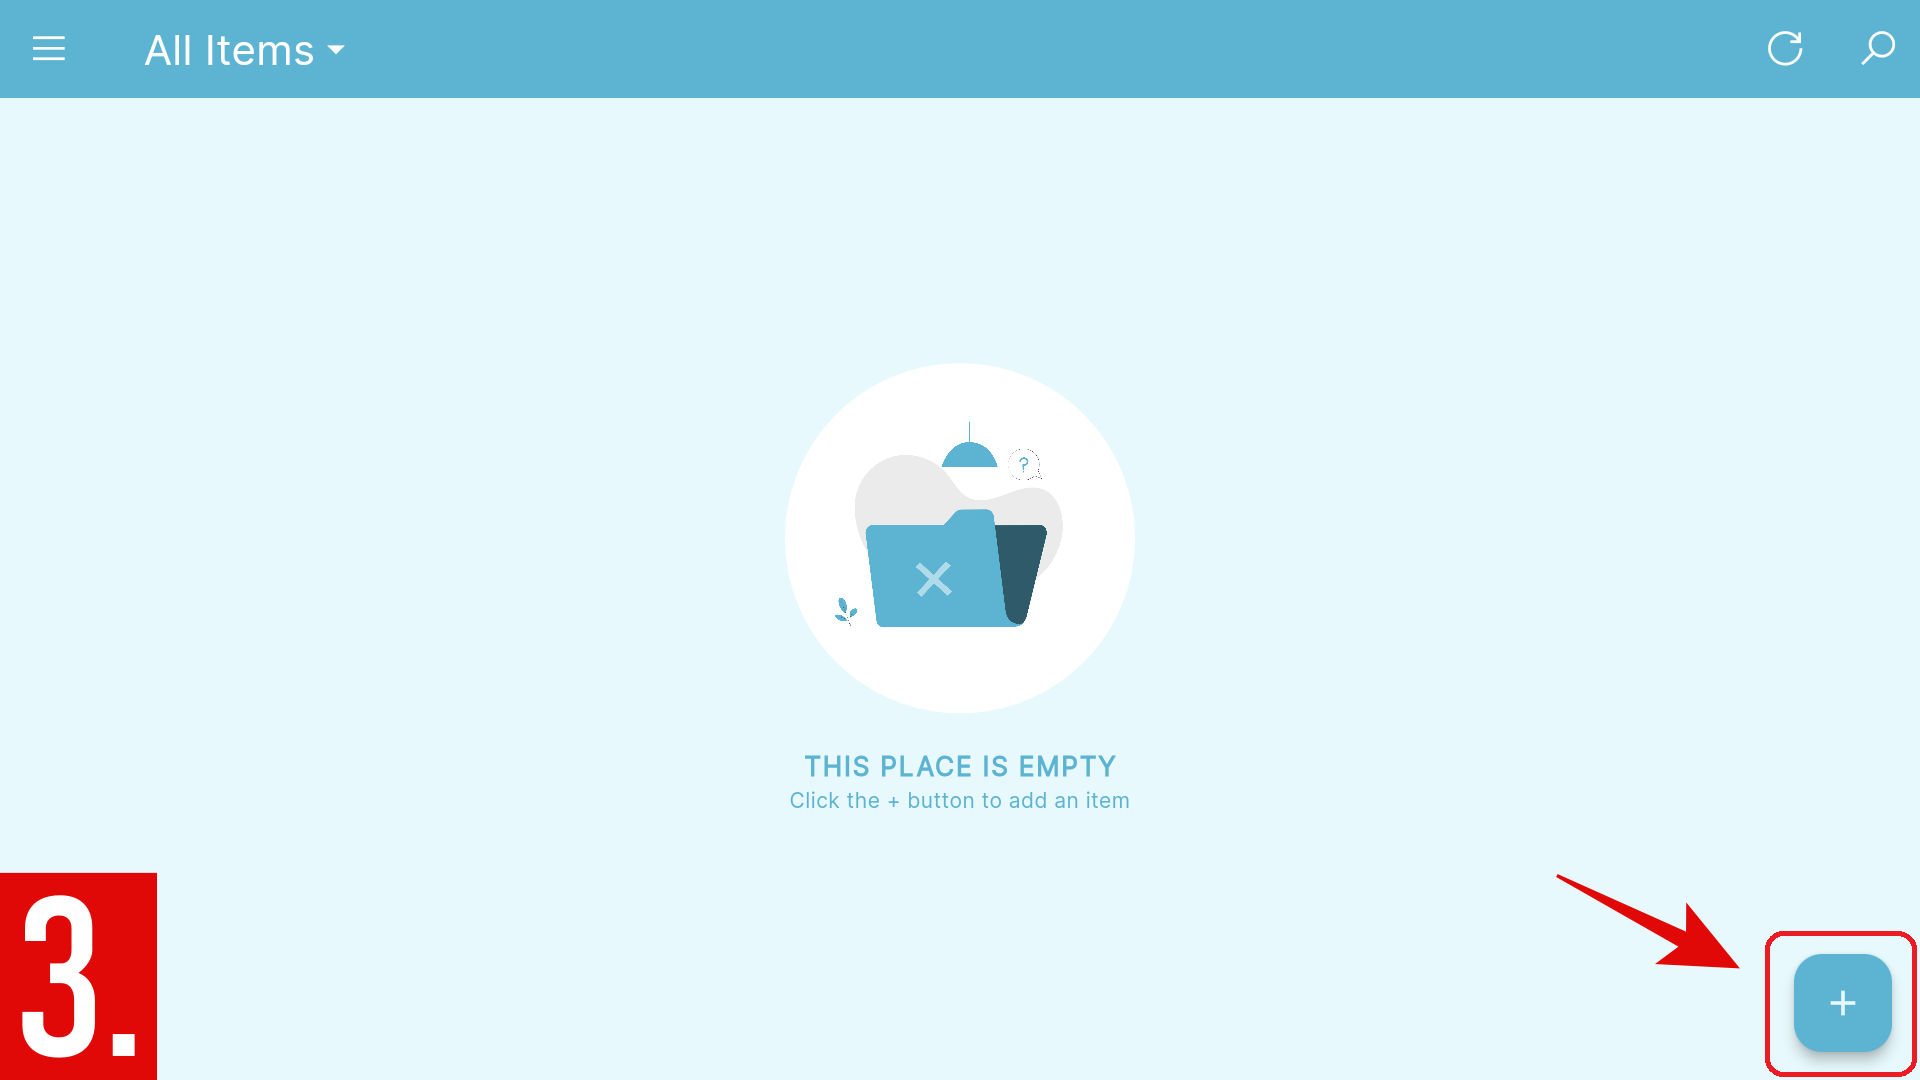
You will then be redirected at the Add Item screen.
To change the Item Name (Green) and Item Price (Red):
- Enter the following details on the blank space provided below.

To categorize your Item:
- Press the dropdown icon in No Category.
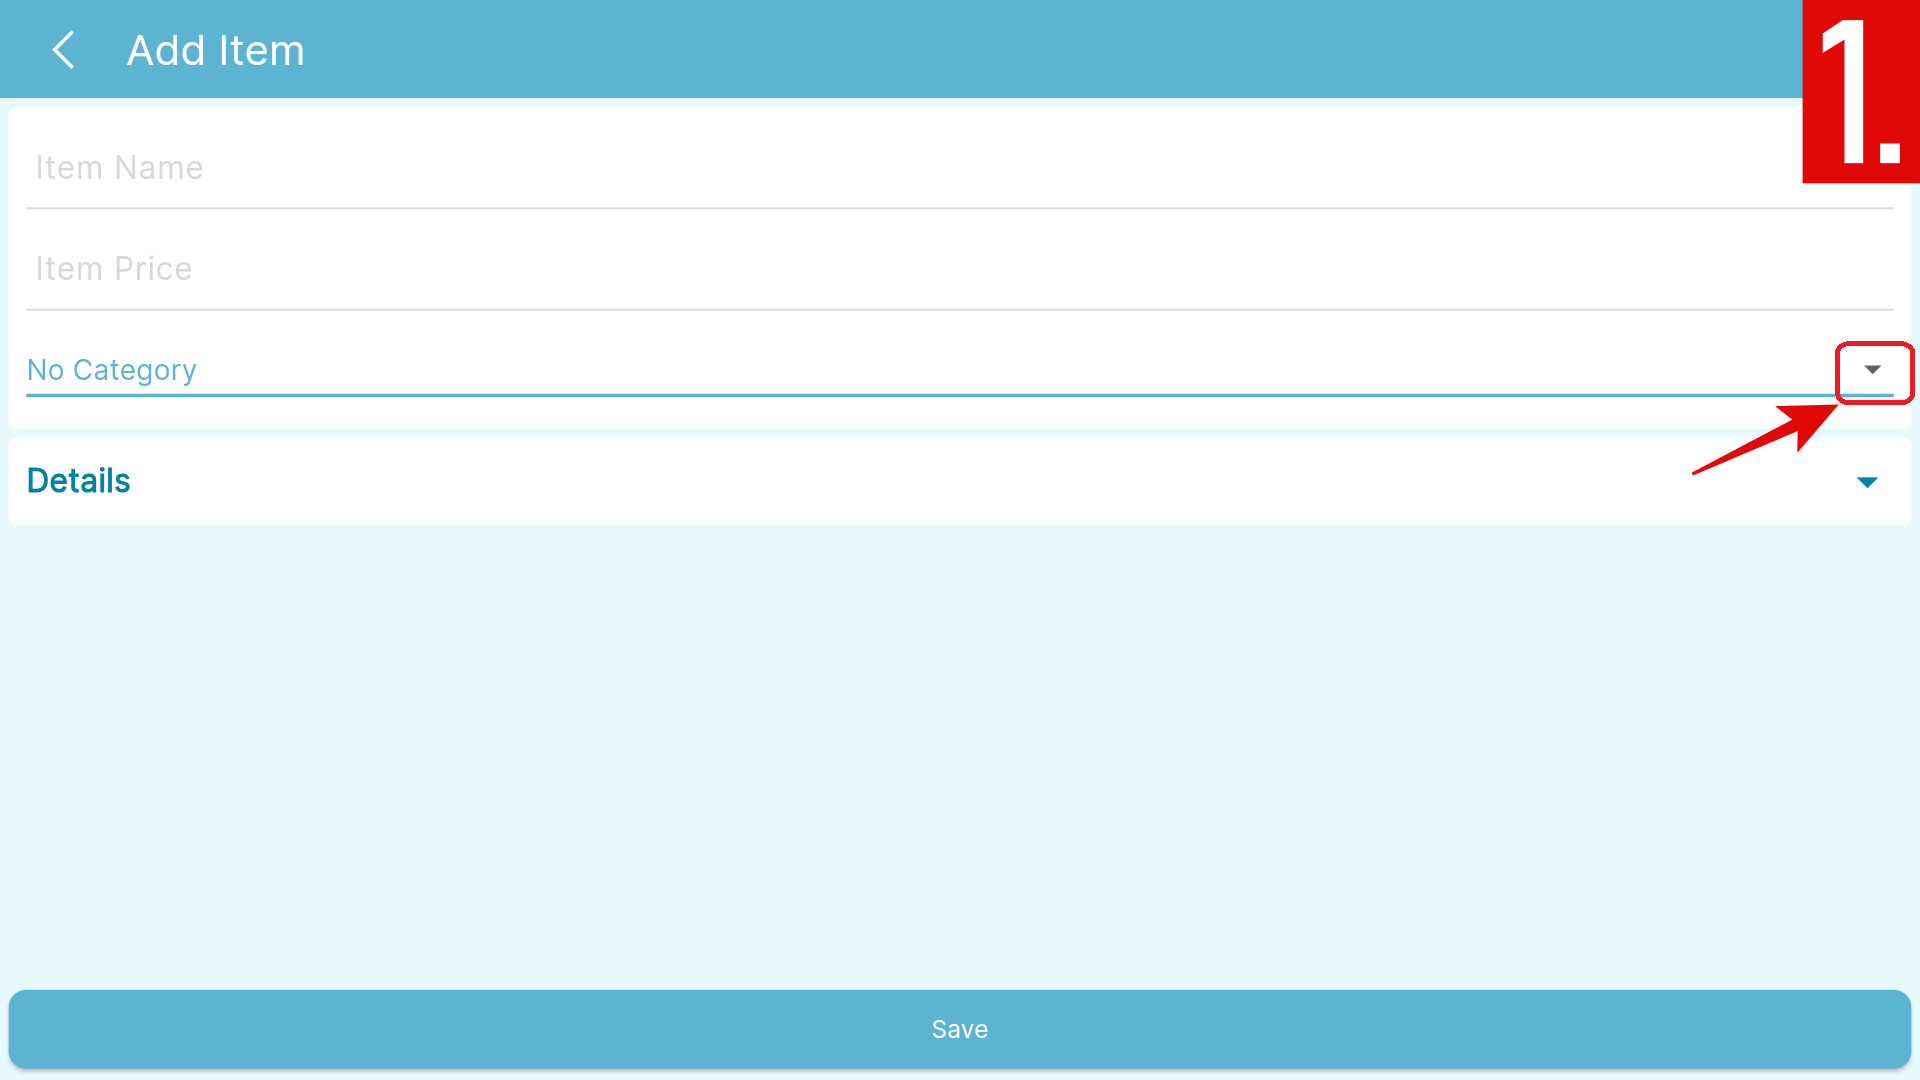
- Choices will then be presented, select accordingly.
- If none of the categories matches your items, simply press Create Category.
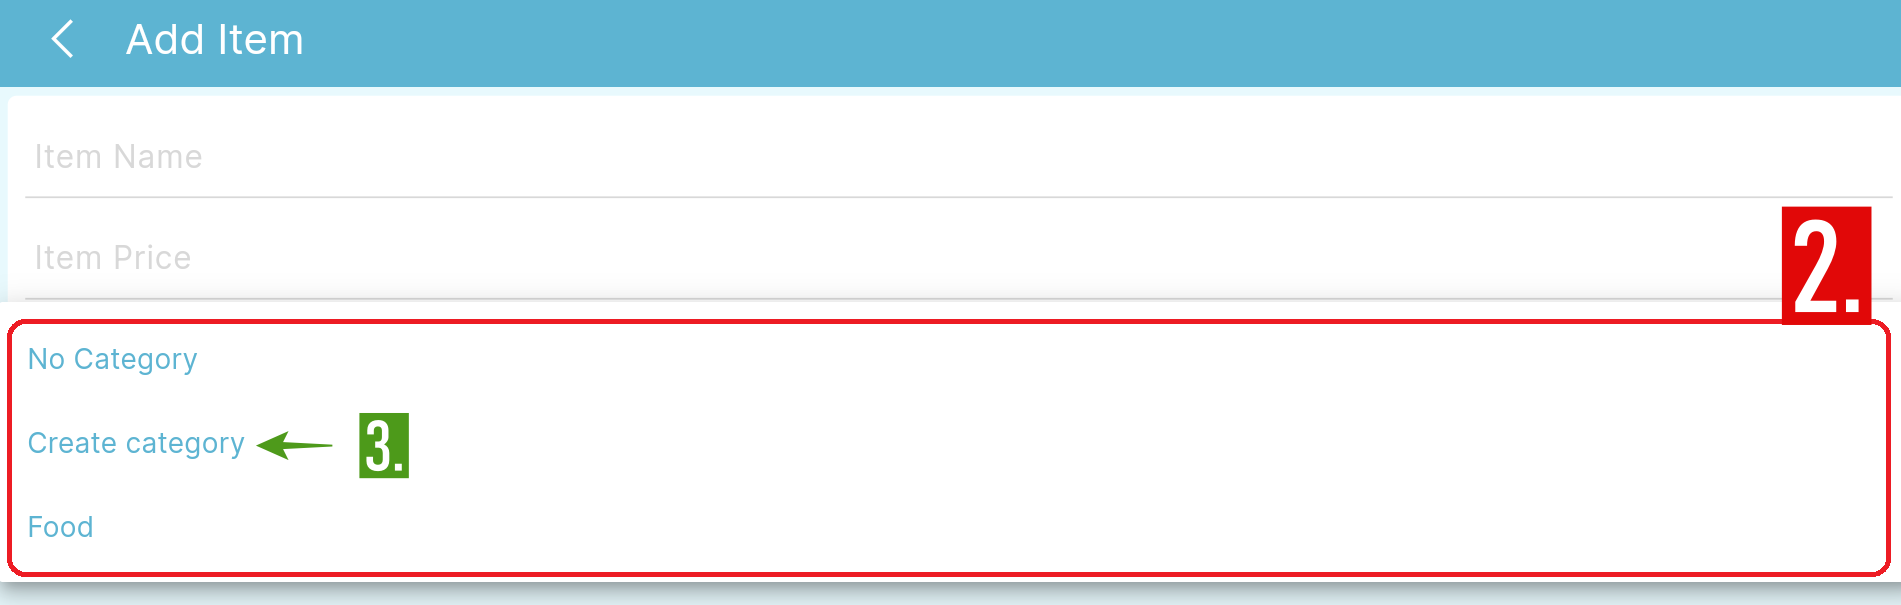
- You will then be redirected to the Add Category screen.
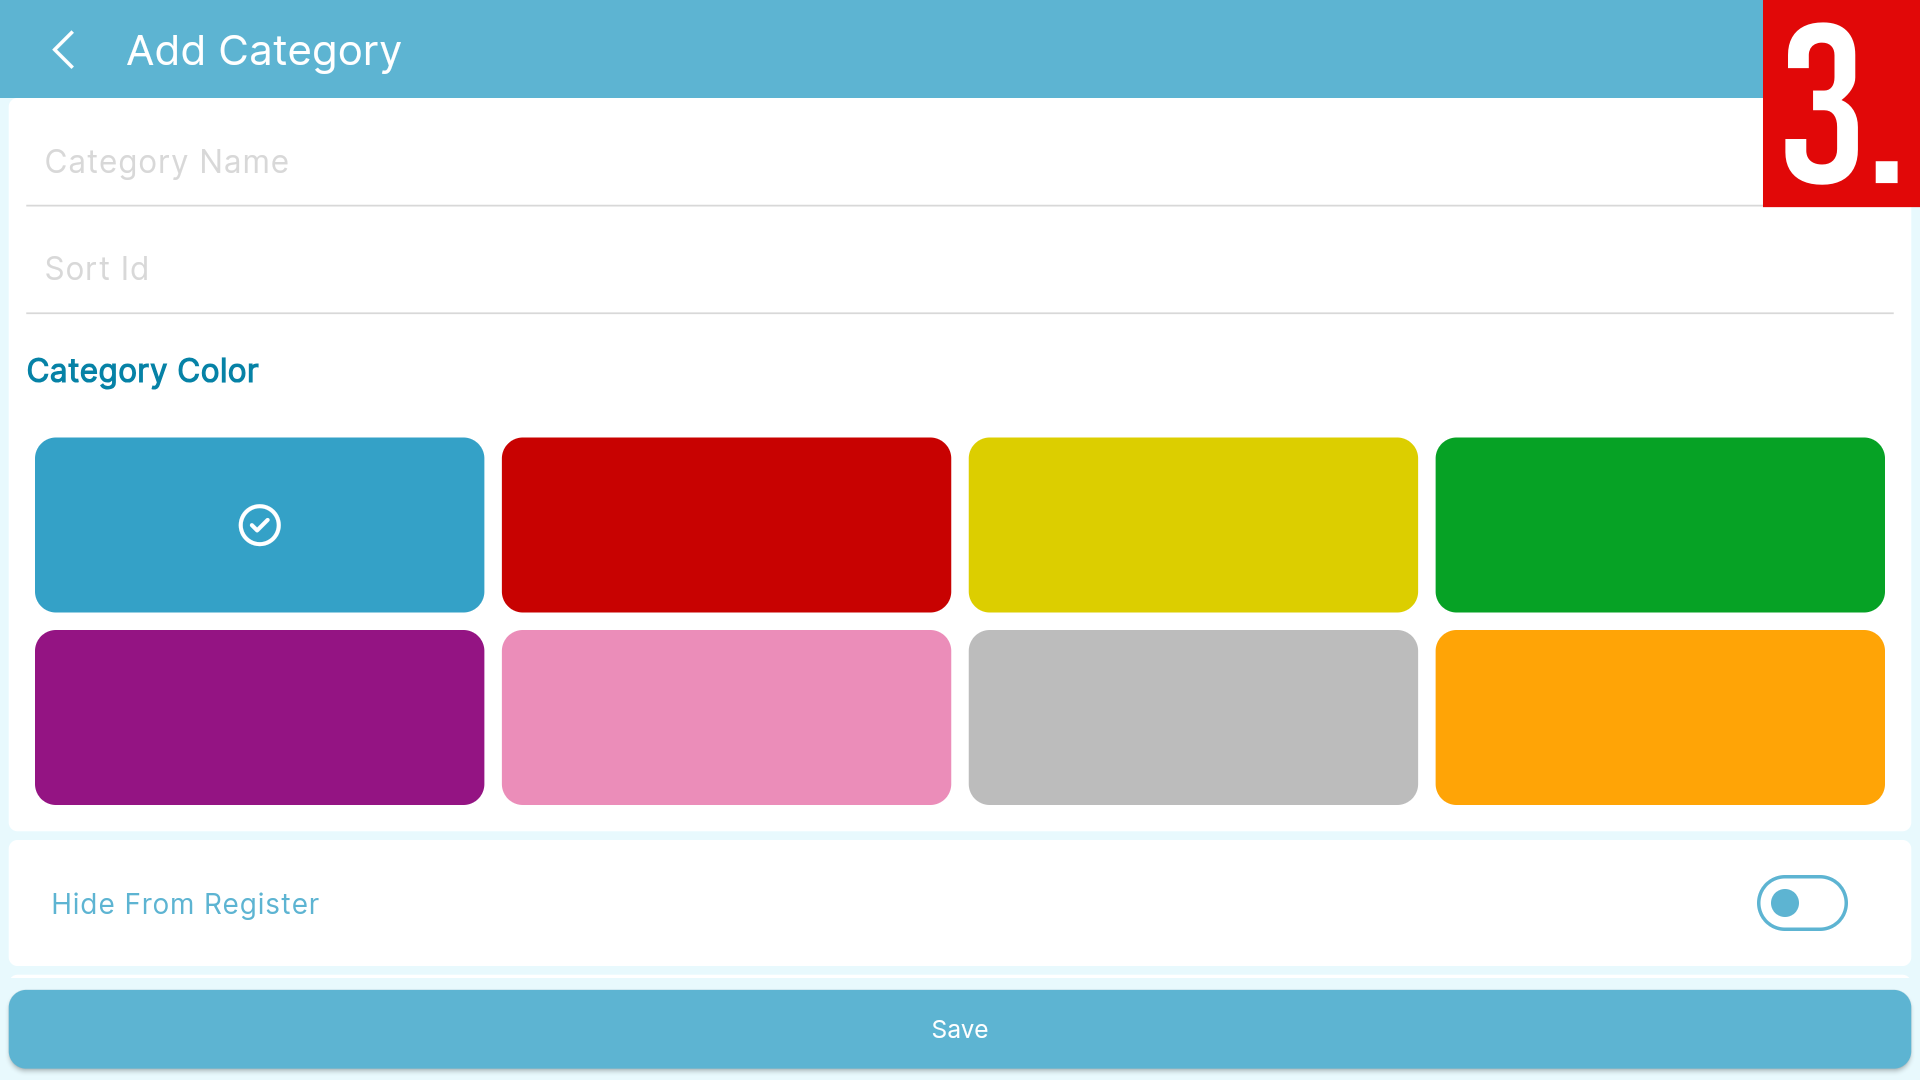
Add Category
In this section you can customize your own category.
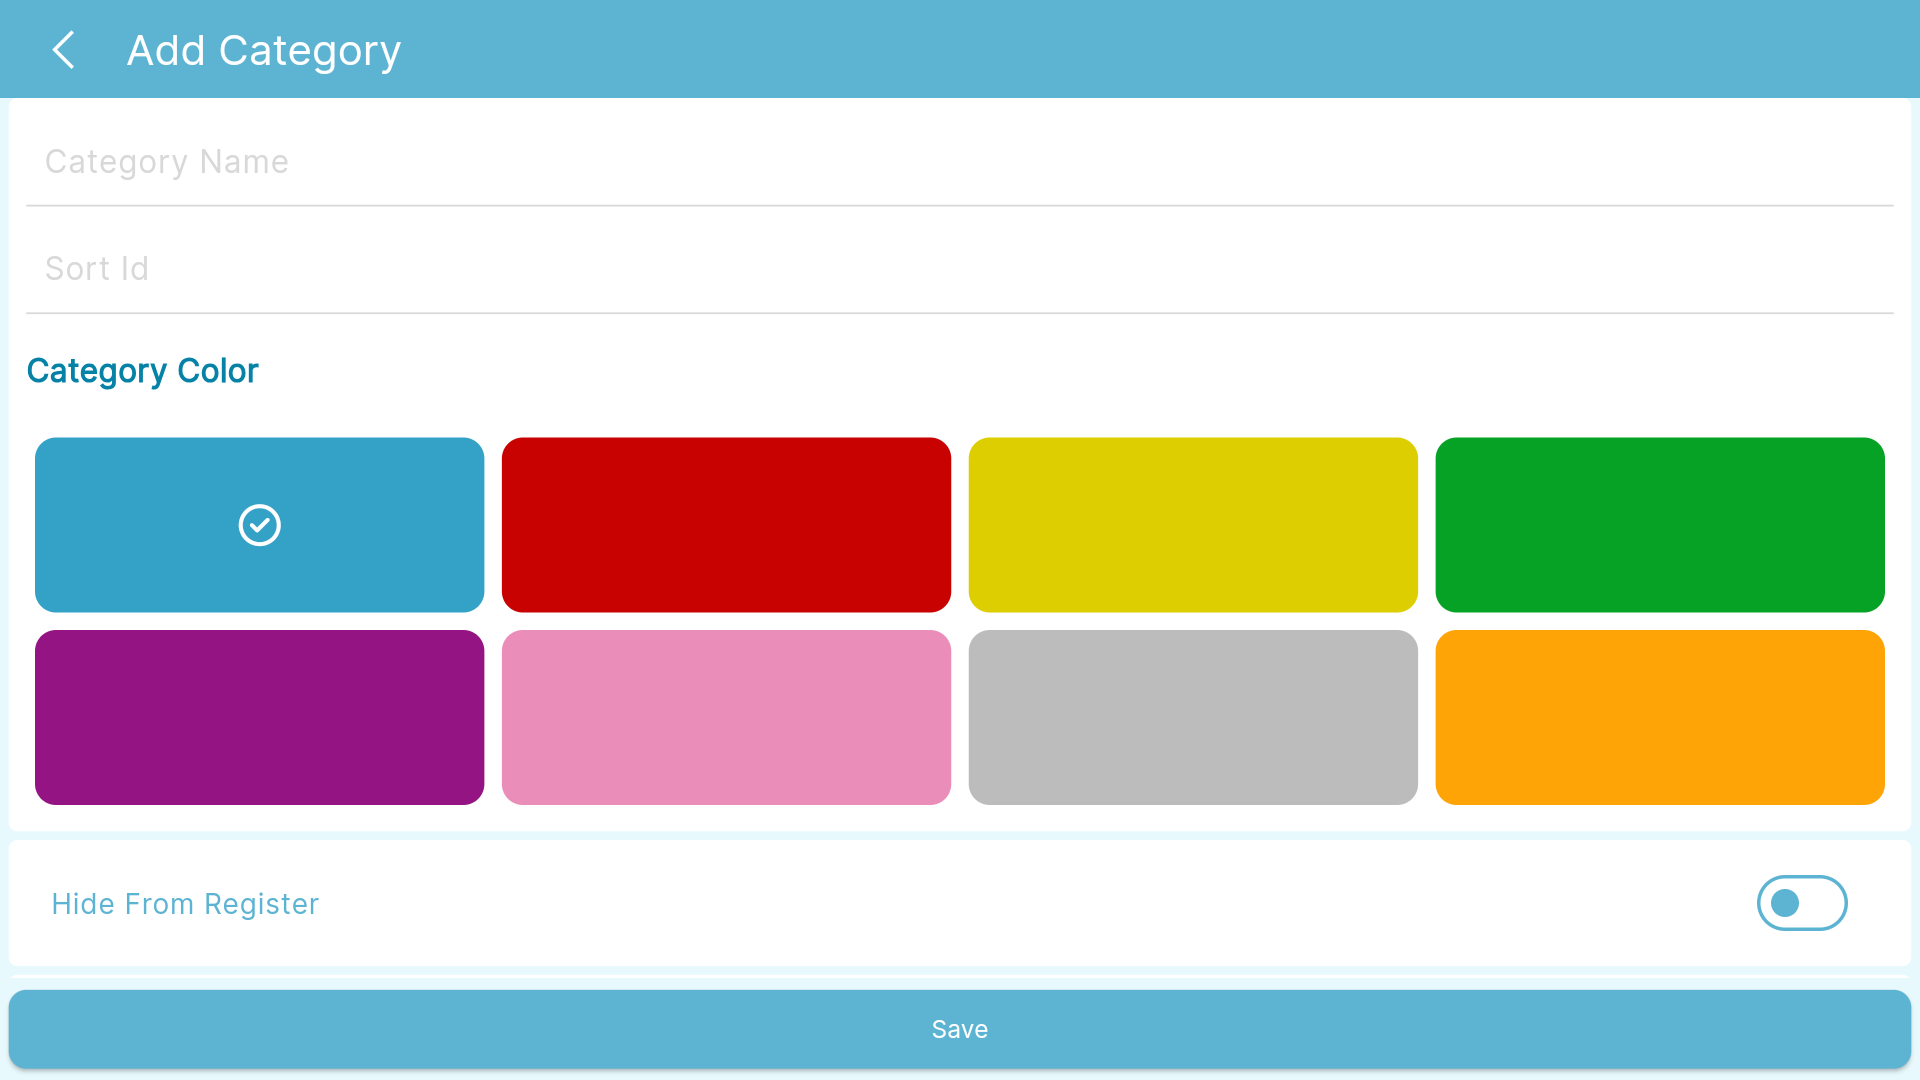
To create a Category:
- Enter the Category Name and Sort Id in the fields below.

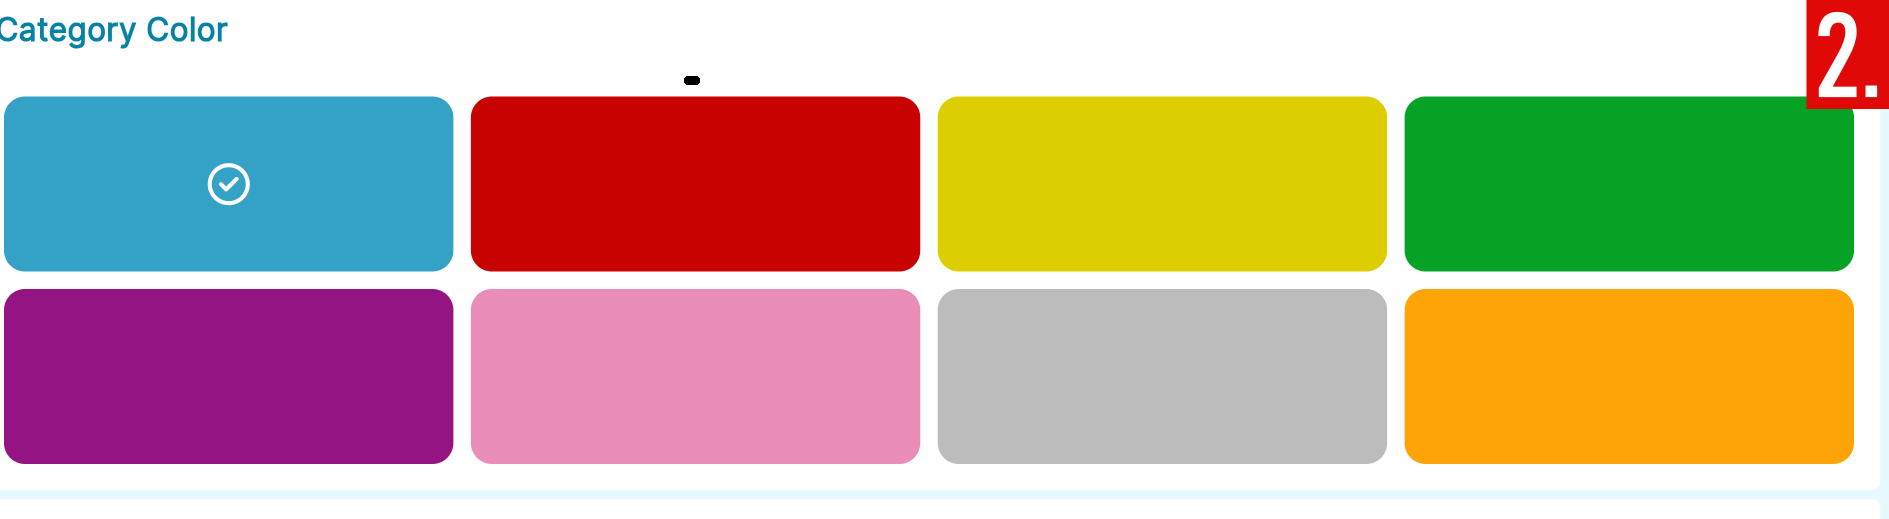
- Select a color for a category.
- Under Hide From Register:
- Enabled - If you want to hide the Category from Register.
- Disabled - If you want to show the Category from Register.
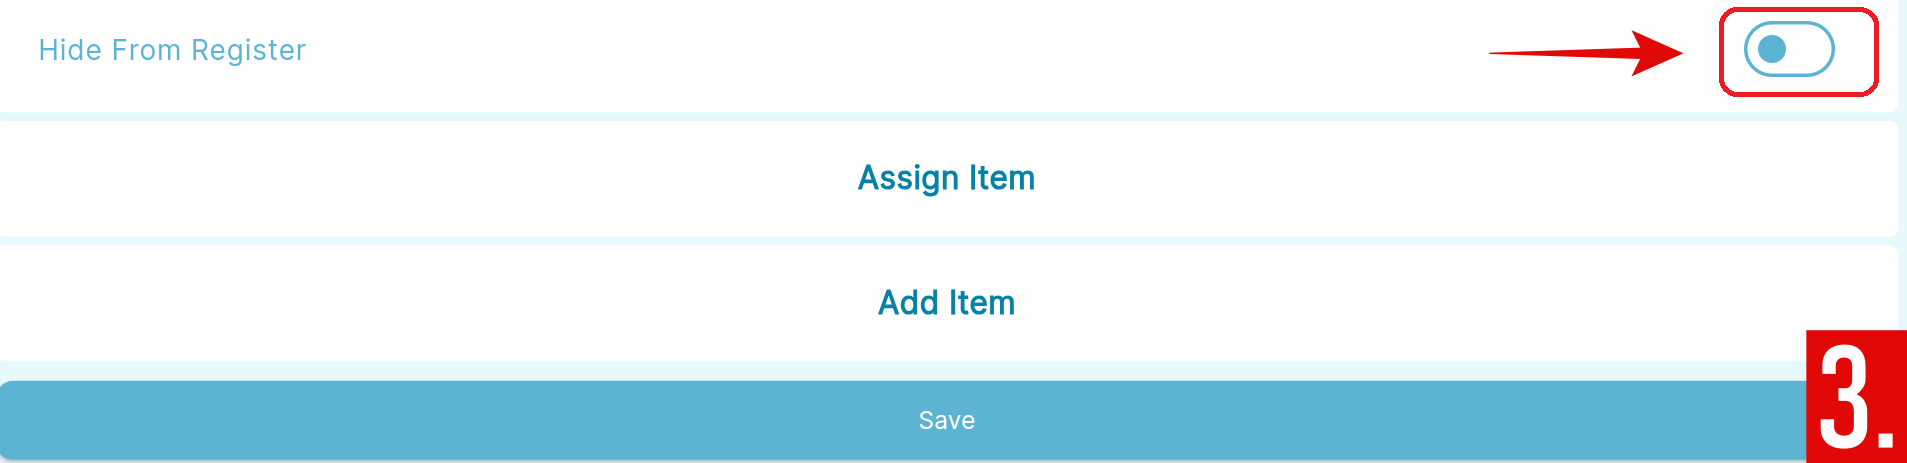
Buttons and their description:
- Assign Item - to add existing items to the Category.
- Add Item - to create a new item for the Category.
To assign an existing item to the Category:
- Press the Assign Item button.

- Select items you want to add to your Category.

- Press Save to save your changes and proceed. You will be sent back to Add Item screen.
Adding Items (cont.)
Now let's continue with Add Item.

Under the No Category section, you can find the item details.
To edit an item detail:
- Press the dropdown button of Details.

- Set the item's SKU (Stock Keeping Unit), Item Cost, and Unit of Measurement (kg/inch/ml) by pressing and entering the information in the blank spaces provided below.

- For Barcode:
- Press the Barcode text field to manually enter the barcode of the item.
- Press the Barcode icon on the right side to use a Device to scan and enter the barcode for you.

- Under Sold By:
- If item is sold by each, press Each.
- If item is sold by weight, press Weight.

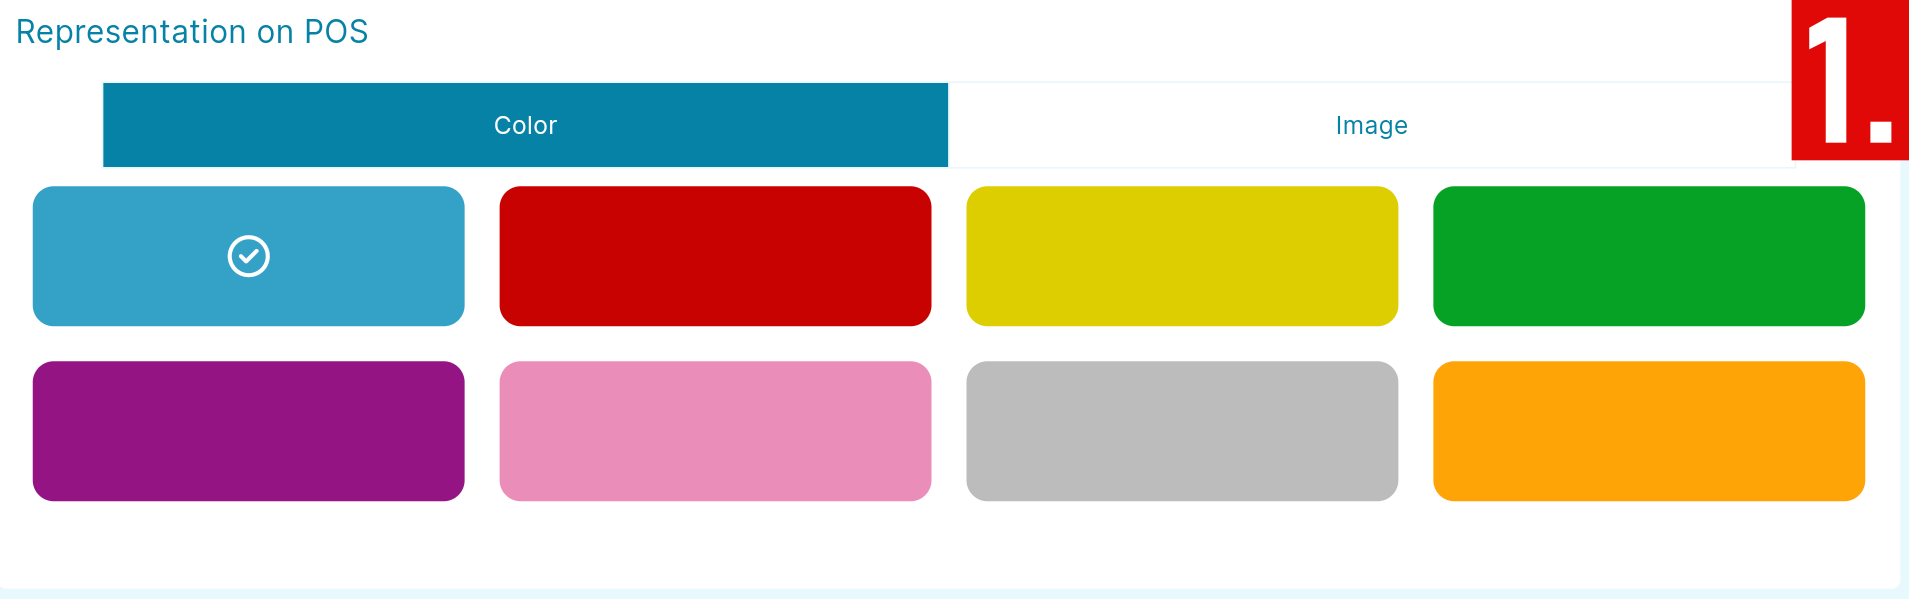
You can customize the item's appearance on the application by either choosing a color or using an image.
To use a color as a representation for your item:
- Select a color that you prefer.
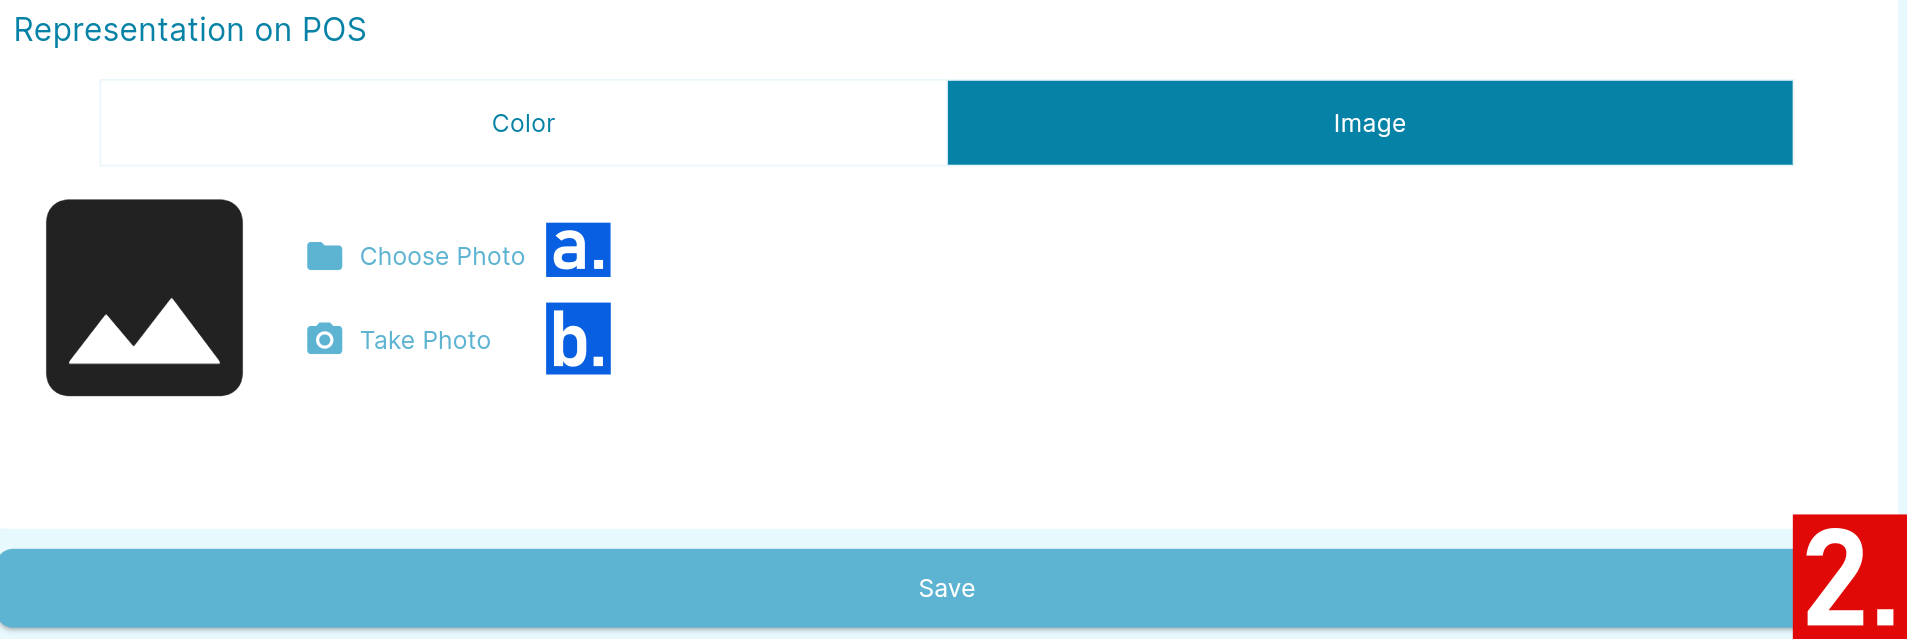
To use an image as a representation for your item:
- Press the Image button.

- Under Image:
- If you want to upload an image from your device, press Choose Photo.
- If you want to take a photo using your device, press Take Photo.
- A permission will pop-up. Make sure to click Allow to continue the process.
- Press Save to add the item and save everything.