In this session, you can edit an item to include an item option and its details.
Let's get started:
- Hover/click the Tag icon/Listings > Items.
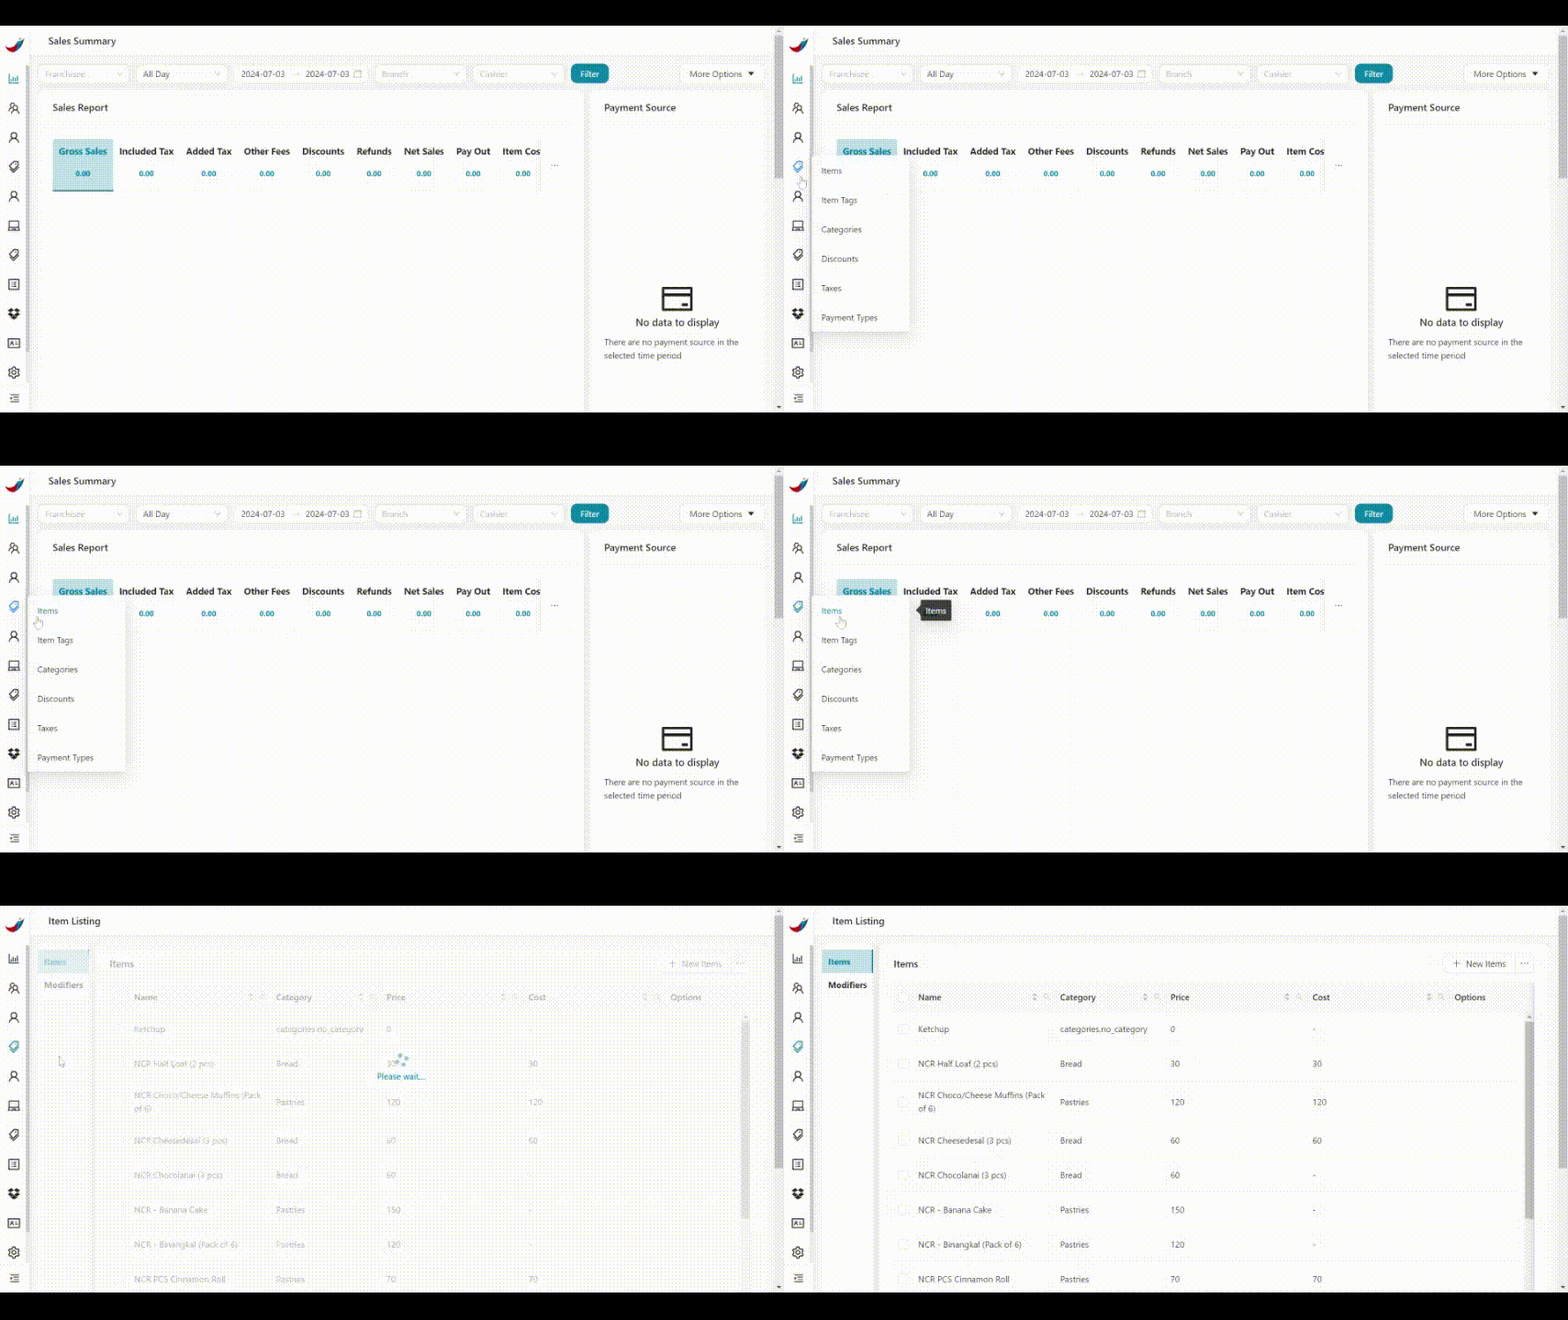
- Click the pencil icon / Edit on any item you wish to add an option.
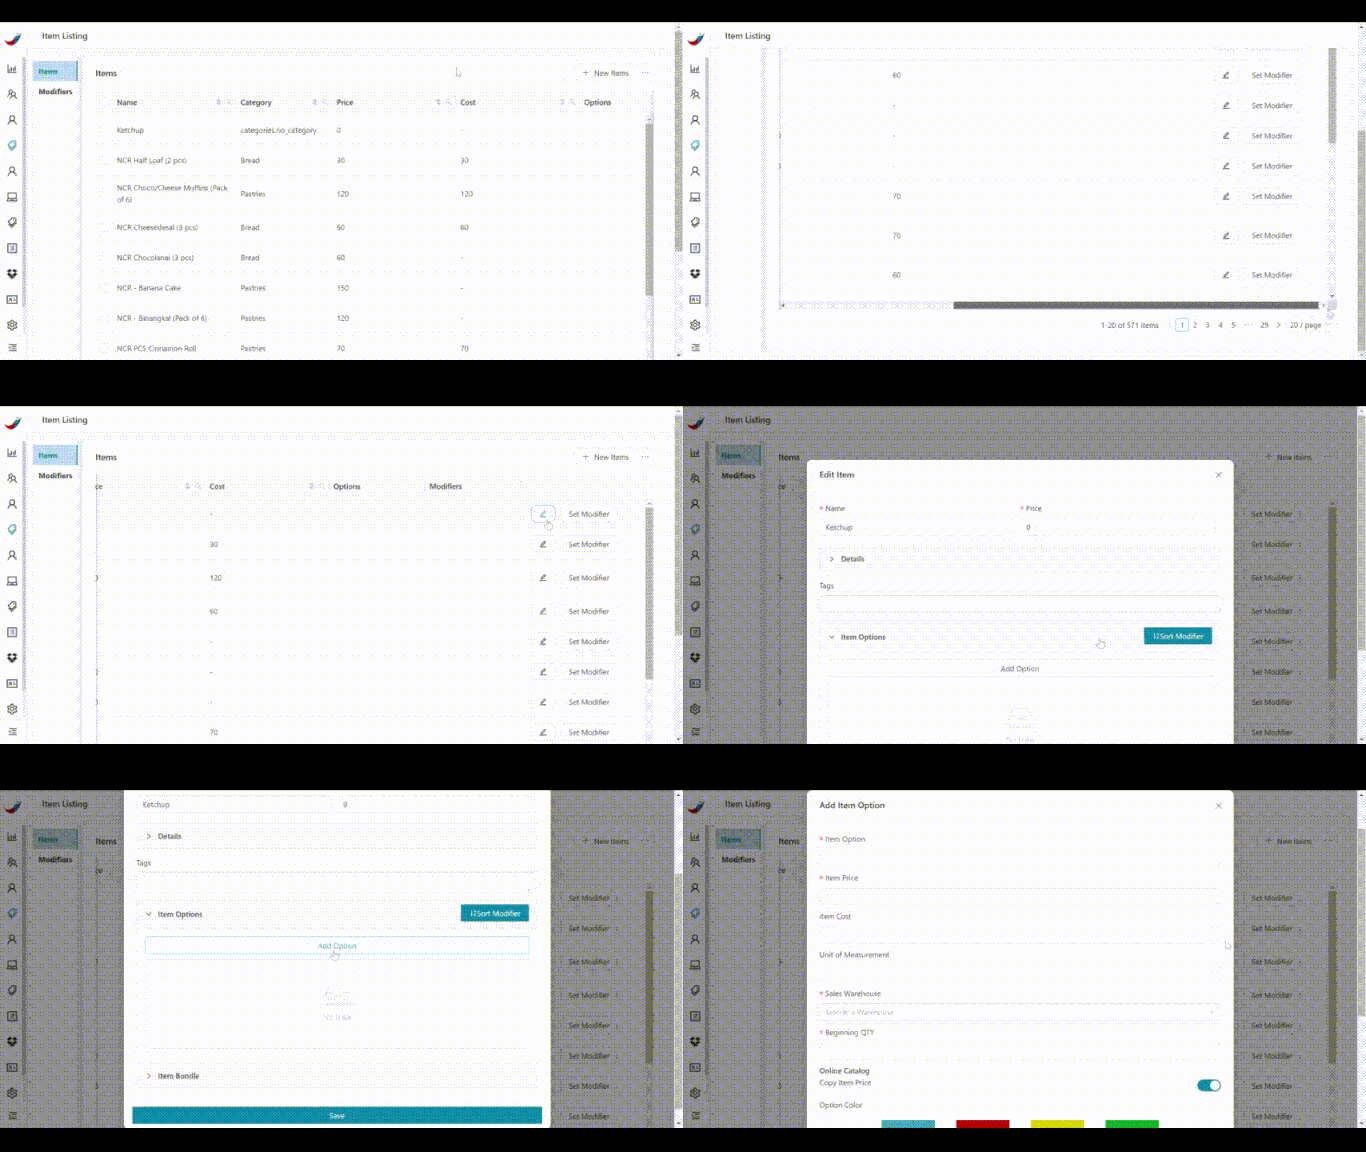
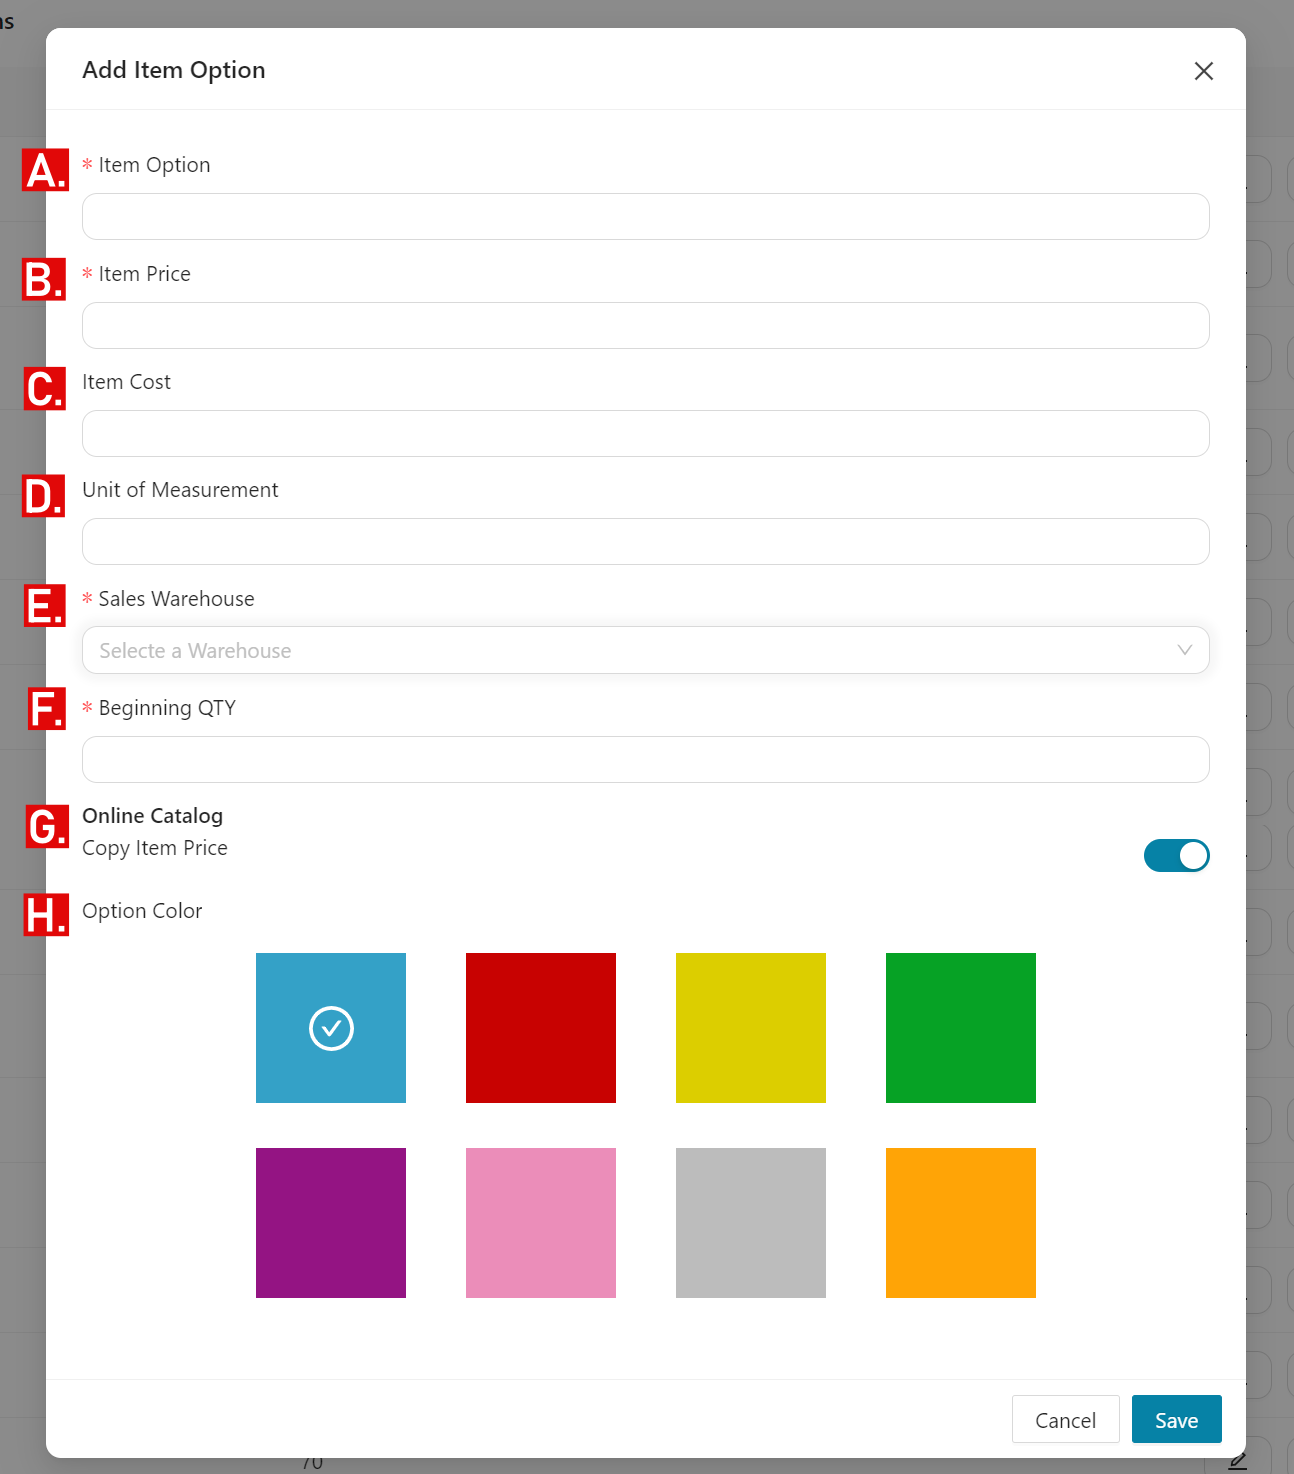
- Click Add Option. Under Add Option menu:
A. Item Option - Input your Item Option name.
B. Item Price - Input your items price.
C. Item Cost - Input your items cost .
D. Unit - Input your items unit. (ex. pc, scoop, ml, grams)
E. Sales Warehouse - Select your warehouse. *
F. Beginning QTY - Input your items beginning quantity.
G. Copy Item Price - Enable if you want your items price on Register and Online Store be the same. **
H. Option Color - Assign a color of your Item Option.
* Only appears when Inventory Management PRO feature is enabled.
** The Online Catalog will appear when you enable the Online Store PRO feature.
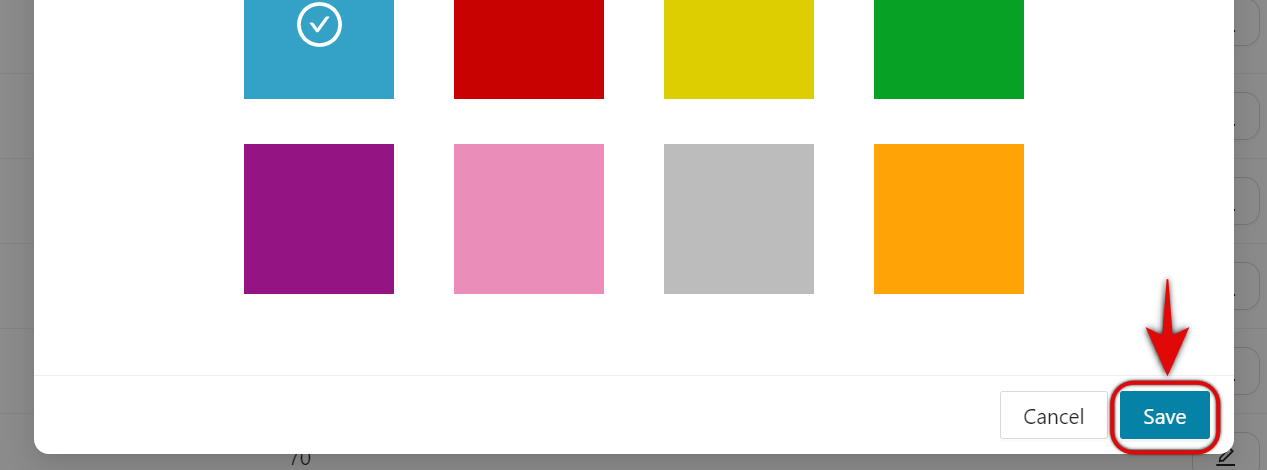
- If done, click Save.
- Under Item Options, you can also;
A. Sort your items automatically in alphabetical order through Sort Modifier.
You can sort your Item options by;
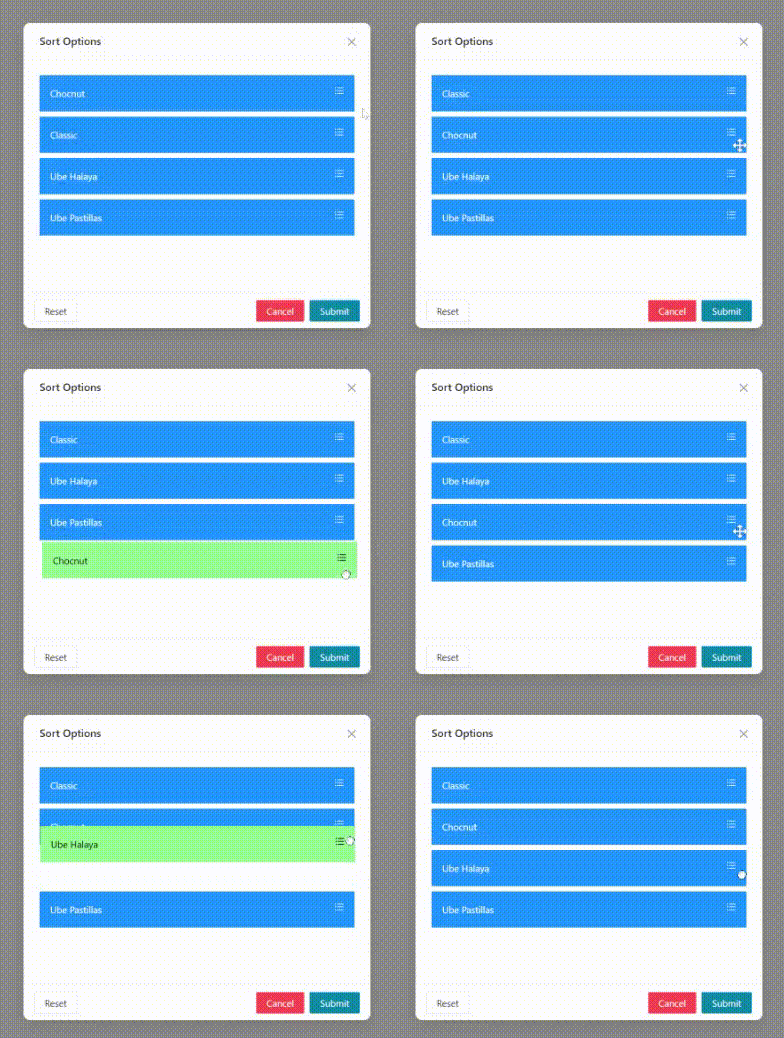
A1. Dragging your item option to your preference.
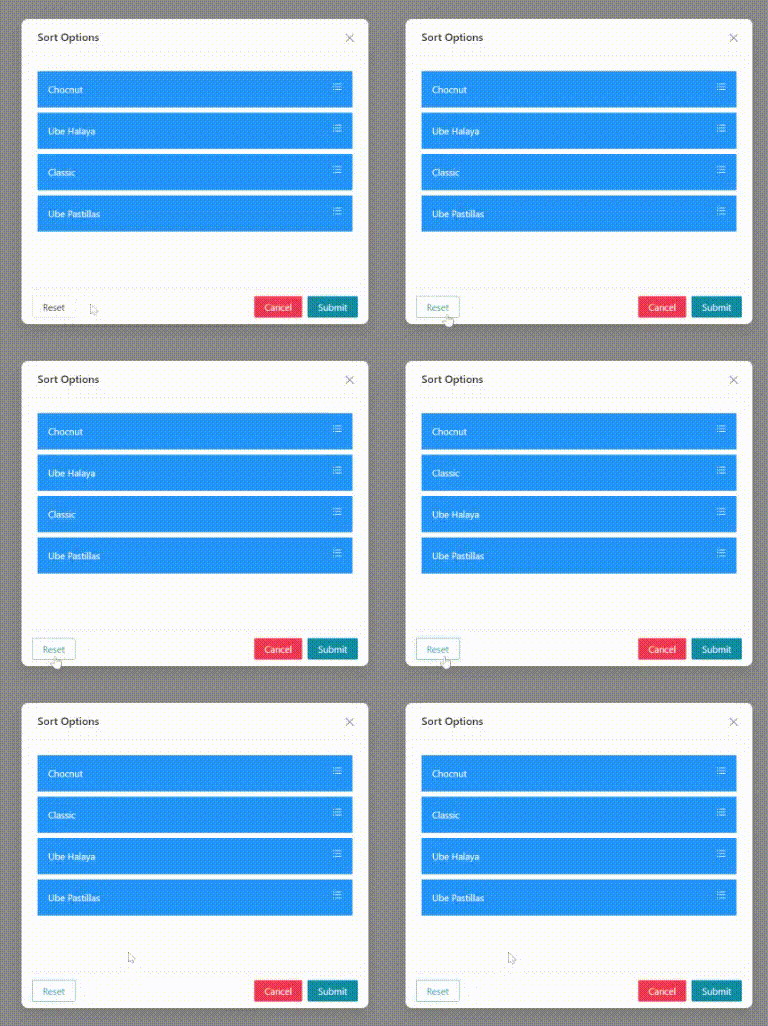
A2. Clicking Reset to return to the previous sorting.
A3. Clicking Submit to save or Cancel to cancel your changes.
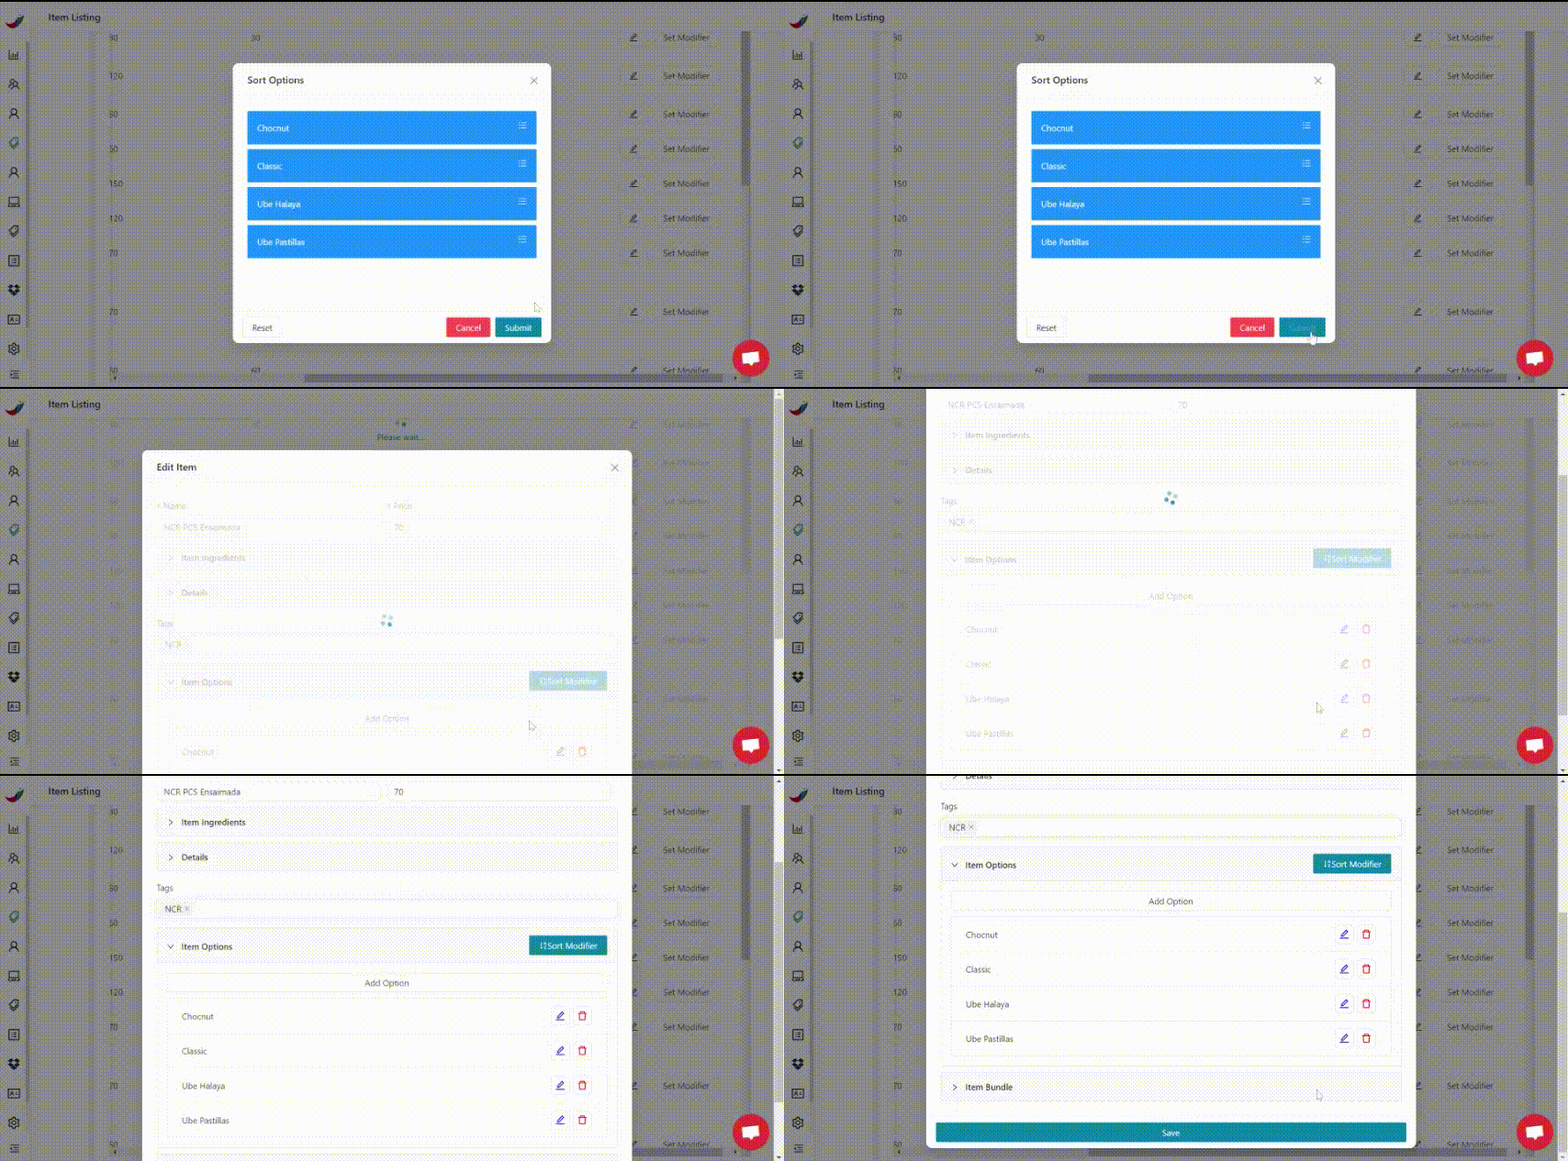
- If done, click Save.
🤩
Yay! You've reached this far. You can now add and sort your item options.
