Partial payments on a POS system are crucial for businesses because they allow customers to make purchases even if they don't have enough funds to pay the full amount upfront. This flexibility increases sales opportunities and customer satisfaction while reducing the risk of lost sales due to insufficient funds.
Creating Partial Payments
Partial Payment made easy by our POS .
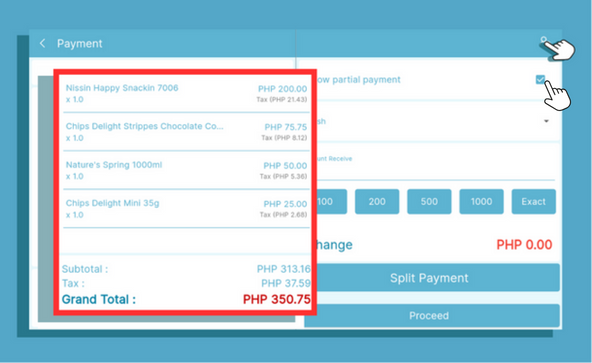
Once you've created your transactions, simply tap on the payment to proceed and open the Payment Interface.

This is the Payment Interface. Ticket is located on the left side of the screen,
Enable Partial Payment to enable customers to pay for their transactions partially.

Select one of the customer's account(1) and click save to proceed(2).

After Clicking save ,the Customer's name will then show on the payment interface.
Tap on proceed to finish the transaction.

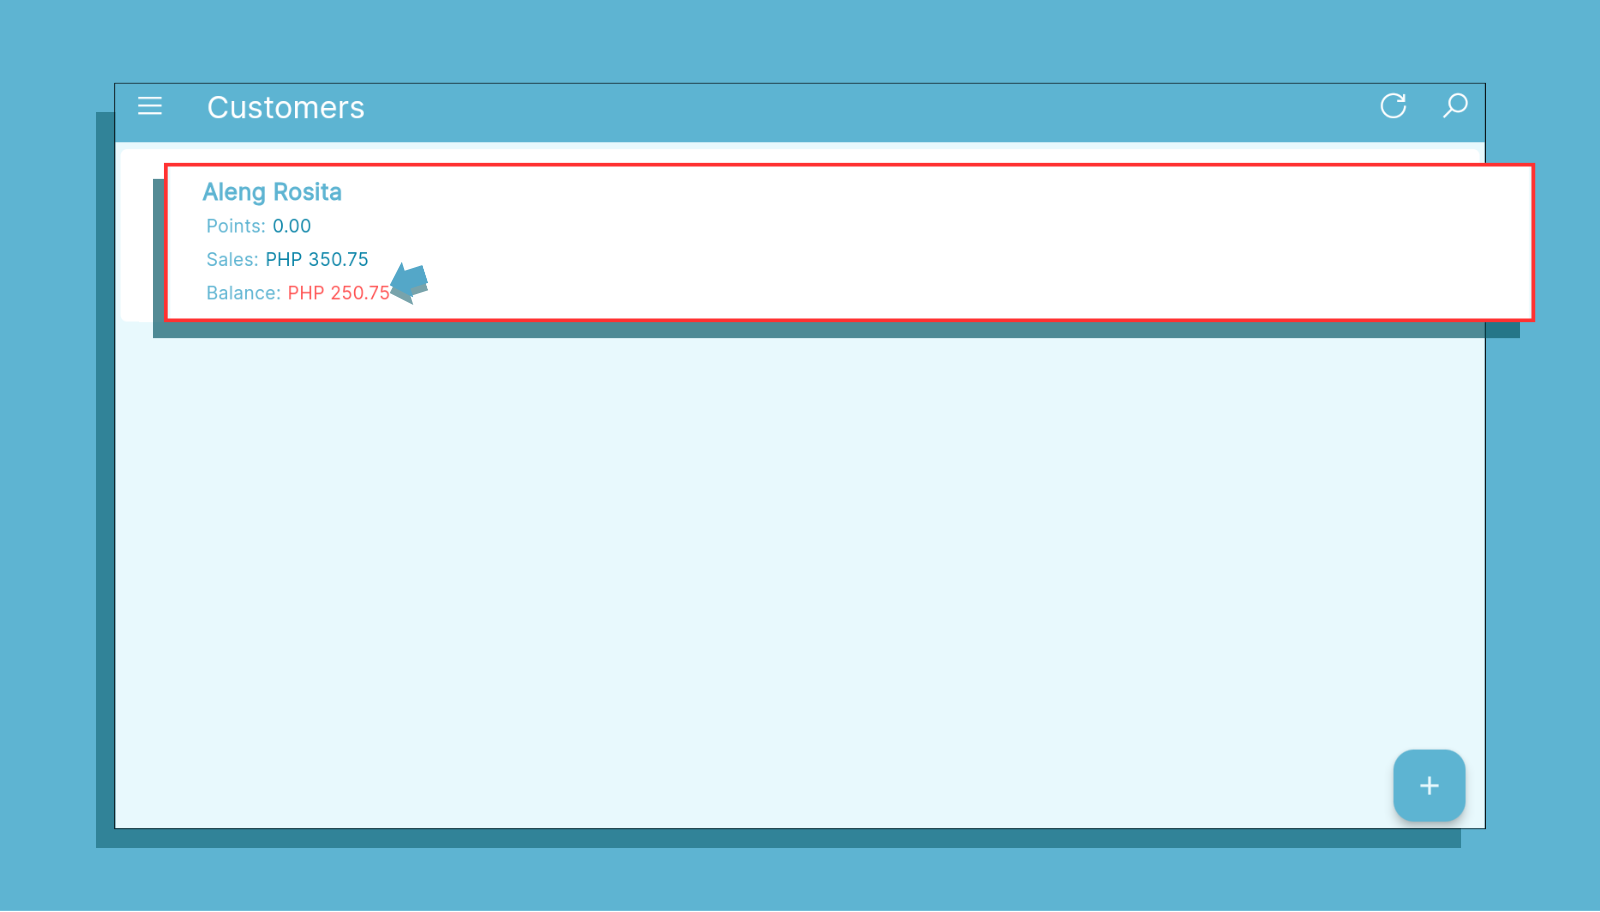
To confirm the balance addition on the customer's account, navigate to the "Customer" section.

Paying Partial Payments
Collecting your customer's balance comes after making partial payments.
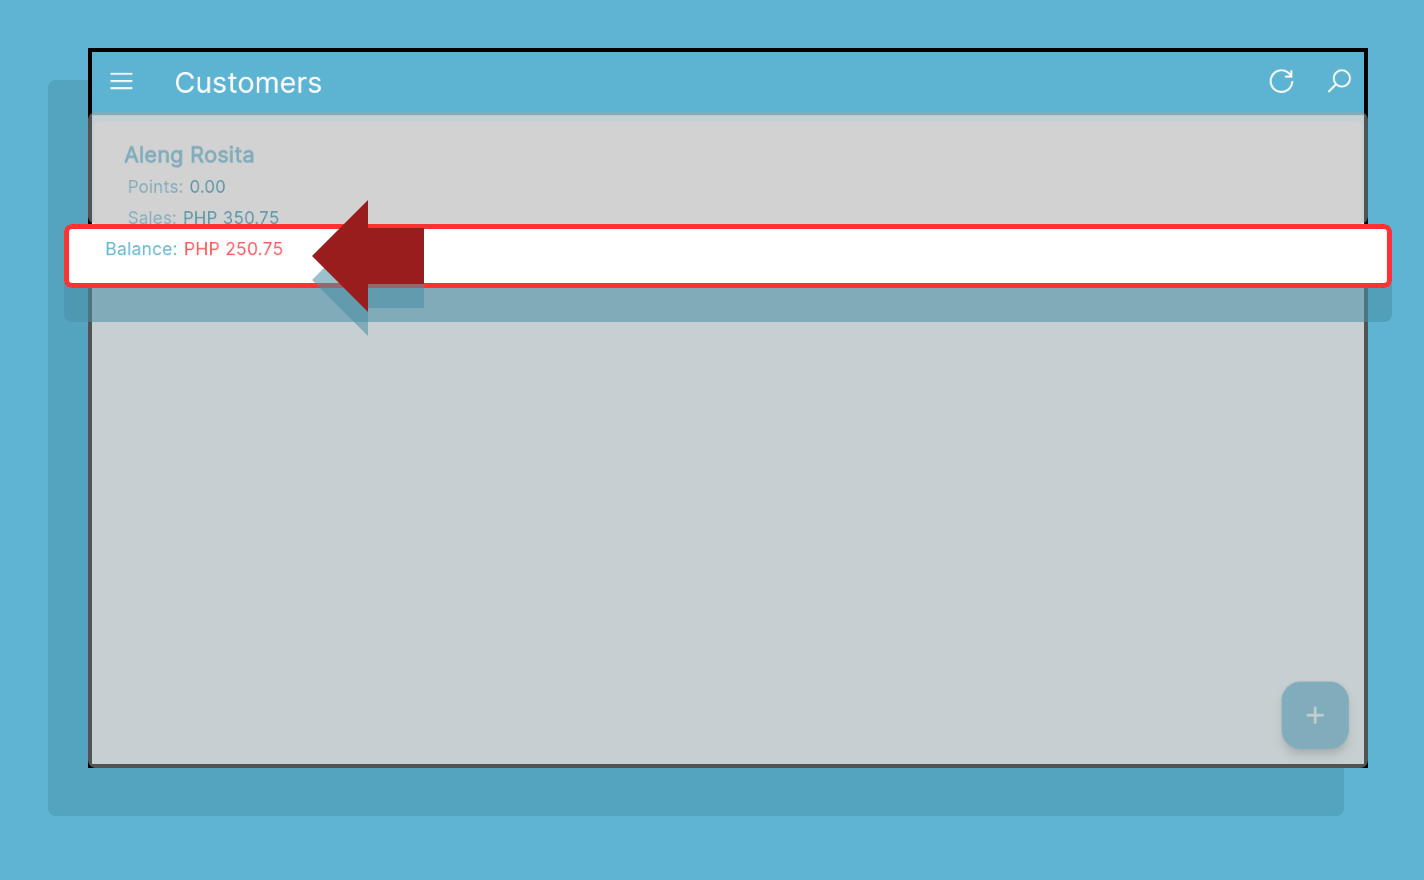
View the customer's account first to know how much their overall balance is
On the Navigation Menu, select Customers.

You can see the customer's remaining balance under the customer's Name .

Note: Click this to know more about Customer Account.
Go back to the register .
Tap the wallet icon at the top. Subsequently, a pop-up will emerge prompting you to input the customer's remaining balance.

Once you've entered the customer's remaining balance, it will automatically reflect on the ticket. Tap on "Payment" to proceed with the transaction.
On the Payment Interface, click on the icon positioned at the top right of the screen

Select the customer who wishes to pay their balance. Click save to Add customer on the bill
After clicking the save button, take note that the customer's name is displayed on the top right of the screen.
Tap on the Proceed button to finish the transaction .

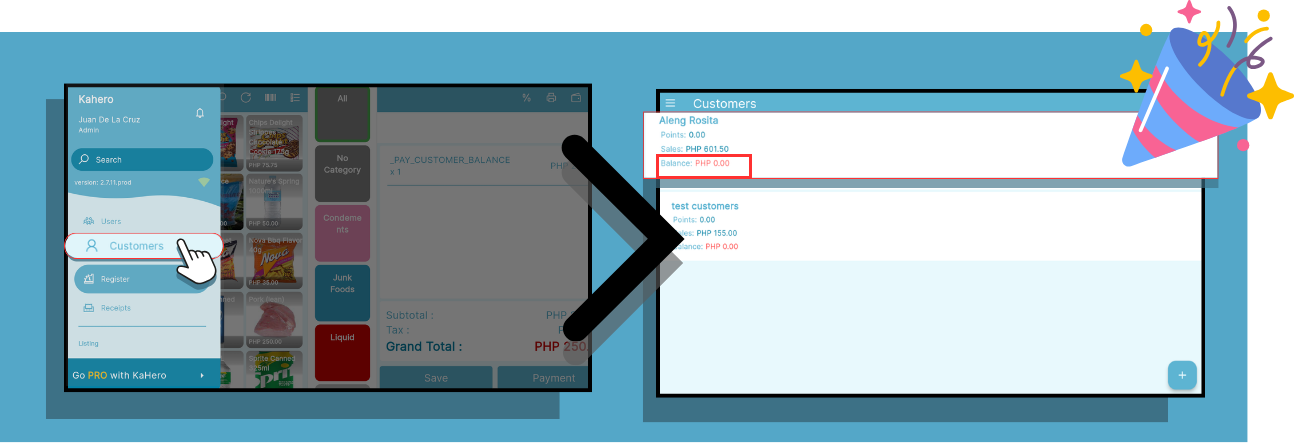
Verify the customer's account to ensure that the balance is indeed zero by going to the "customer" in navigation menu.

