
KaHero POS Manual — Cash Drawer + XPrinter + Tablet/POS Machine
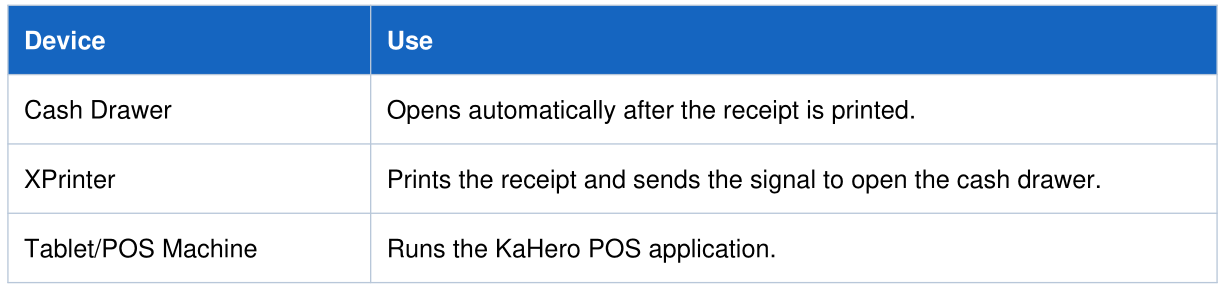
Required Devices
Connection Setup
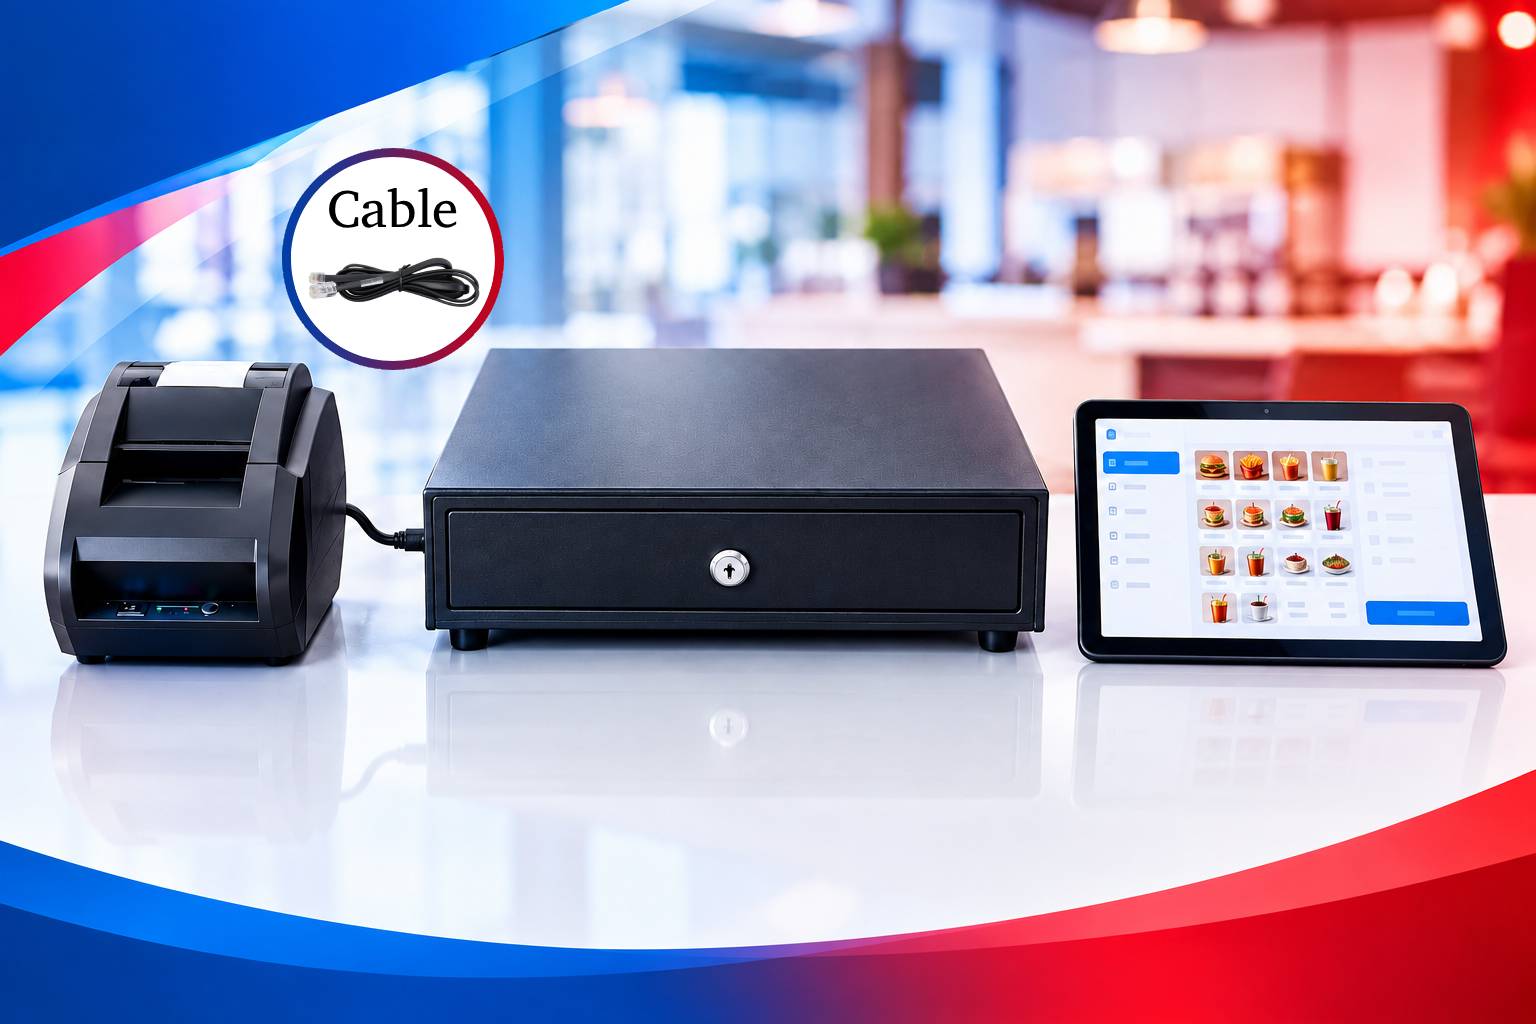
Cash Drawer → cash drawer cable → XPrinter → USB → Tablet/POS Machine
The cash drawer must be connected to the cash-drawer port of the XPrinter. The XPrinter is then connected to the
Tablet/POS Machine. When a receipt is printed through KaHero POS, the XPrinter sends the drawer-open
command.
Step 1 — Connect the Cash Drawer to the XPrinter
Turn off the XPrinter before connecting the cables.
- Locate the cash-drawer port on the XPrinter, commonly labeled DK or Cash Drawer.
- Connect the cash drawer cable to the XPrinter's cash-drawer port.
- Connect the other end of the cable to the Cash Drawer.
- Turn on the XPrinter.
Step 2 — Connect the XPrinter to the Tablet/POS Machine
- Connect the XPrinter to the Tablet/POS Machine using the USB cable.
- Make sure the XPrinter is powered on.
- Open the KaHero POS application.
- Go to Menu → Device & Integration → Printer.
- Add or select the connected XPrinter.
- Select Receipt Printer.
- Enable Receipt and Bill.
- Enable Cash-drawer
- Tap Save.
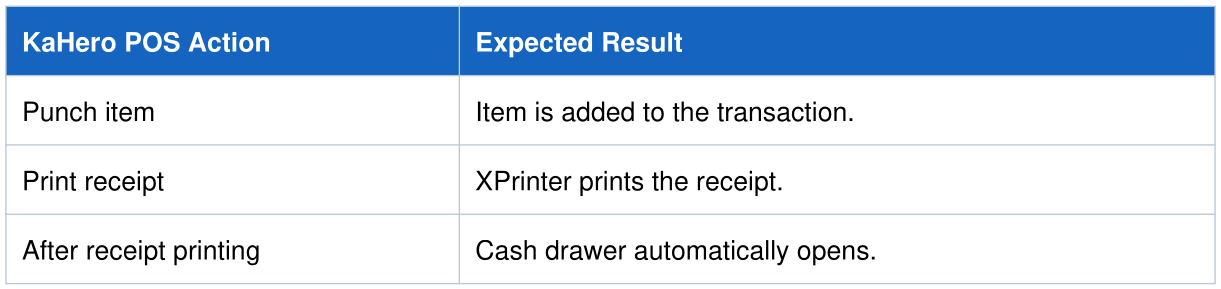
Expected Result
Troubleshooting
- Make sure the XPrinter is powered on.
- Check that the cash drawer cable is securely connected to the XPrinter and cash drawer.
- Check that the XPrinter is properly connected to the Tablet/POS Machine.
- Confirm that the correct XPrinter is selected in KaHero POS.
- Confirm that Receipt Printer is selected and Receipt and Bill are enabled.
- Close and reopen KaHero POS, then perform the test again.
Note: If the receipt prints but the cash drawer does not open, check the cash-drawer cable and the cash-drawer port on the XPrinter. The drawer must be connected to a supported cash-drawer port for the automatic-open function.