
- On the Navigation Menu, select Register.
If Shift Management is enabled in your features, you must first open a shift before you can access the Register option in the Navigation Menu. To start a shift, please refer to the following instructions.
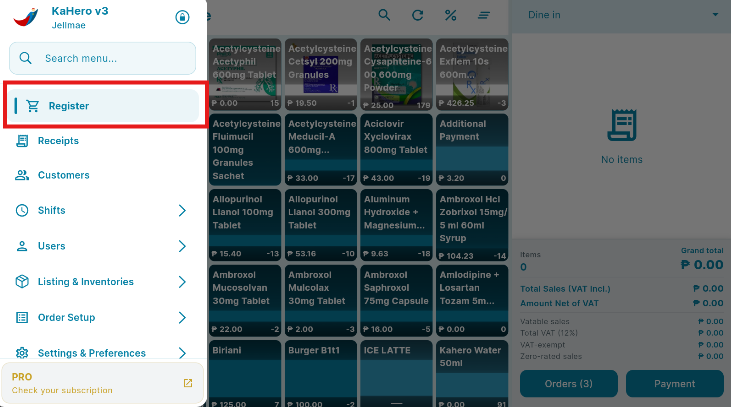
This is the Register interface, where you can manage and process your transactions with ease. ✨
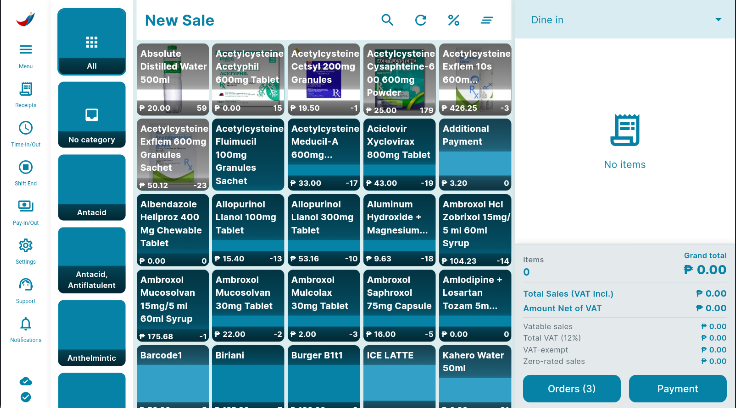
Getting to know the Register Features
Before proceeding with any transactions, let’s take a moment to explore the features available on the Register interface and familiarize ourselves with its functions.
Searching For Items
Locate Your Items Faster
To speed up the transaction process, use the Search button to quickly find the item your customer wants to purchase.
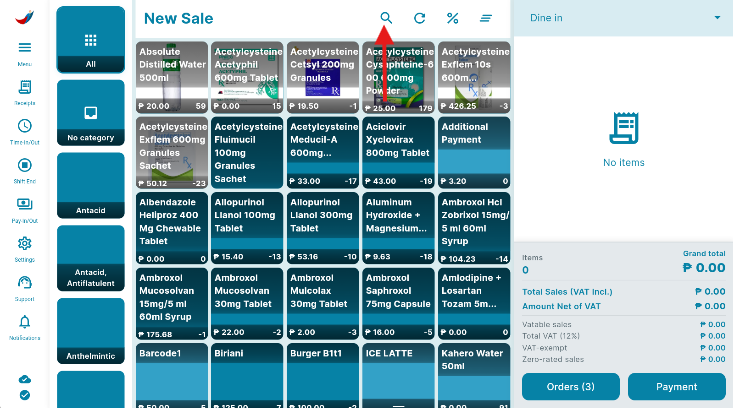
Click the small arrows to choose to either search by name or by barcode.
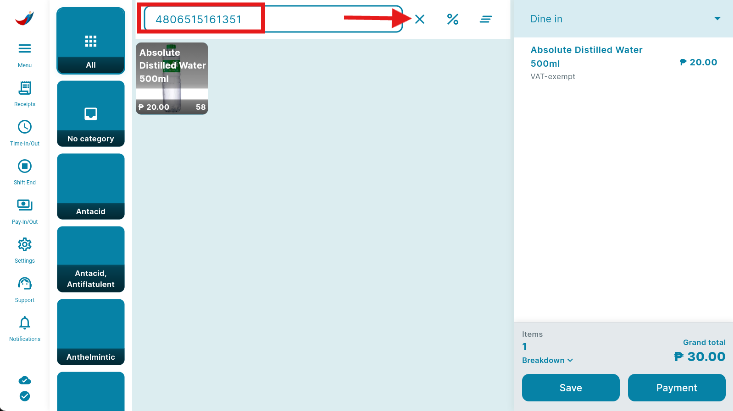
For Search by Barcode Number
Enter the Barcode Number of the item to locate it
Reload/Refresh
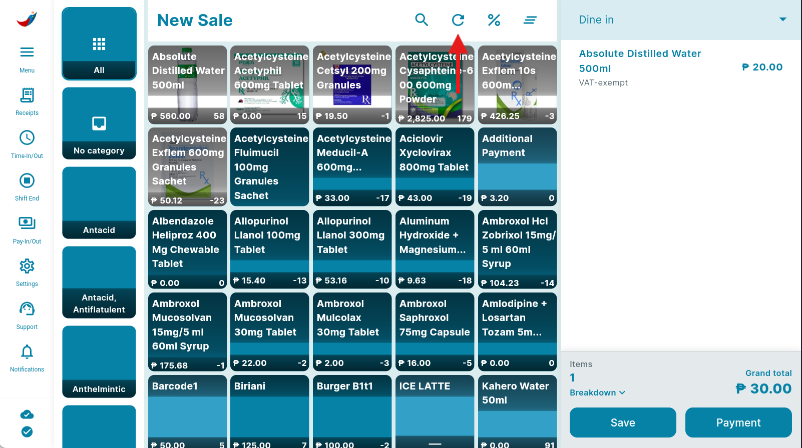
Click the Reload button to refresh the Register interface and load additional items for easier access.
Tip: If some of your items are not appearing on the Register, click the icon below to refresh the interface or load more items.
Scanning Items
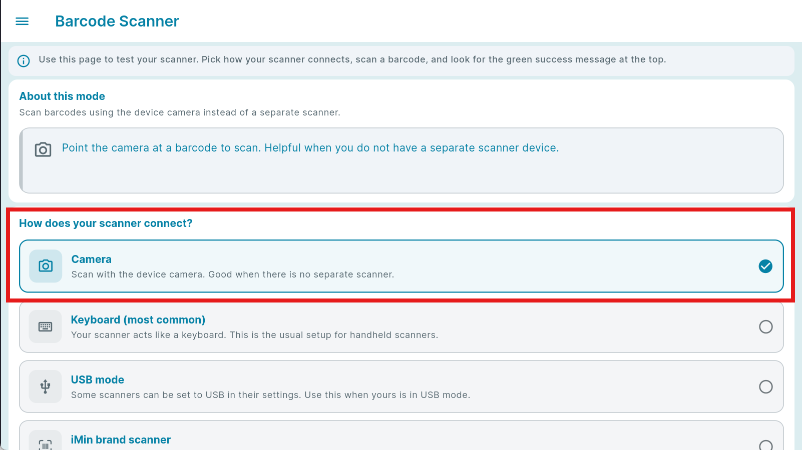
The Barcode button allows you to quickly scan items using your device’s camera.
Once you click the Barcode icon, a scanning screen will appear. Simply point your camera at the item’s barcode to scan and locate the item.
Note: To use this feature , Set the Barcode mode to Camera, follow this instructions.
Categorizing Items
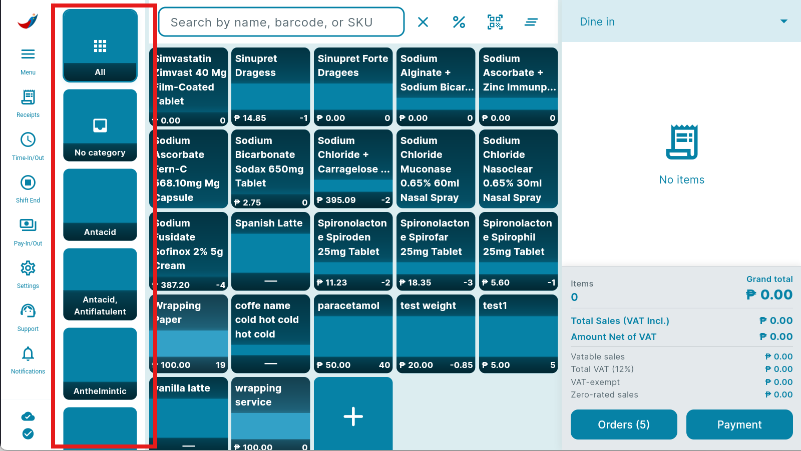
The squares located the left side of th Layout and Receipt buttons represent the Category feature.
Click the desired category to display the corresponding items on the interface.
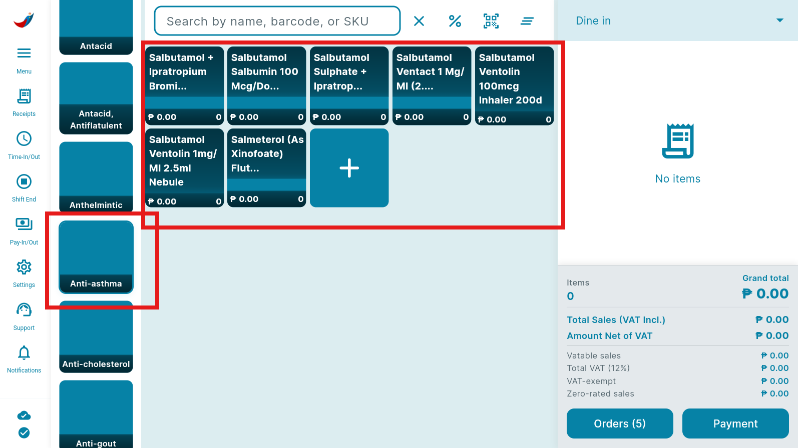
In this example, we've opted for the "Anti-asthma category" to exclusively display items categorized Anti-asthma.
Adding your items on the Register
Adding items directly from the Register is quick and easy. Simply click the PLUS (+) icon to add a new item.
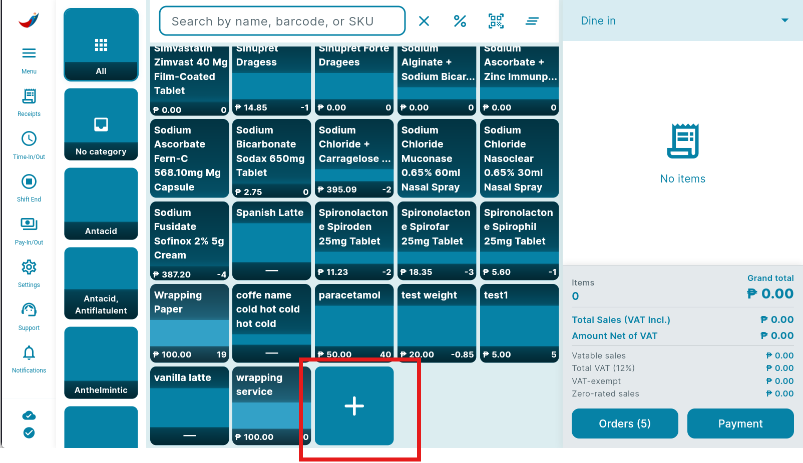
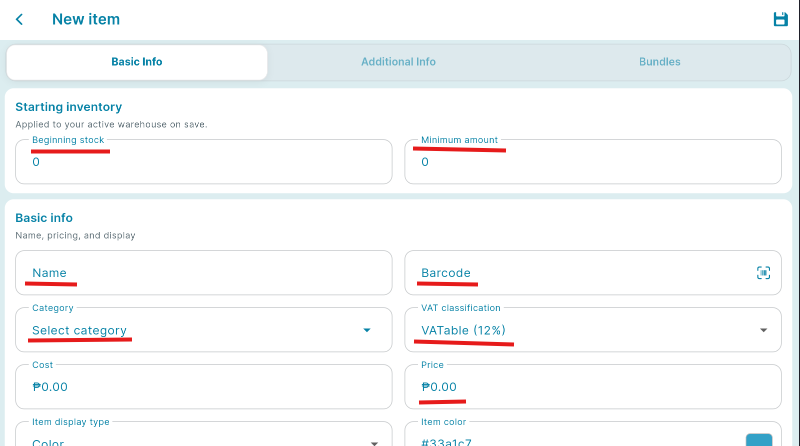
After clicking the PLUS (+) button, you will be redirected to the Add Item interface. Follow the instructions to complete the item details, then click Save to add the item to your Register.
Applying Discounts
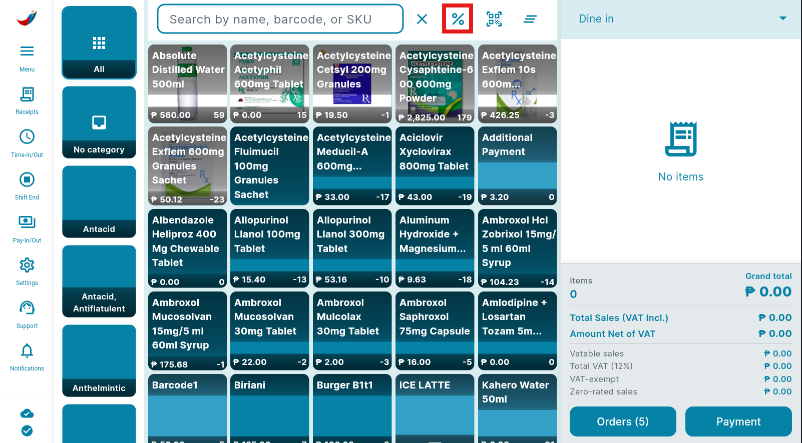
To apply a discount, simply click the percentage (%) icon.
After clicking the percentage (%) icon, a pop-up window will appear.
Click the drop-down button to view the available discounts. Select the discount you wish to apply to the transaction.
Note: The discounts presented are based on the discounts that you added on the discounts section. Follow this instruction if you wish to add/edit your discount.
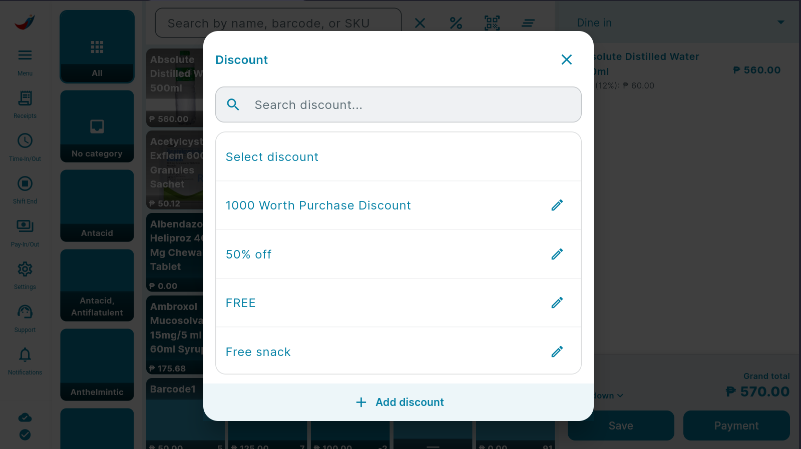
Click the discount you wish to apply, and it will automatically be reflected on the Receipt.
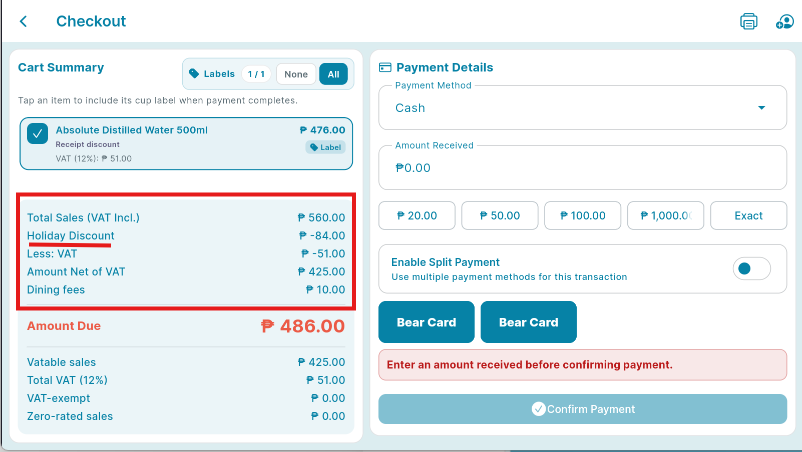
Additional Note: You also have the option to apply a custom discount, regardless of whether you select one from the available discount options.
Balance To Pay
This feature allows you to collect your customer’s remaining balance after they have made a partial payment.
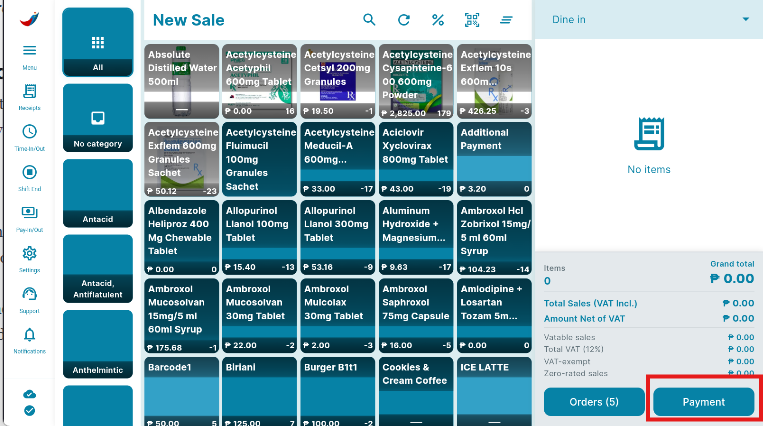
Click the payment located at the lower-right corner of your screen.
Once clicked, a pop-up window will appear.
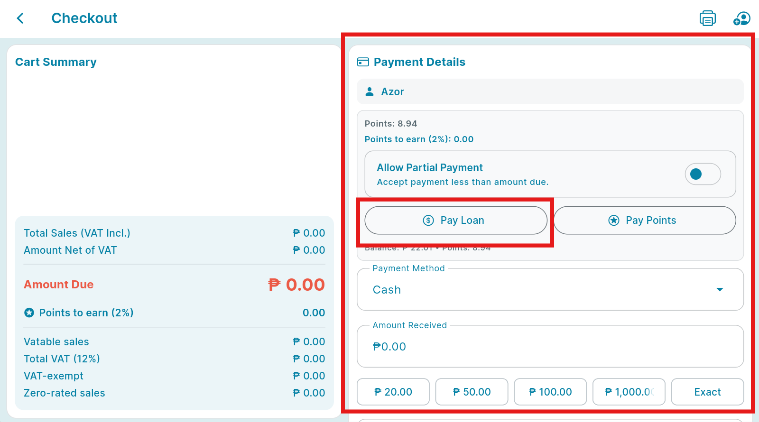
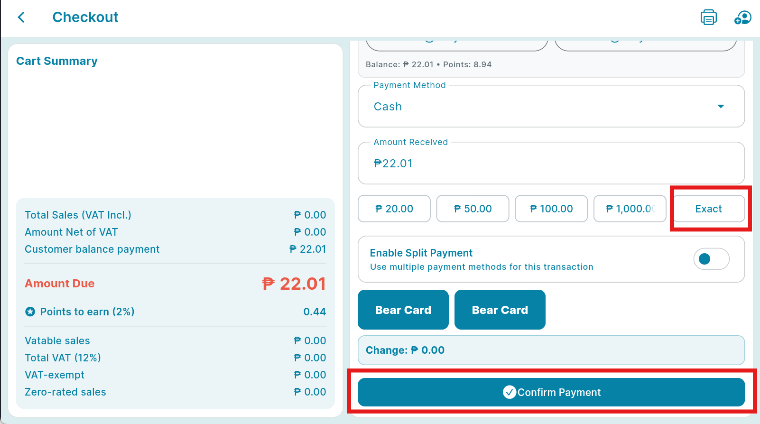
Enter the customer’s remaining balance. You can view the customer’s outstanding balance by accessing their profile in the Customer section.
After entering the customer's balance, it will be added to the total amount due for the customer to pay.
Click PAY LOAN > Exact Payment > Confirm Payment.
Clear Items
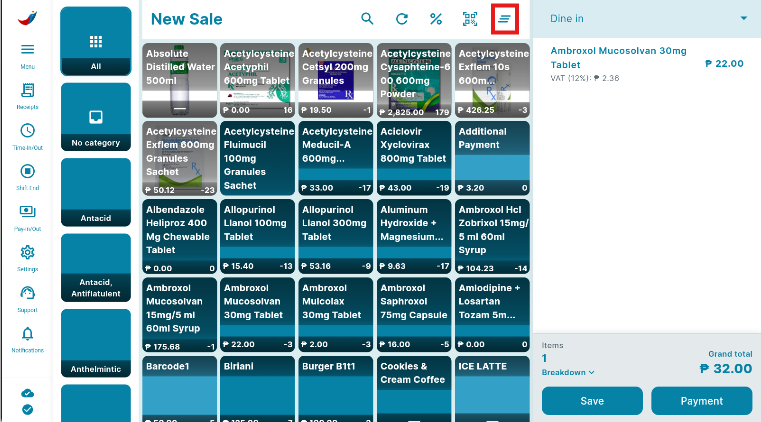
This button allows you to remove the current transaction and start a new one.
Simply click the icon located on the right side of the screen.
Tickets and Predefined Tickets
This feature allows you to save your current receipt for later use and provides additional functionality. You can activate this feature by following these instructions.
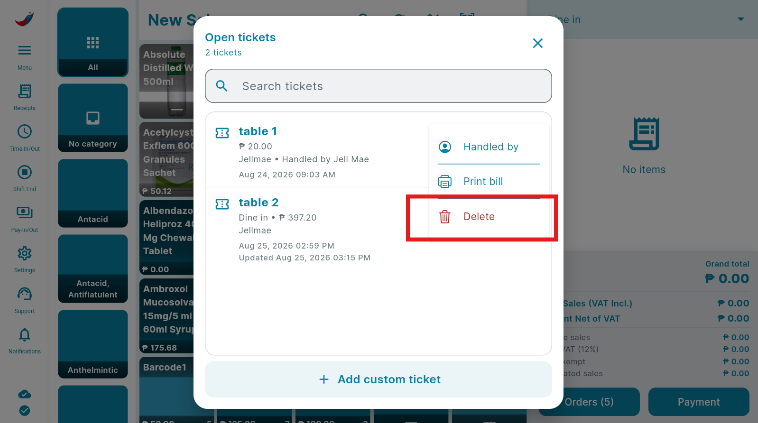
Simply click the Open Tickets button if you don't have any transactions ongoing.
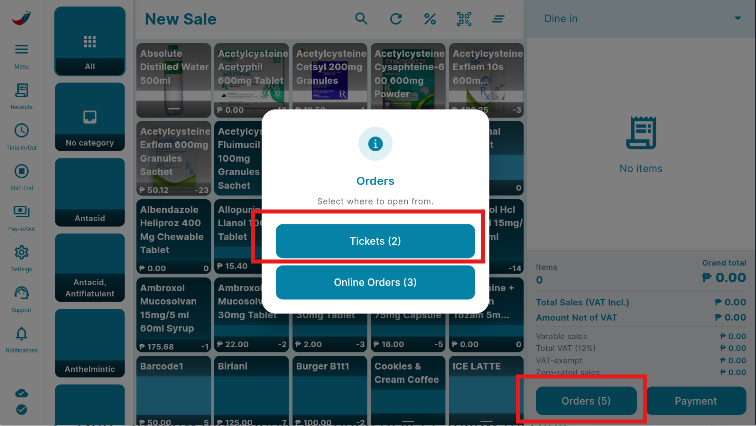
After clicking the Open Tickets button, you are then presented with this screen.
By clicking the delete at the right, specific ticket will be selected.
Items
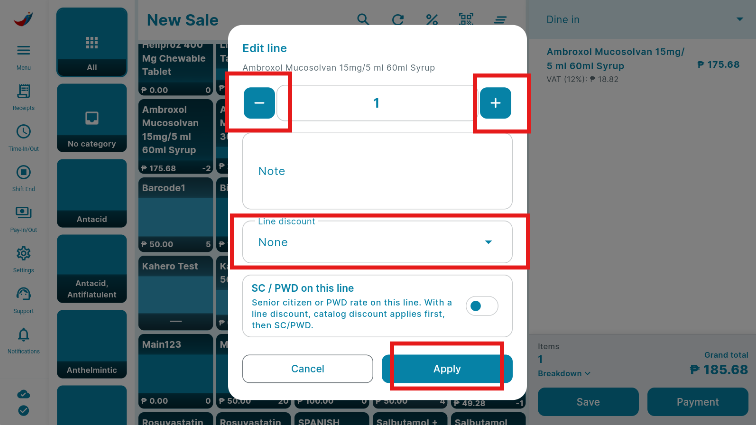
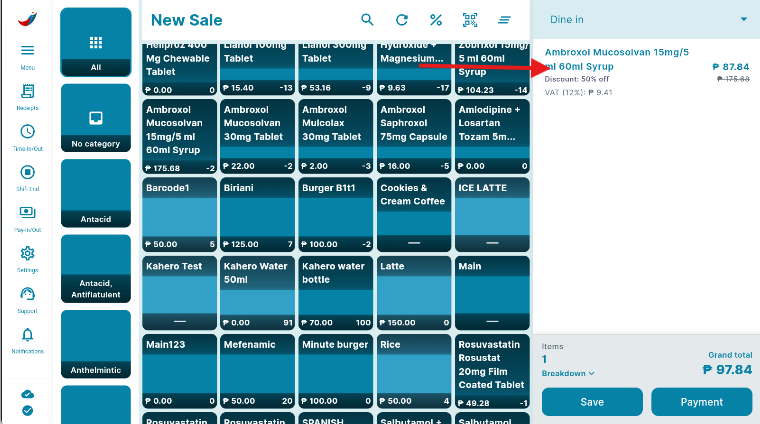
By clicking an item on the Checkout interface, you can edit its quantity, apply individual discounts, and add notes.
- To increase the quantity, click the Plus (+) button.
- To decrease the quantity, click the Minus (-) button.
- To add a discount, follow these instructions.
- To add a note, simply enter your desired note for the item.
Transaction
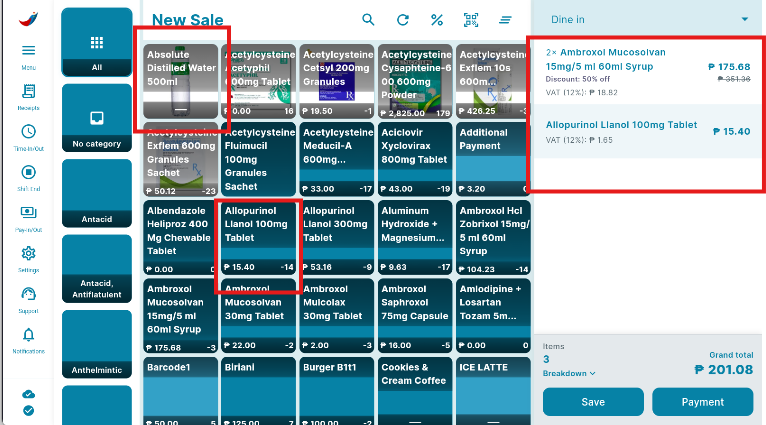
😍Let's process our first transaction
To initiate a transaction, simply click the items that the customer wishes to purchase.
Payment Interface
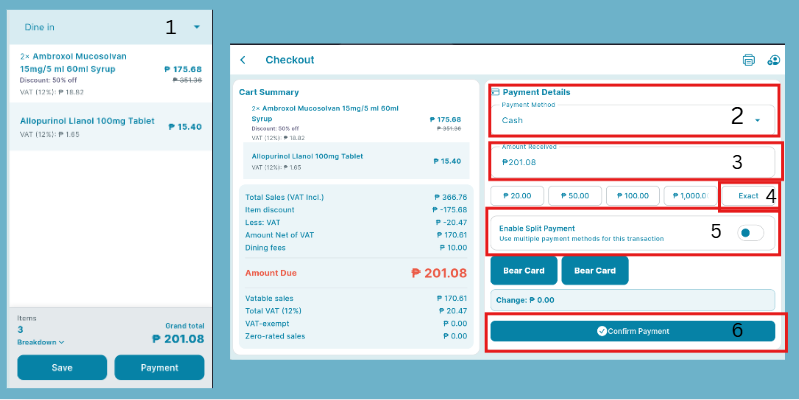
This is what the Payment Interface looks like. It includes the following options and information:
- Checkout Interface
- Payment Details
- Amount received
- Exact
- Split Payment
- Confirm Payment
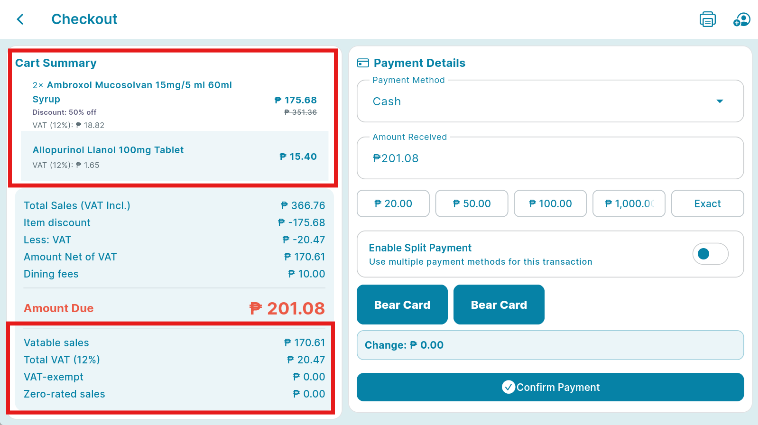
Checkout Interface
The customer’s total purchase is displayed, including the applicable tax. To edit or configure the tax, simply follow these instructions.
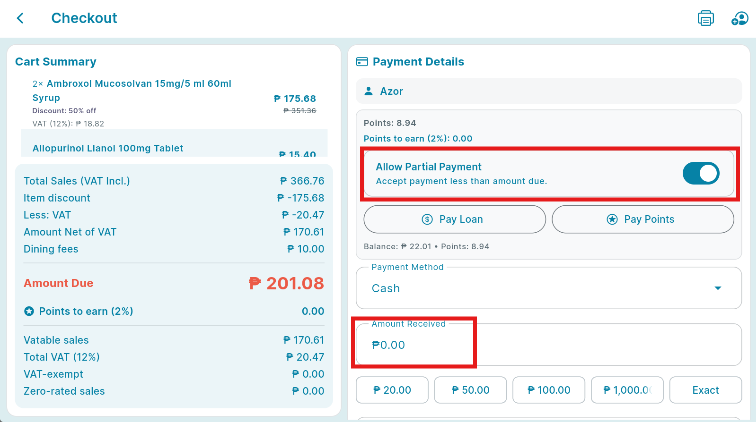
Partial Payment
By clicking the enable option, the customer is then allowed to make a partial payment.
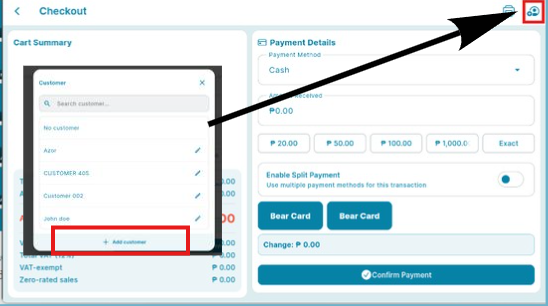
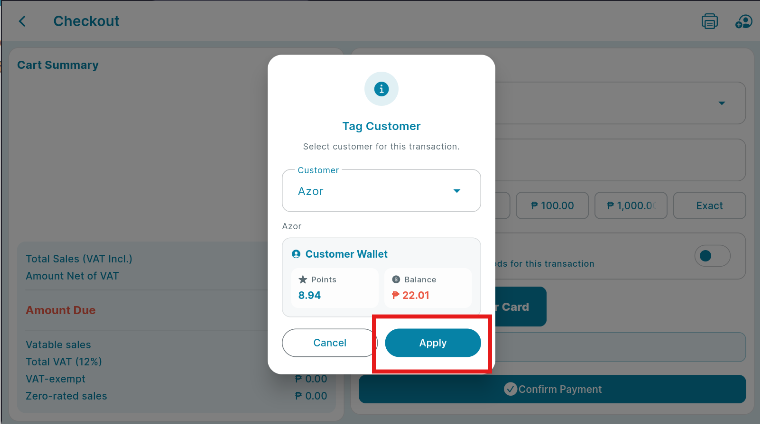
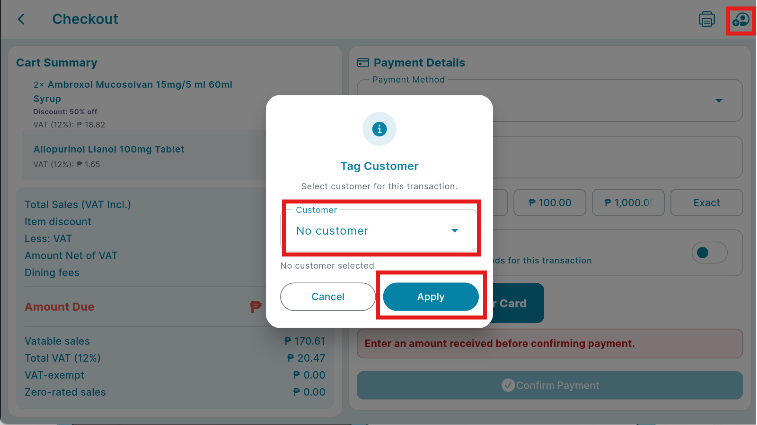
Adding Customer to ticket
This feature allows you to add the current ticket to the customer’s account, making it easier to track their transaction and payment details.
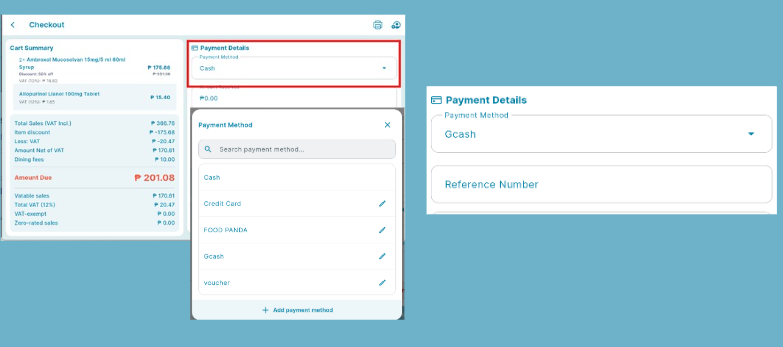
Payment Types
If your store accepts various payment methods, you can easily add multiple payment types to KaHero POS.
Simply click the drop-down button and select the appropriate payment method.
In this example, we selected Mobile Wallet as the payment method.
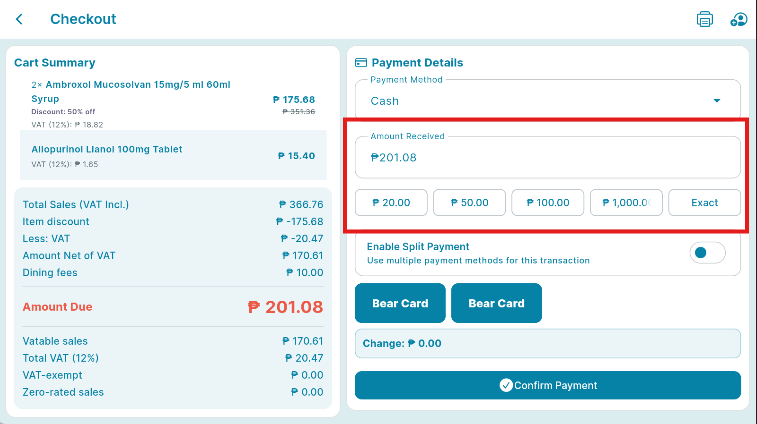
Amount Received
This section allows you to enter the amount received through the selected payment method or choose from the available preset amounts.
The change will be automatically calculated based on the customer’s total purchase amount.
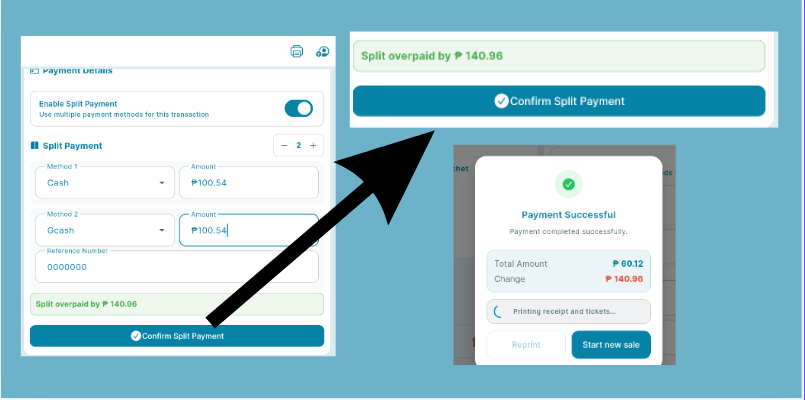
Split Payment
After clicking the Split Payment button, the Split Payment interface will be displayed.
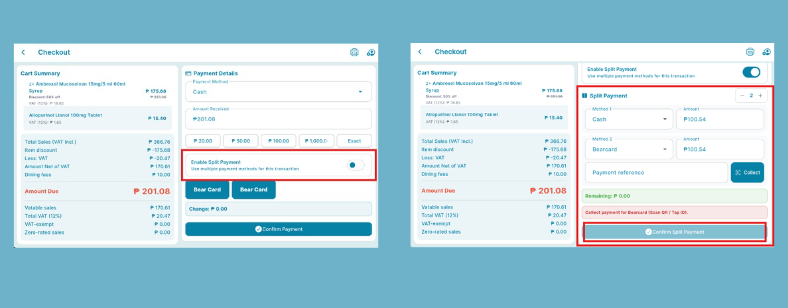
After clicking the payment methods the bill will then automatically be divided by two (2)
In this example we used Cash and Mobile wallet as to split the payment.
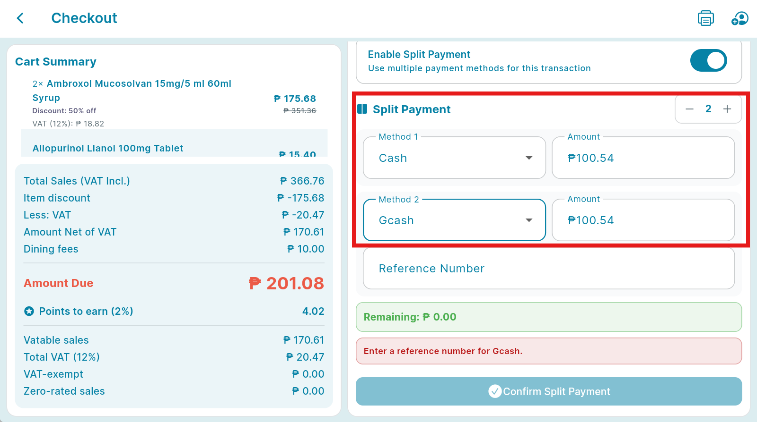
After learning the features within the Payment interface, we can now continue our transaction.
Input the amount received and ensure that the payment method used matches the received amount.
In this example, we received a Php 140.96 as a payment, hence need for Split payment, the Payment method that the customer used is Cash and Gcash.
🥳You are now prepared to embark on your transaction using our KaHero POS.